Custom social providers
Custom social providers let you connect an external OAuth 2.0 or OpenID Connect identity provider that ReachFive does not already support as a built-in social login. You configure the provider in the ReachFive Console, then users authenticate through the same social login flows as Facebook, Google, and other first-party connectors.
Typical use cases include:
-
An IdP that ReachFive does not list under social providers
-
A one-off or customer-specific IdP that does not justify a dedicated product integration
| Custom social providers are distinct from custom email providers, custom SMS providers, and trusted providers (token exchange). This page covers social login only. |
Prerequisites
-
You must have access to the ReachFive Console.
-
You must have a Developer, Manager, or Administrator role.
-
The custom social providers feature must be enabled on your account.
If you do not see Add a custom provider under , contact ReachFive support. -
Your identity provider must support the OAuth 2.0 authorization code flow with HTTPS endpoints for authorization, token exchange, and user info.
-
The user info response must include a stable user identifier in the
suboridclaim. -
On your identity provider application, set the OAuth redirect URI to:
https://<REACHFIVE_DOMAIN>/login/callback (1)| 1 | Where <REACHFIVE_DOMAIN> is your domain. |
Configure a custom social provider
In your ReachFive Console, go to and select Add a custom provider. This opens the Add a custom provider wizard.
-
Information: Define how the provider appears in the UI and how it is identified in APIs and SDKs.
-
Configuration: Connect ReachFive to your identity provider’s OAuth 2.0 endpoints.
-
Mappings: Map provider attributes to user profile fields.
1. Information
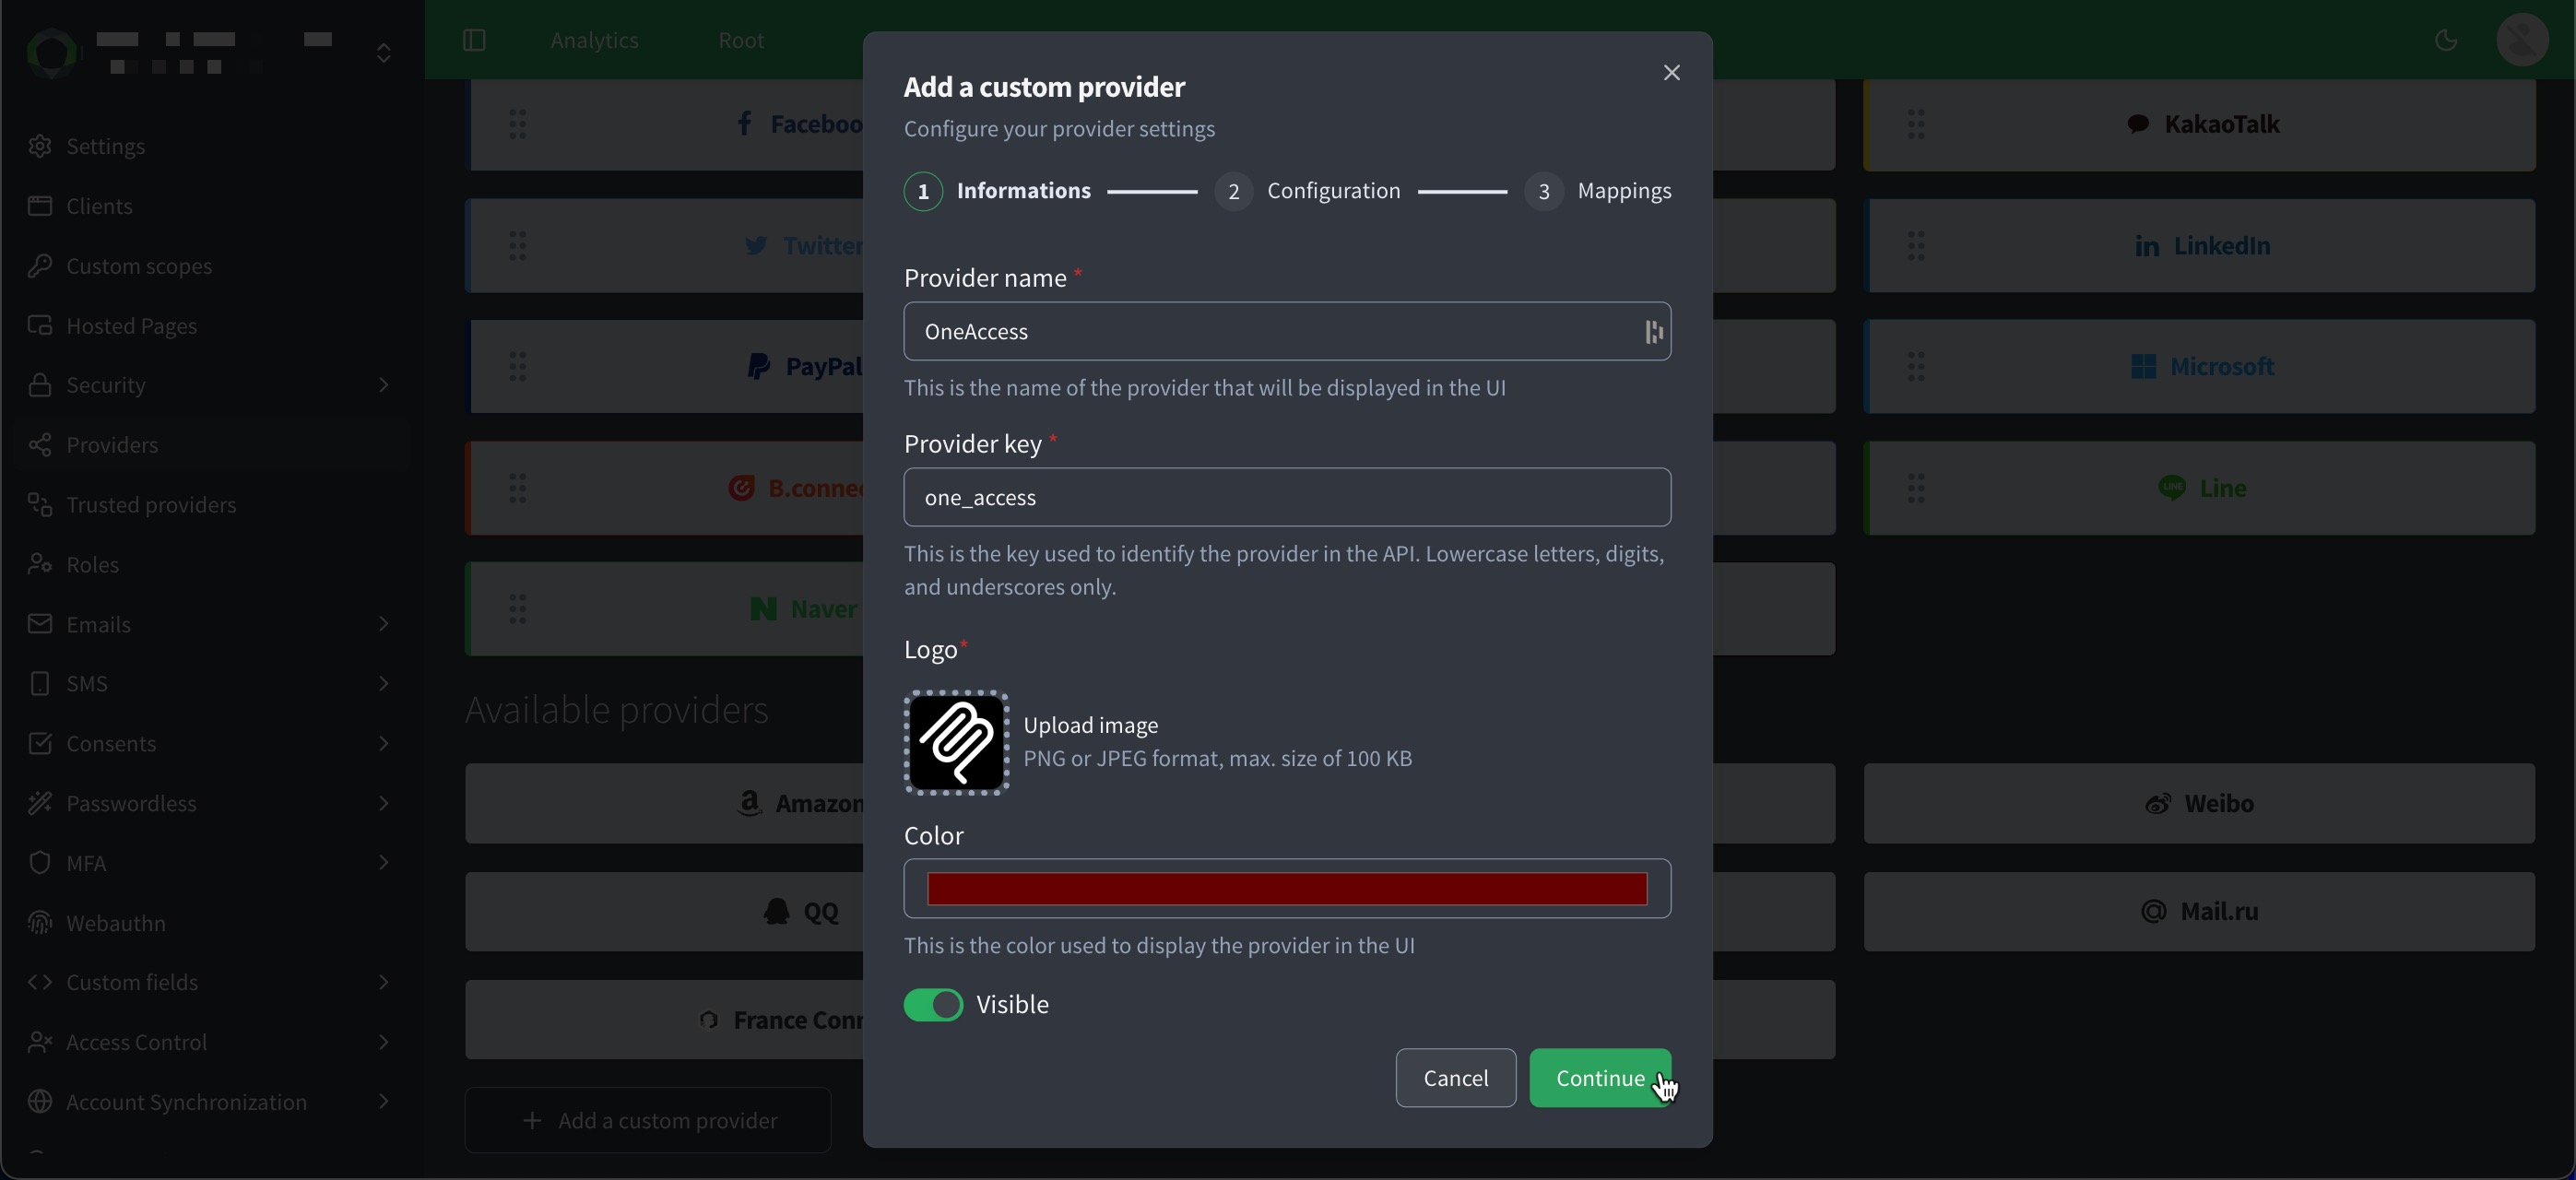
In Step 1: Informations, define how the provider appears in the UI and how it is identified in APIs and SDKs.
-
Enter the Provider name (required): Display name shown to end users and in the ReachFive Console.
-
Enter the Provider key (required): API and SDK identifier.
Use lowercase letters, digits, and underscores only (
^[a-z][a-z0-9_]{1,39}$). The key cannot match a built-in provider key such asfacebookorgoogle. The key is fixed after you create the provider. -
Upload the Logo (required):
PNGorJPEG, maximum100 KB. -
Select the Color: Accent color used when displaying the provider.
-
Select whether the provider is Visible: When enabled, the provider is advertised to the Identity JS SDK and social login widgets.
When disabled, the provider remains configured but is omitted from SDK provider discovery.
2. Configuration
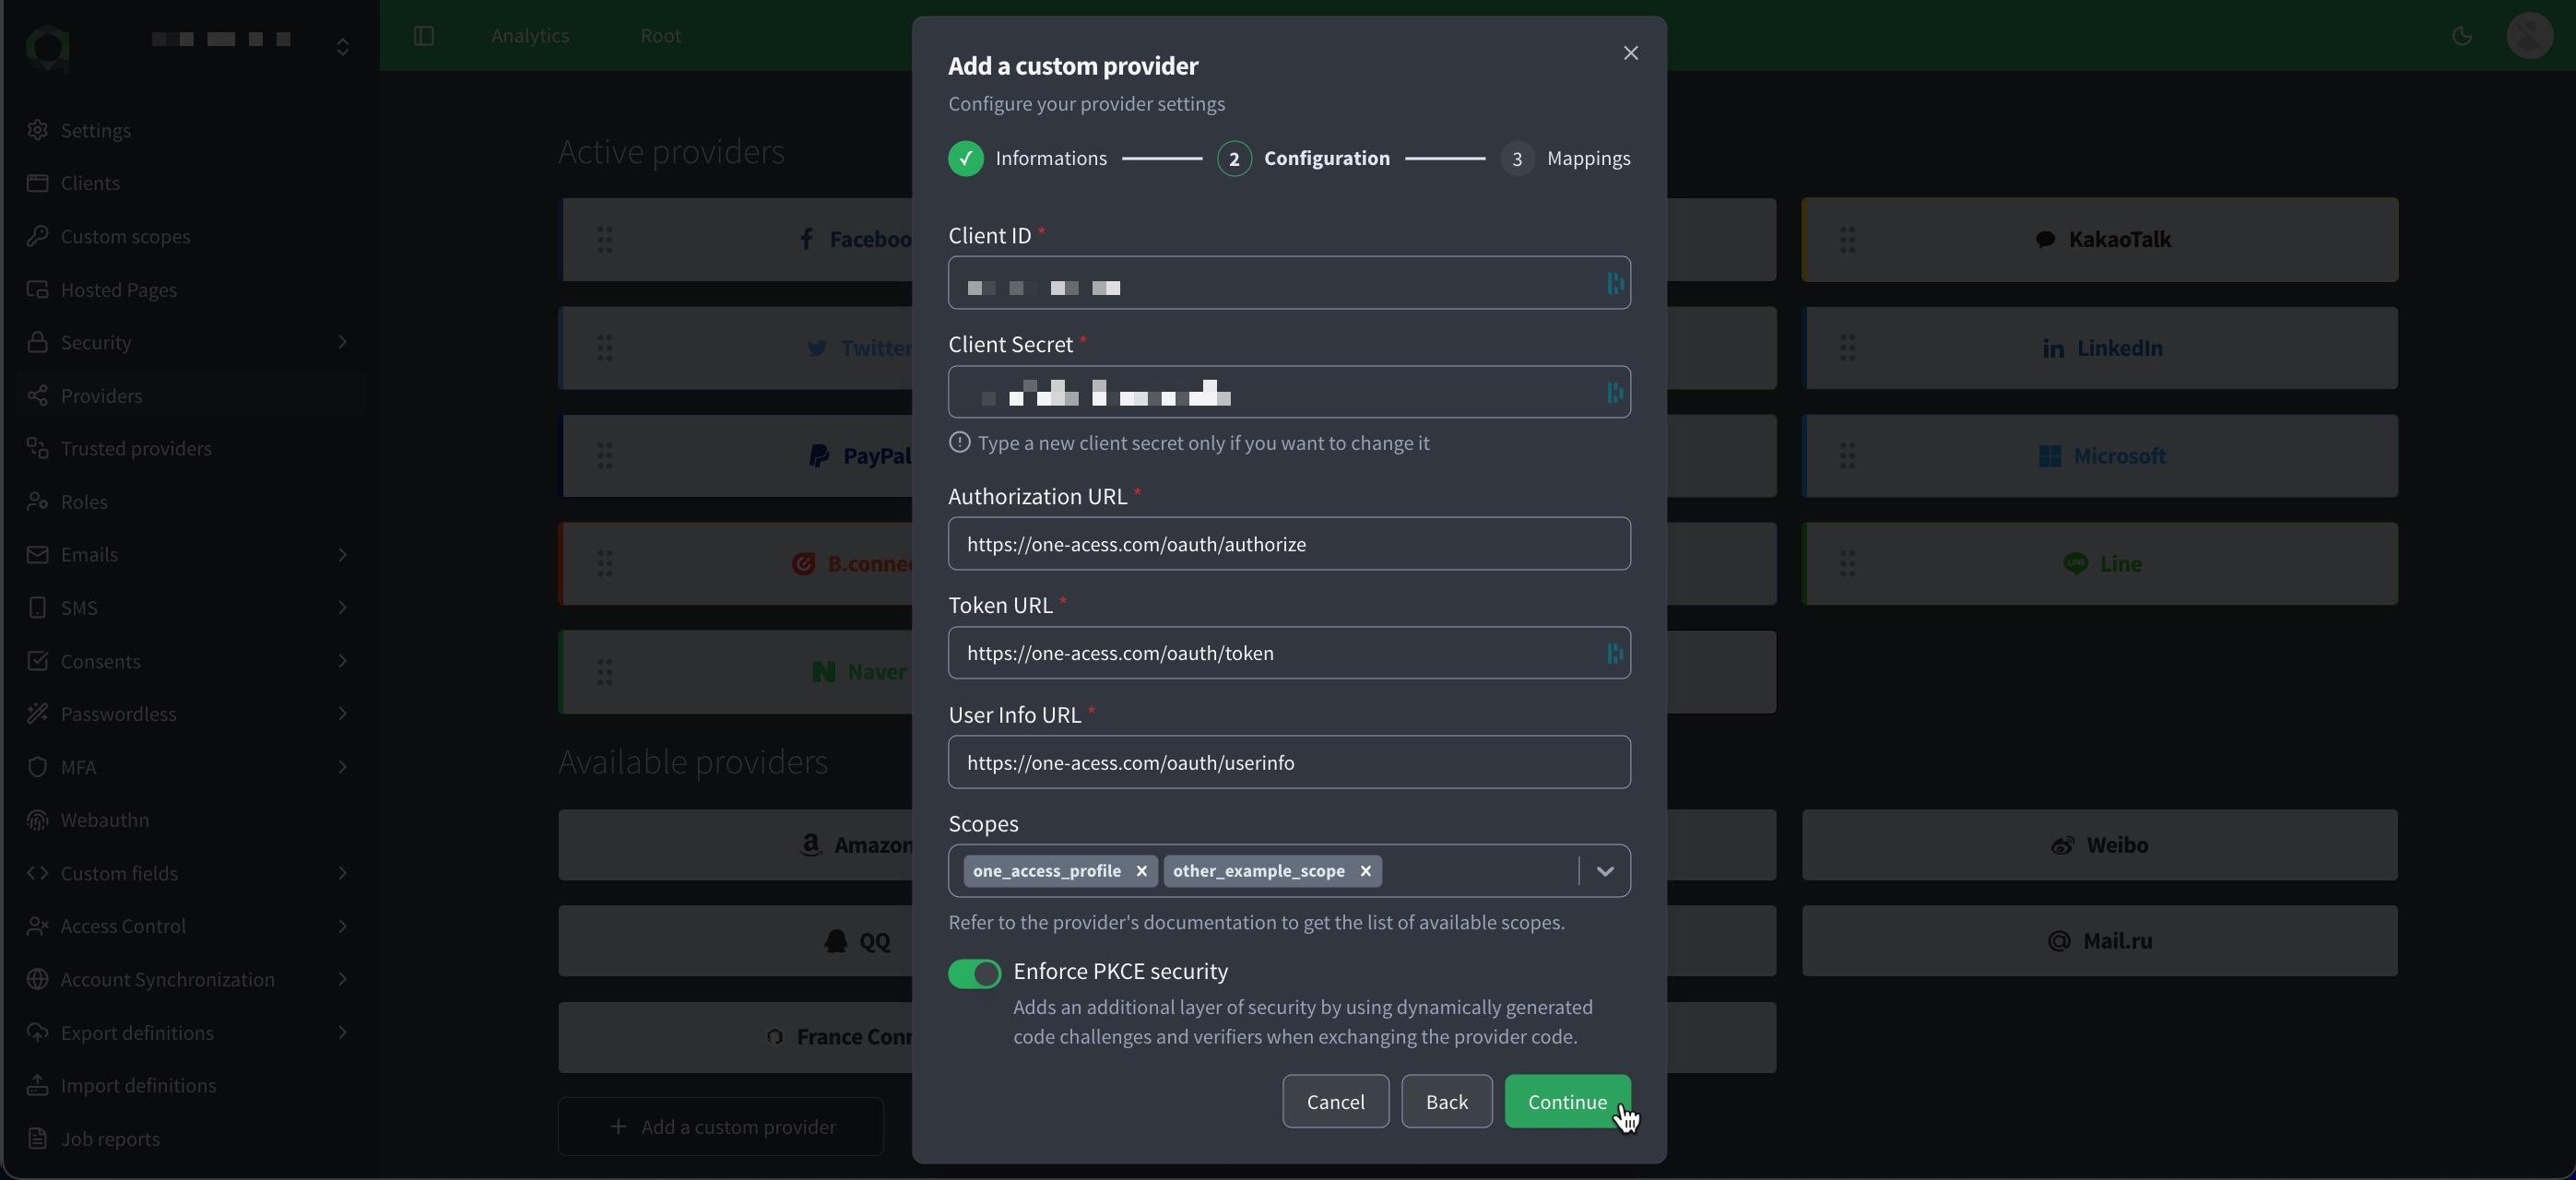
Connect ReachFive to your identity provider’s OAuth 2.0 endpoints.
-
Enter the Client ID and Client secret (required): Credentials issued by your identity provider.
When editing an existing provider, enter a new client secret only if you want to rotate it.
-
Enter the Authorization URL.
Example:
https://example.com/oauth/authorize. -
Enter the Token URL.
Example:
https://example.com/oauth/token. -
Enter the User Info URL.
Example:
https://example.com/oauth/userinfo. -
Enter your desired Scopes: Scopes requested from the provider.
If the identity provider exposes OpenID Connect discovery (
/.well-known/openid-configuration), the ReachFive Console may suggest available scopes from that document. Otherwise, enter the scopes from your identity provider’s documentation. You can always type a scope that is not in the suggested list. -
Decide whether to Enforce PKCE security or not: When enabled, ReachFive uses PKCE (code challenge and verifier) when exchanging the authorization code with the provider.
3. Mappings
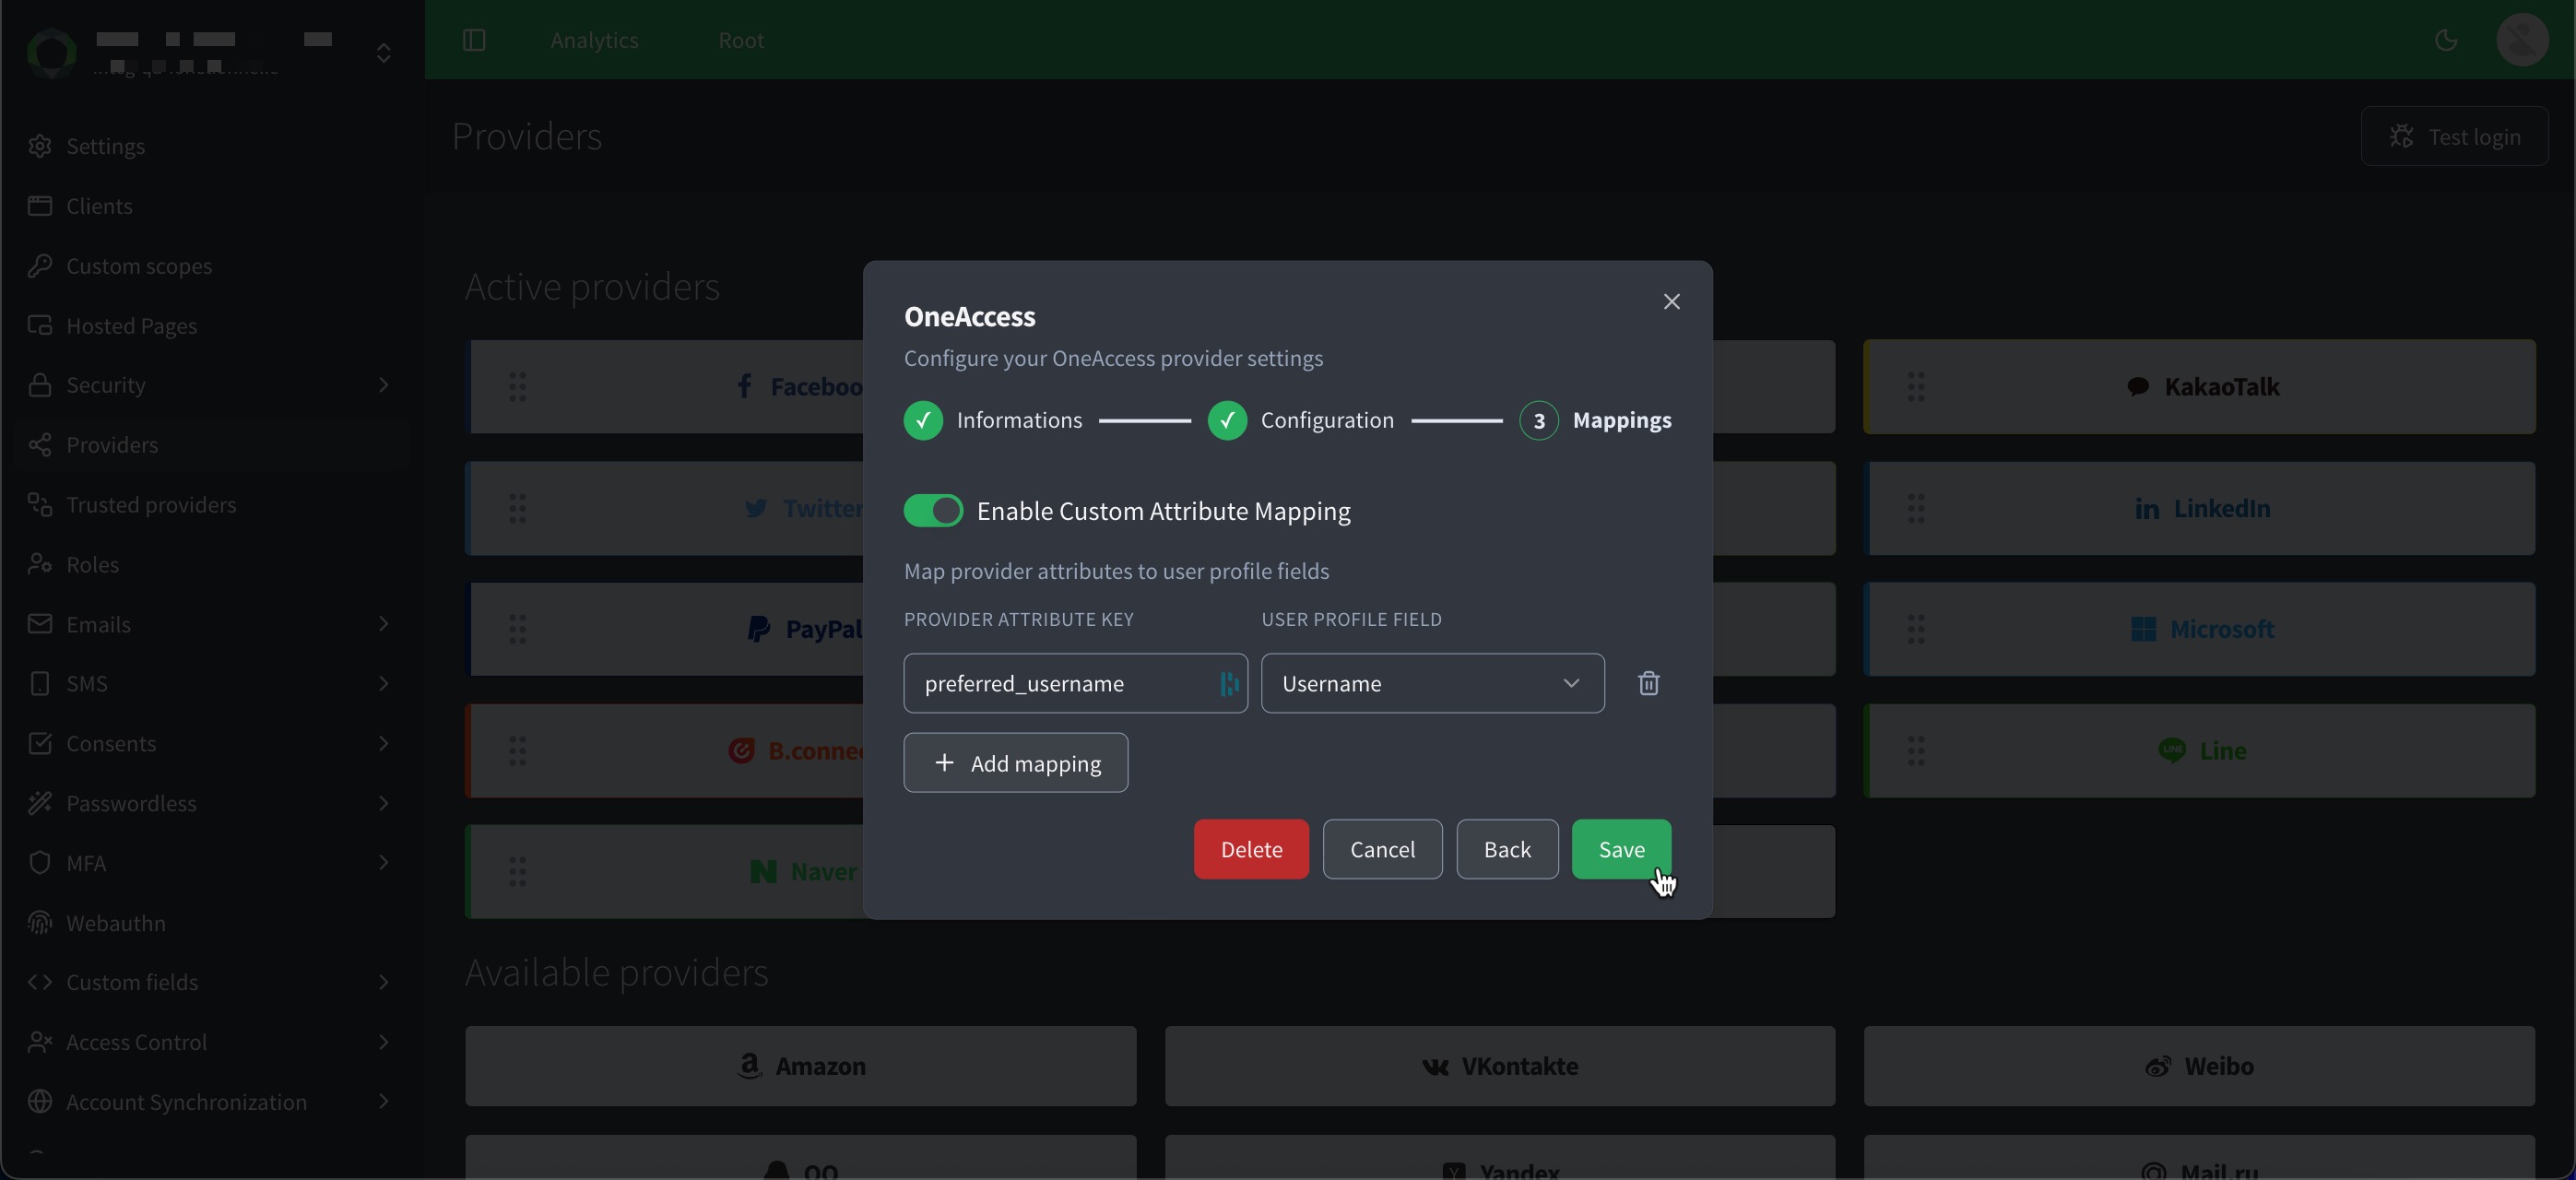
By default, ReachFive maps standard OpenID Connect claims from the user info response to the user profile (for example email, given_name, and family_name).
Optionally, choose to Enable Custom Attribute Mapping to override or extend those defaults.
Map a provider attribute key (including nested paths such as address.street_address) to a user profile field.
If the identity provider exposes OpenID Connect discovery, the ReachFive Console may also suggest claim names from claims_supported when you enter a provider attribute key.
Otherwise, enter claim names from your identity provider’s documentation.
Use a custom social provider
After you save the provider, use its provider key anywhere you would pass a built-in social provider name.
The examples below use one_access as the provider key.
The provider key also appears in the user profile’s auth_types and identities, like other social providers.
For hosted pages and UI SDK widgets to discover the provider automatically, keep Visible enabled in the wizard.
You can still call the Core SDK or /oauth/authorize with the provider key when the provider is hidden.
|
Pass the custom provider key to loginWithSocialProvider:
import { createClient } from '@reachfive/identity-core'

const client = createClient({
  domain: 'YOUR_DOMAIN',
  clientId: 'YOUR_CLIENT_ID'
})

client.loginWithSocialProvider('one_access', { (1)
  redirectUri: 'https://www.example.com/login/callback'
})| 1 | Where one_access is the provider key. |
Include the custom provider key in the socialProviders list for showSocialLogin:
client.showSocialLogin({
  container: 'social-login-container',
  socialProviders: ['facebook', 'google', 'one_access'], (1)
  auth: {
    redirectUri: 'https://www.example.com/auth-callback'
  }
})| 1 | Where one_access is the provider key. |
Start social login with the /oauth/authorize endpoint and set provider to your custom provider key:
GET https://YOUR_DOMAIN/oauth/authorize?
  client_id=YOUR_CLIENT_ID&
  response_type=code&
  redirect_uri=https://www.example.com/login/callback&
  scope=openid%20profile%20email&
provider=one_access (1)| 1 | Where one_access is the provider key. |