Premium Analytics
Premium Analytics overview
ReachFive’s Premium Analytics offers deeper insight into your user base’s behaviour beyond that of just the standard analytics package as shown in Analytics. Combined with the powerful out-of-the-box analytics that come standard with ReachFive, these Premium Analytics help you to better understand how your users are interacting with your sites so you can best tailor experiences for them and respond to new patterns as they emerge.
Get started with Premium Analytics
To get started with Premium Analytics, you just need to sign into your ReachFive Console and go to .
| If you don’t see Premium Analytics, please contact your ReachFive contact to enable the Premium Analytics module. |
Change the timeframe
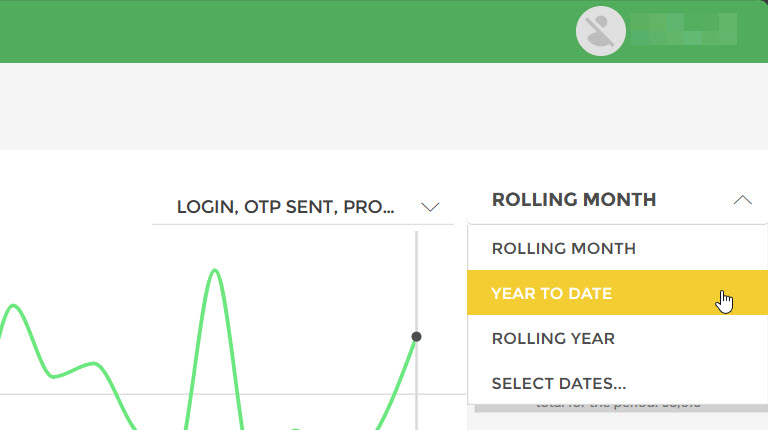
Generally speaking, in each Premium Analytics page, you can adjust the timeframe by:
-
Rolling month: the latest month.
-
Rolling year: the latest year (12 month period).
-
Year to date: the start of the year to the current date. (Example: January 1st 2026 to 2026-07-23).
-
Select dates (select your own timeframe)
To change the range of dates (timeframe) for your data, go to the calendar picker and select your desired dates.
Premium Analytics pages
Currently, we have 6 Premium Analytics subpages on the ReachFive Console:
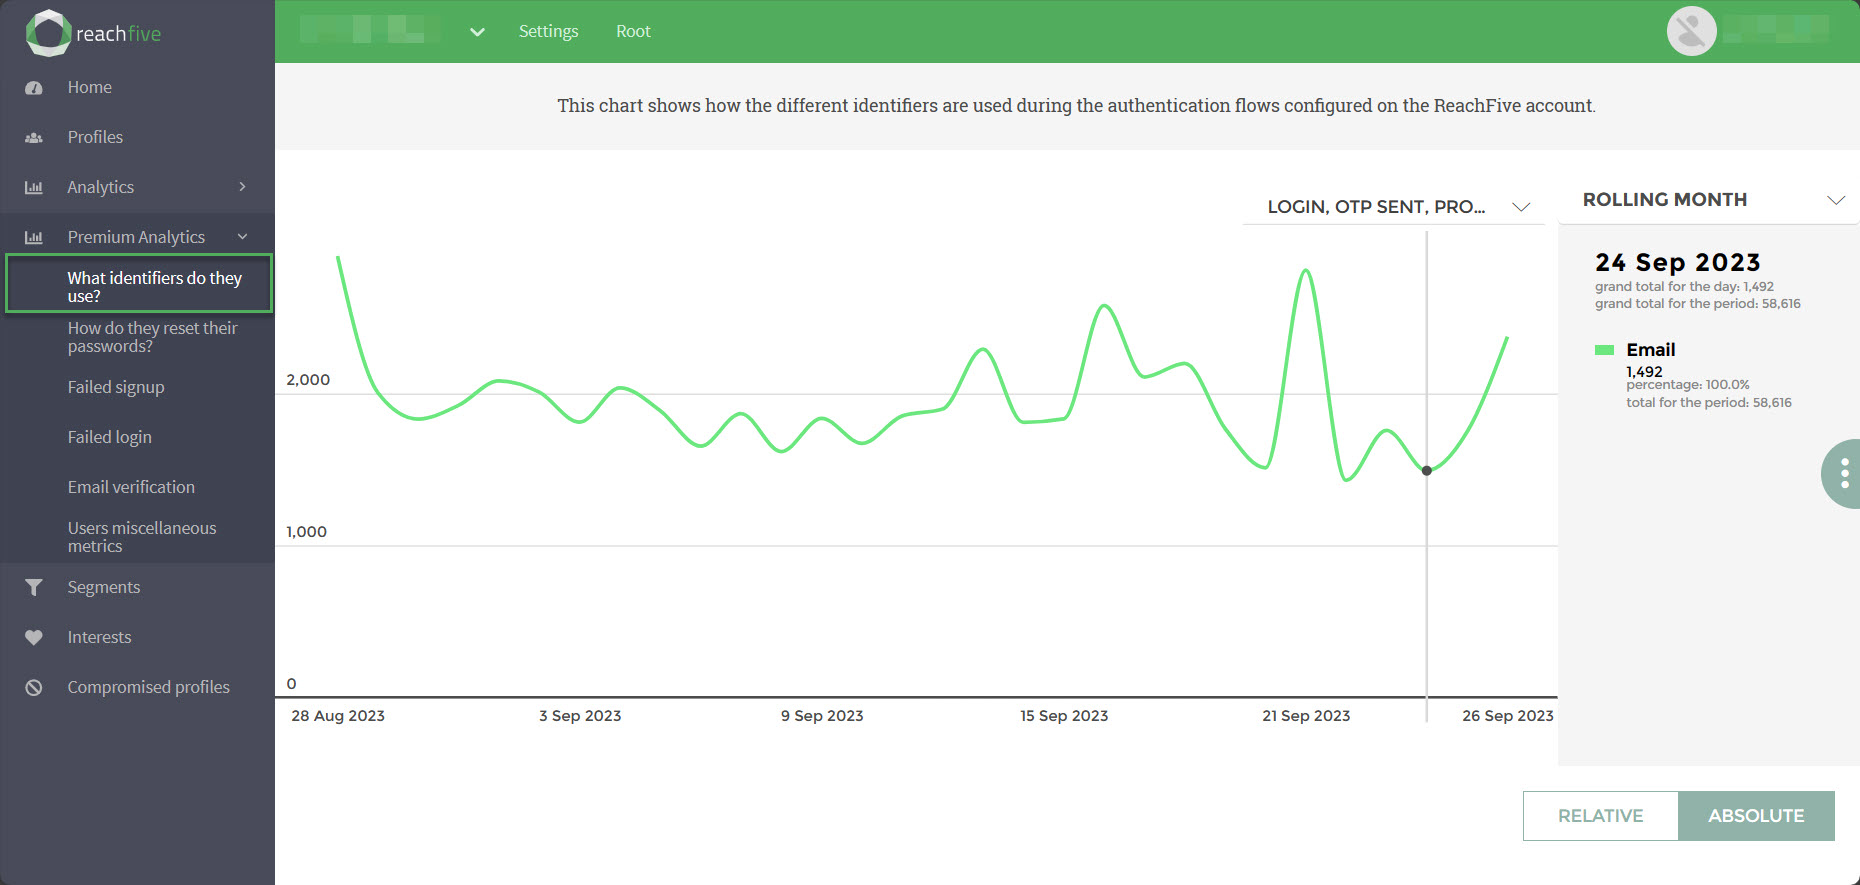
What identifiers do they use?
To access this page, go to on your ReachFive Console.
This page displays the different identifiers that are used during the authentication flows configured on the ReachFive account in a visual by relative or absolute values.
-
Login
-
Login from suspended account
-
Login with invalid ID format
-
Login with matching password
-
Login with unknown identifier
-
Login with wrong password
-
OTP sent
-
Profile was locked
-
Signup
How do they reset their passwords?
To access this page, go to on your ReachFive Console.
This page displays the time observed between a password reset request and the password being effectively reset, and a comparison with the average found across all our brands.
The categories are grouped as follows:
-
Less than 1 minute: The request and the reset happened in under 1 minute.
-
Less than 15 minutes: The request and reset happened in under 15 minutes.
-
Less than 2 hours: The request and reset happened in under 2 hours.
-
More than 2 hours: The request and reset happened over 2 hours apart.
-
Never: The actual password reset never happened after the request to reset the password.

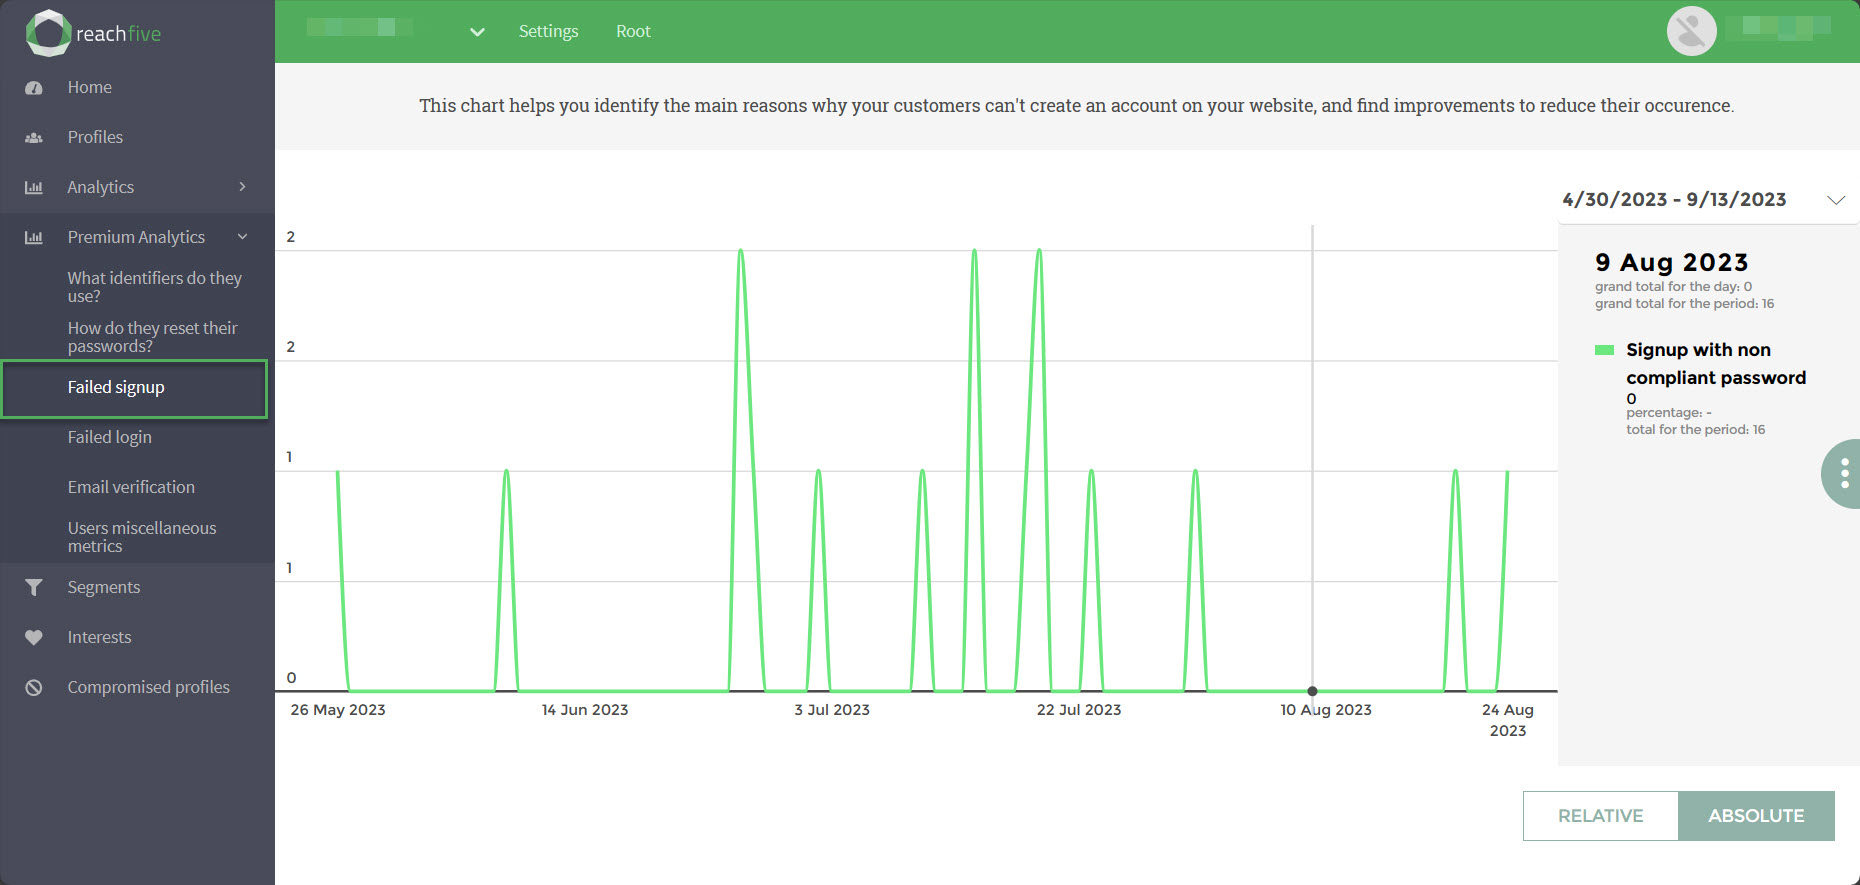
Failed signup
To access this page, go to on your ReachFive Console.
This page displays the reasons why failed signups occurred on your site. The primary purpose is to help you identify why customers are unable to create an account for your site so you can better minimize the obstacles in the future.
Examples:
-
Non-compliant password
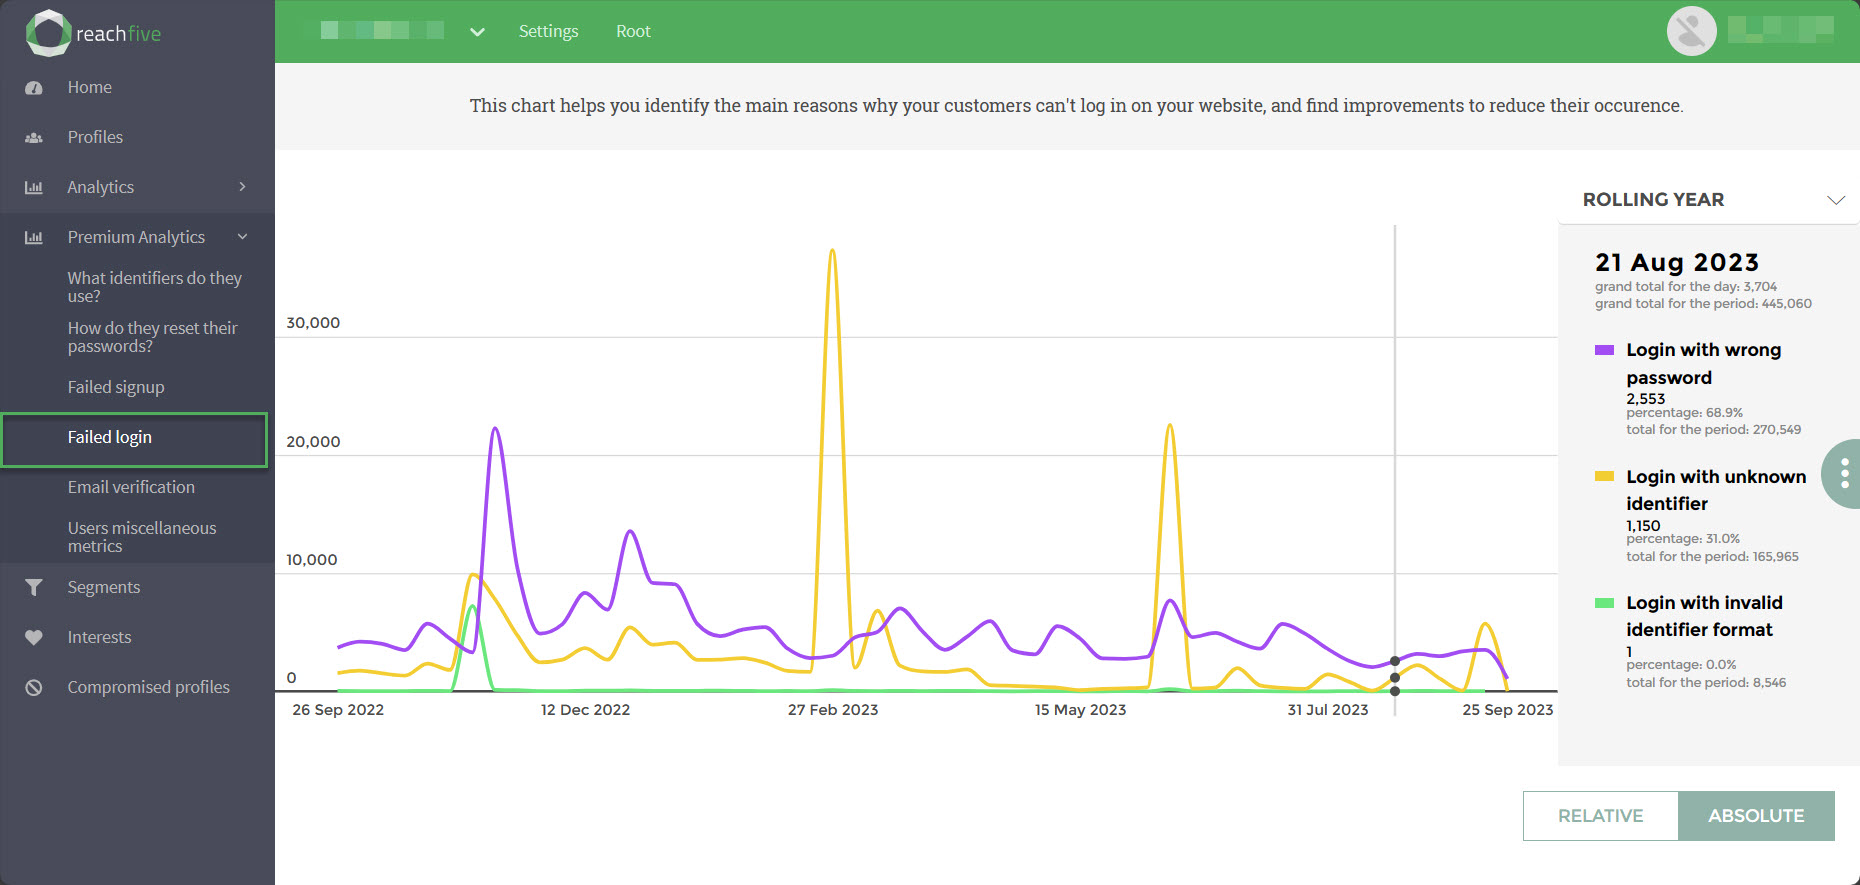
Failed login
To access this page, go to on your ReachFive Console.
This page displays the reasons why failed logins occurred on your site. The primary purpose is to help you identify why customers are unable to log in to their account(s) for your site so you can better minimize failed logins in the future.
Examples:
-
Wrong password
-
Invalid identifier format
-
Unknown identifier
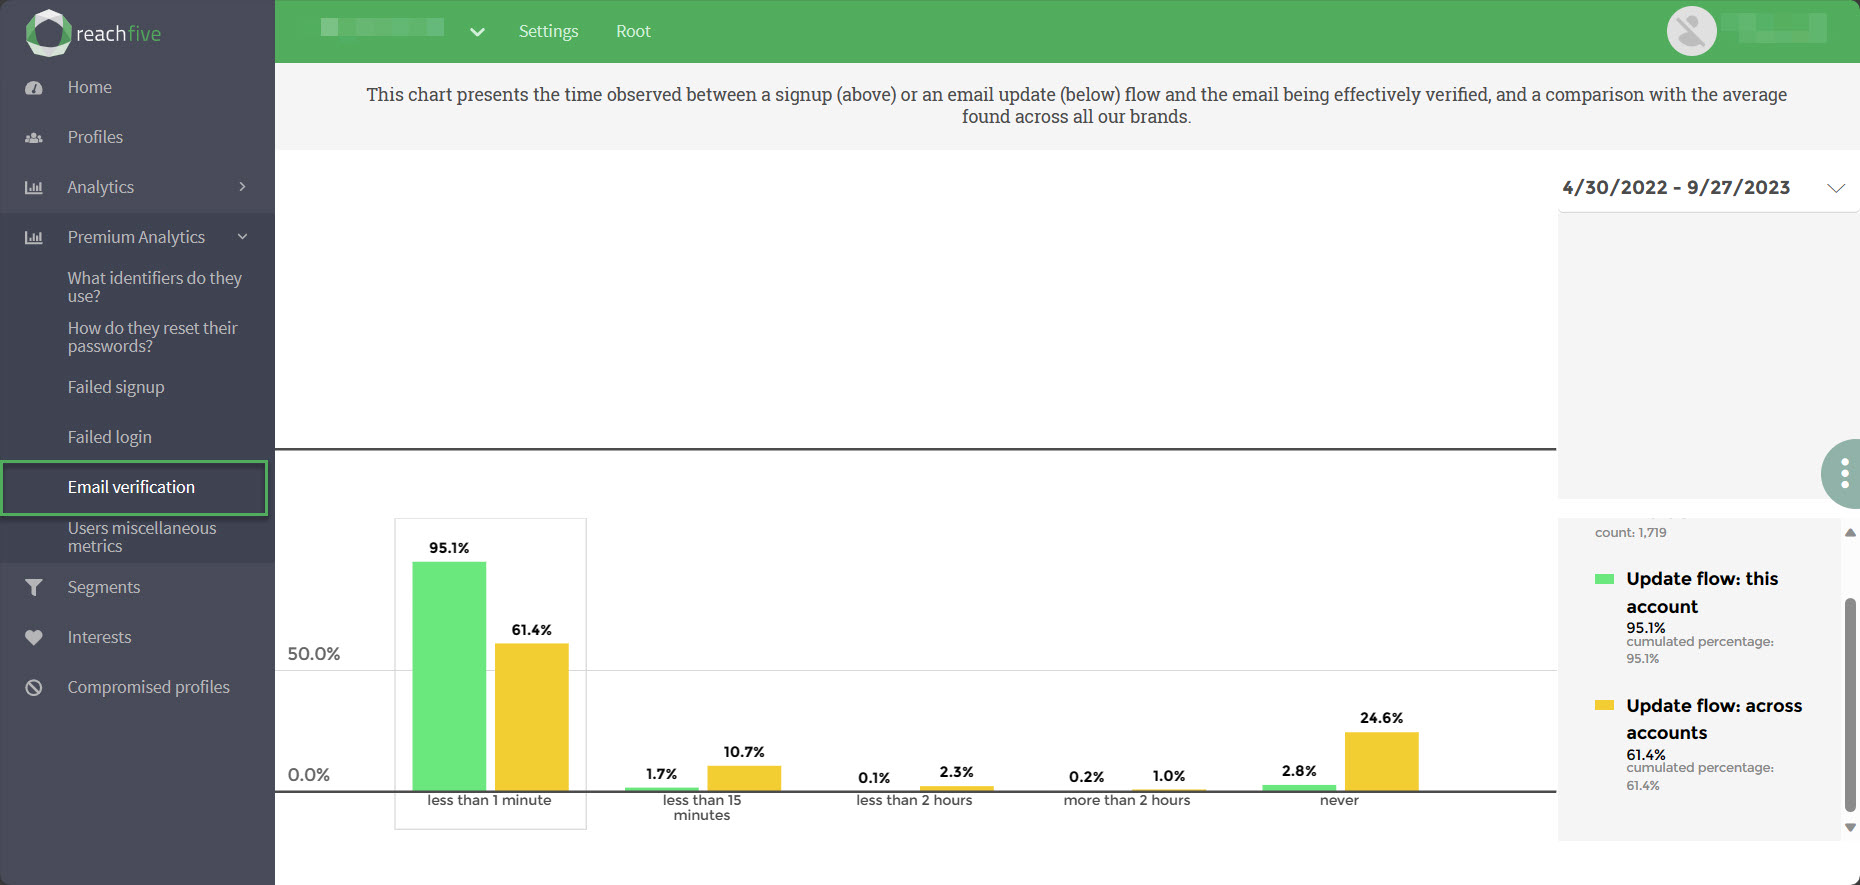
Email verification
To access this page, go to on your ReachFive Console.
This page displays the time observed between a signup (top visual) or an email update (bottom visual) flow and the email being effectively verified by the user. It compares this with the average found across all our brands.
Flows accounted for are:
-
The current account.
-
Across all accounts (brands)
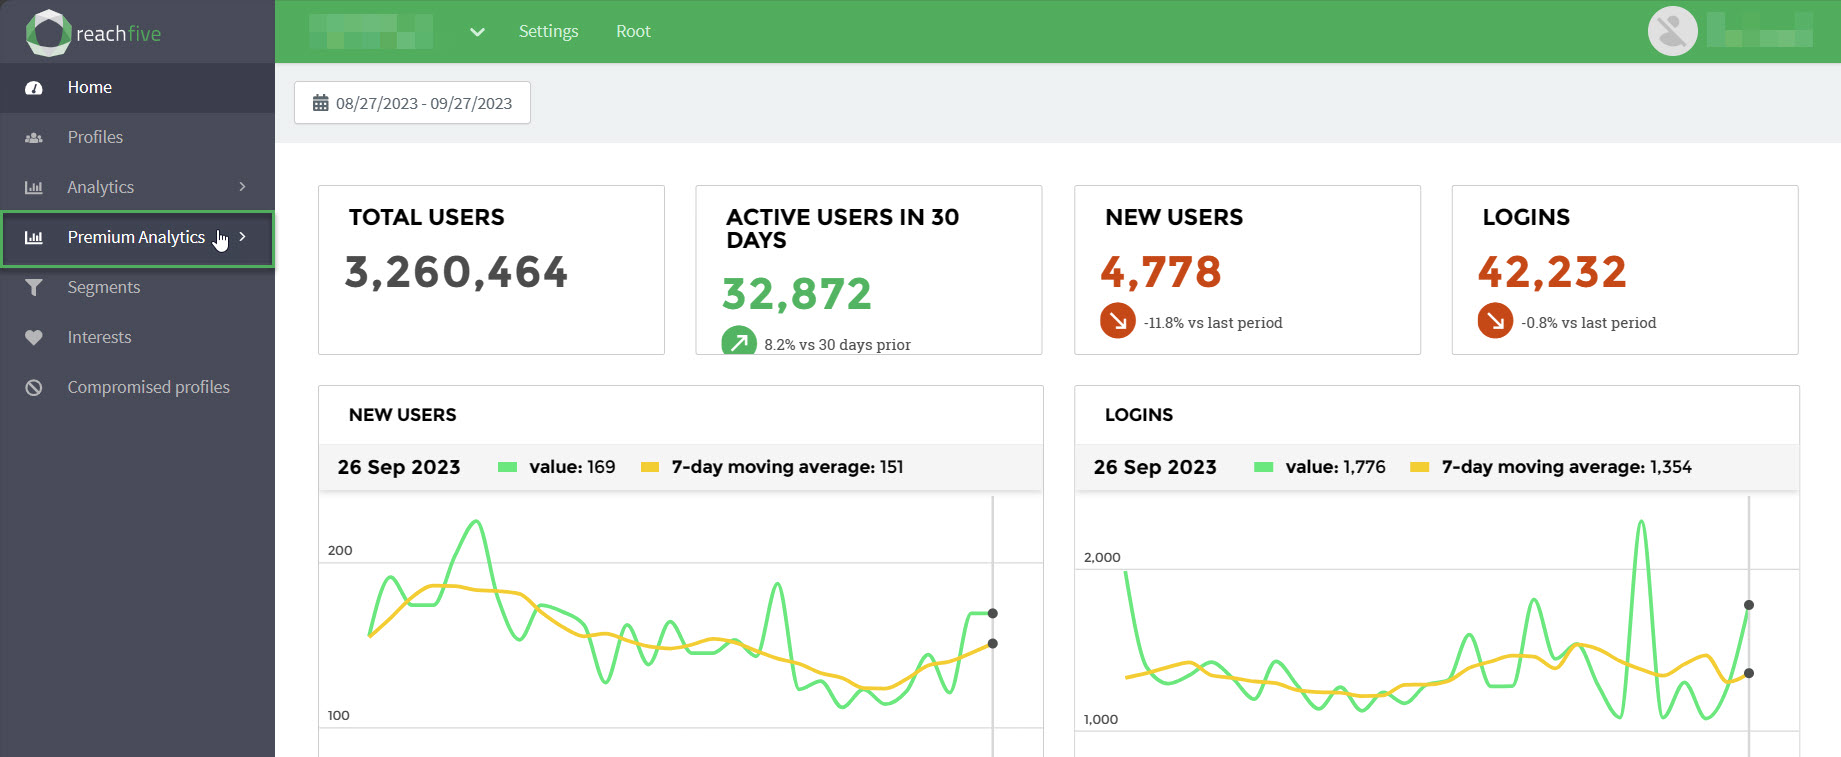
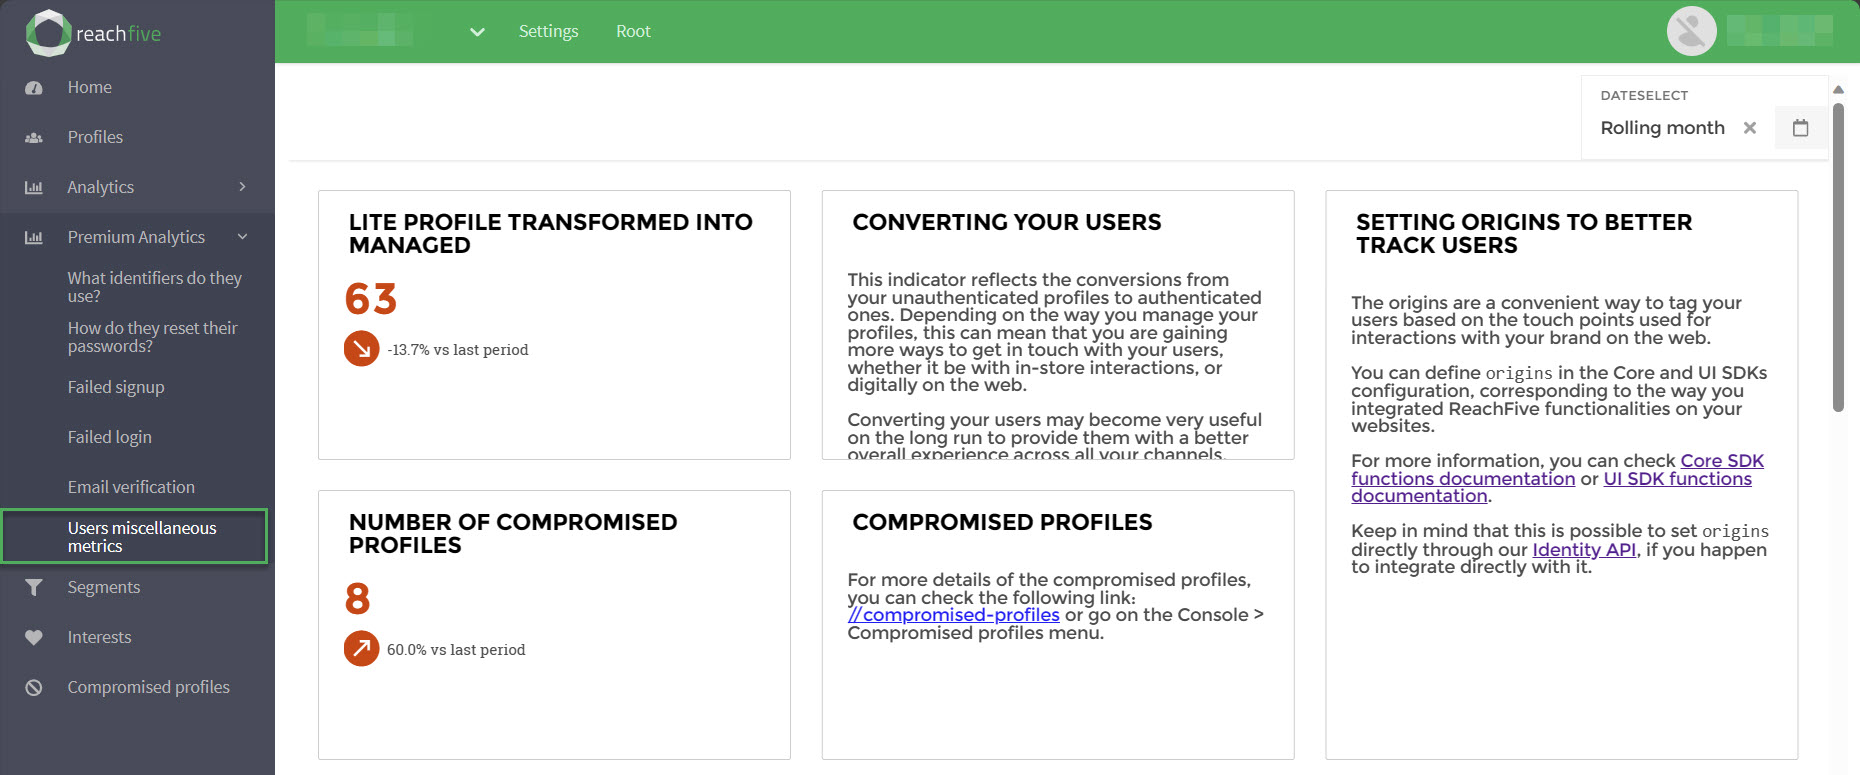
Users miscellaneous metrics
To access this page, go to on your ReachFive Console.
This page displays miscellaneous metrics for your users in a given time period including:
-
Lite profiles converted to fully managed profiles
The number of
lite_merged_into_managedevents created in the selected time frame. -
The number of compromised profiles
The number of
profile_comprisedevents created in the selected time frame. The number may differ from the “Compromised profiles” listed in the Analytics section because this page only list profiles that are currently compromised. -
How often users change passwords
-
How many users were deleted
The number of
user_deletedevents created in the selected time frame. -
How many MFA activations (2FA enabled) occurred
The sum of
mfa_email_verify_registrationandmfa_phone_number_verify_registrationevents created in the selected time frame.
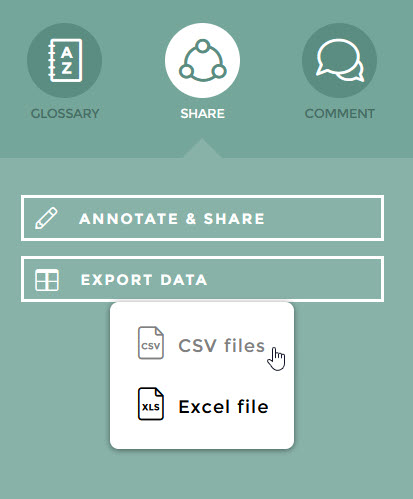
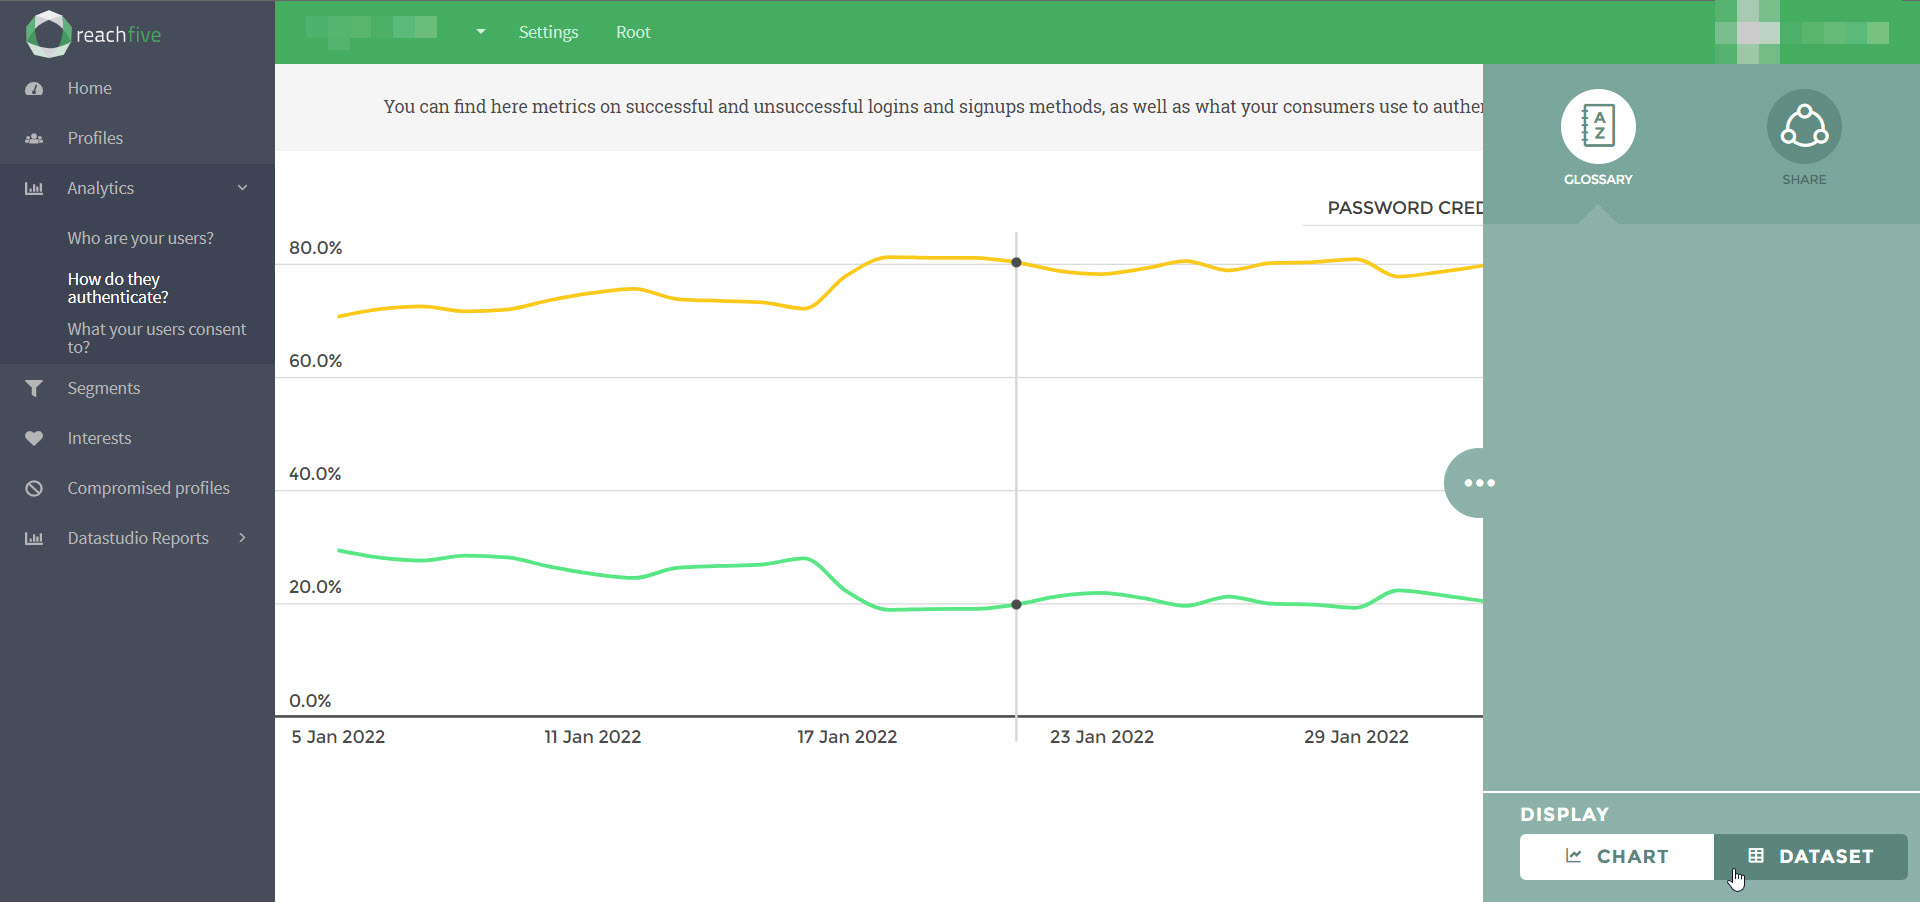
Use analytics tools
Our analytics provide some handy tools when interacting with your customer data.
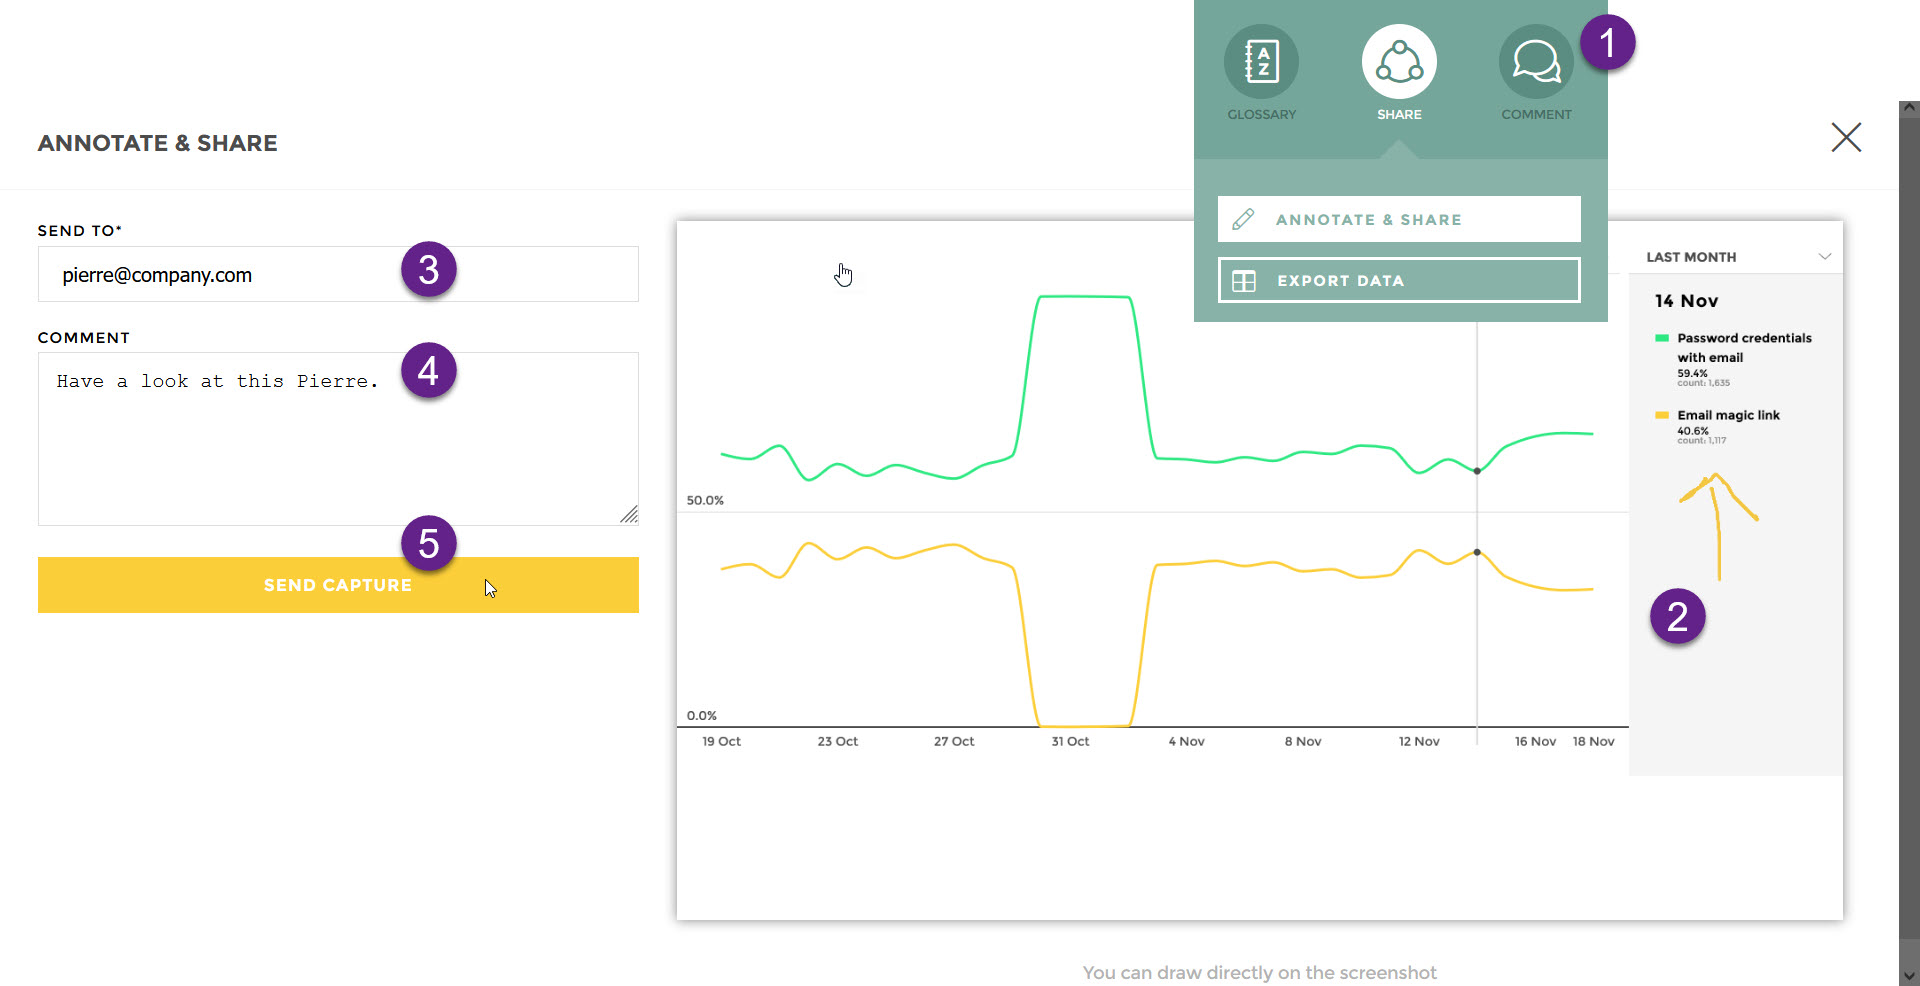
Sharing data
One of the handy tools is the ability to annotate and share or simply export your data via csv or excel.
To do this:
-
Go to the analytics page that you want to share.
-
Click the slider to open the tools.
-
Click Share.
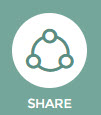
Next: annotate and share or export your data.
Annotate & Share
-
Click Annotate & Share.
-
Annotate (draw directly) on the screenshot. This highlights important information.
-
Add an email in the Send to field.
-
Add a comment in the Comment field. (optional)
-
Don’t forget to click Send Capture.
Voila! Your email recipient will have an annotated screenshot of your analytics page.