Email templates
The email templates provided via the ReachFive Console allow you to send templated emails that are triggered when certain actions occur.
Configure email templates
You configure the email templates from the ReachFive Console by navigating to . The tabs below show you how to configure each template. Currently, the following variables are available using liquid.
Signup
Sent after a user signs up via email
A link with a code and a specific redirect URL is sent. This verifies the user and redirects the user to the page of your choice.
-
Enable the template.
-
Enter the sender’s email in the From field.
-
Write your Subject.
Hi {{user.given_name}}! Please confirm your email. -
Enter the URL to redirect users in the Redirect to field.
-
Specify the URL lifetime (in seconds).
-
Write your Message for the template.
<h1>Please verify your email address</h1> <p>To verify your email, please select <a href="{{link}}">this link</a>.</p> -
Don’t forget to Save your input.
If you have configured a custom provider, your templates will be different and only contain the following fields:
| Field | Description |
|---|---|
Enabled |
Checkbox to enable the template.
|
Template ID |
The ID that you assign to the template.
|
Client ID |
The client ID used to perform the API call. This can be either an Identity or Management client. |
Redirect to |
The URL to which you want to redirect the user.
|
URL Lifetime (seconds) |
The URL lifetime in seconds.
|

Verify email
Sent to users who still need to verify their account.
Sometimes, users have created an account without verifying it. In these cases, the accounts may have been around for quite some time or perhaps, they’re new. Either way, this template is sent in order to verify the user account.
-
Enable the template.
-
Enter the sender’s email in the From field.
-
Write your Subject.
Please verify your account, {{user.give_name}}. -
Enter the URL to redirect users in the Redirect to field.
-
Specify the URL lifetime (in seconds).
-
Write your Message for the template.
<h1>Hi there! Please verify your email address so we can ensure it’s you. </h1> <p>Click <a href="{{link}}">this link</a> to verify your email.</p> -
Don’t forget to Save your input.
If you have configured a custom provider, your templates will be different and only contain the following fields:
| Field | Description |
|---|---|
Enabled |
Checkbox to enable the template.
|
Template ID |
The ID that you assign to the template.
|
Client ID |
The client ID used to perform the API call. This can be either an Identity or Management client. |
Redirect to |
The URL to which you want to redirect the user.
|
URL Lifetime (seconds) |
The URL lifetime in seconds.
|
Email update
Sent when a user email is updated
When the user updates their email address in the system, an email is sent to them containing a verification link.
-
Enable the template.
-
Enter the sender’s email in the From field.
-
Write your Subject.
Email update - Please confirm your email. -
Enter the URL to redirect users in the Redirect to field.
-
Specify the URL lifetime (in seconds).
-
Write your Message for the template.
<h1>Please verify your email address</h1> <p>To verify your email, please select <a href="{{link}}">this link</a>.</p> -
Don’t forget to Save your input.
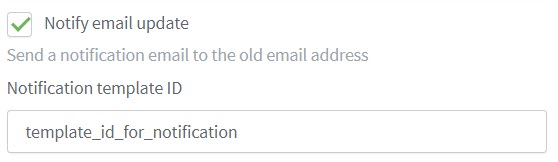
If you want to notify the old email address that the email was updated, you’ll also need to do the following:
-
Click the Notify email update option.
This sends a notification email to the old email address about the email being updated.
-
Write your Notification subject.
Email address updated -
Write your Notification message.
<h1>We have just received a request to update your email address.</h1> <p>If you didn't change it, please contact the site administrator to cancel this update.</p> -
If desired, enable HTML? to send HTML in the message.
If you have configured a custom provider, your templates will be different and only contain the following fields:
| Field | Description |
|---|---|
Enabled |
Checkbox to enable the template.
|
Template ID |
The ID that you assign to the template.
|
Client ID |
The client ID used to perform the API call. This can be either an Identity or Management client. |
Redirect to |
The URL to which you want to redirect the user.
|
URL Lifetime (seconds) |
The URL lifetime in seconds.
|
Notify email update |
Checkbox if you want to send an email to the old address to notify of an email change.
|
Password reset
Sent when a user password is reset
The email contains a link that can used only once. This link enables the user to change their password on the page of your choice.
| This Password reset template is sent when users have started the "Forgot password" flow. Users receive an email with the magic link as part of the flow and no follow up email is sent after the password is updated. |
When the password reset template is used for custom providers, the request payload contains the has_password boolean.
|
-
Enable the template.
-
Enter the sender’s email in the From field.
-
Write your Subject.
Hi {{user.given_name}}! Please reset your password. -
Enter the URL to redirect users in the Redirect to field.
-
Specify the URL lifetime (in seconds).
-
Write your Message for the template.
<p>A request was made to reset your password.</p> <p>If you initiated this request you can follow <a href="{{link}}">this link</a></p>. Alternatively, you can use this {{verification_code}} to reset your password. -
Don’t forget to Save your input.
If you have configured a custom provider, your templates will be different and only contain the following fields:
| Field | Description |
|---|---|
Enabled |
Checkbox to enable the template.
|
Template ID |
The ID that you assign to the template.
|
Redirect to |
The URL to which you want to redirect the user.
|
URL Lifetime (seconds) |
The URL lifetime in seconds.
|
Account recovery
Sent when a user is recovering their account
Only displayed if the WebAuthn feature is enabled.
The email contains a link that can used only once. This link enables the user to start the account recovery process.
| This Account recovery template is sent when users have started the account recovery flow. Users receive an email with the magic link as part of the flow and no follow up email is sent after the account recovery process is completed. |
-
Enable the template.
-
Enter the sender’s email in the From field.
-
Write your Subject.
Hi {{user.given_name}}! Start your account recovery. -
Enter the URL to redirect users in the Redirect to field.
-
Specify the URL lifetime (in seconds).
-
Write your Message for the template.
<p>A request was made to recover your account.</p> <p>If you initiated this request you can follow <a href="{{link}}">this link</a></p>. -
Don’t forget to Save your input.
If you have configured a custom provider, your templates will be different and only contain the following fields:
| Field | Description |
|---|---|
Enabled |
Checkbox to enable the template.
|
Template ID |
The ID that you assign to the template.
|
Redirect to |
The URL to which you want to redirect the user.
|
URL Lifetime (seconds) |
The URL lifetime in seconds.
|
Password updated
Sent when a user password is updated
When a user’s password is changed, an email is sent to them to inform them of this change.
| This Password updated template is sent when users log in and update their password themselves. For forgotten passwords, users receive an email with the magic link as part of their forgot password (Password reset) flow and no follow up email is sent after the password is updated. |
-
Enable the template.
-
Enter the sender’s email in the From field.
-
Write your Subject.
Hi {{user.given_name}}! Your password was changed. -
Write your Message for the template.
<p>Hi {{user.given_name}},</p> <p>We wanted to let you know that your password was changed.</p> -
Don’t forget to Save your input.
If you have configured a custom provider, your templates will be different and only contain the following fields:
| Field | Description |
|---|---|
Enabled |
Checkbox to enable the template.
|
Template ID |
The ID that you assign to the template.
|
Client ID |
The client ID used to perform the API call. This can be either an Identity or Management client. |
Signup invitation
Sent when a user registers interest
When a user wants to sign up, this email is sent to so they can follow the sign up flow.
If the email fails to send, we register it as the "failed_message_template": "email_presignup" user event.
-
Enable the template.
-
Enter the sender’s email in the From field.
-
Write your Subject.
Hi {{user.given_name}}! Sign up with us! -
Enter the URL to redirect users in the Redirect to field.
-
Specify the URL lifetime (in days).
-
Write your Message for the template.
<p>Hello {{user.given_name}},</p> <p>Please click on the following <a href="{{link}}">link</a> to signup to your account.</p> -
Don’t forget to Save your input.
If you have configured a custom provider, your templates will be different and only contain the following fields:
| Field | Description |
|---|---|
Enabled |
Checkbox to enable the template.
|
Template ID |
The ID that you assign to the template.
|
Client ID |
The client ID used to perform the API call. This can be either an Identity or Management client. |
Redirect to |
The URL to which you want to redirect the user.
|
URL Lifetime (days) |
The URL lifetime in days.
|
Account suspension
Sent when a user account is suspended
When a user’s account is suspended, an email is sent to them informing them of the steps they need to take to reactivate their account.
| If a user is indefinitely suspended, they will not receive a reset link. For more information, see the user suspension page. |
-
Enable the template.
-
Enter the sender’s email in the From field.
-
Write your Subject.
Uh oh! Your account has been suspended. -
Enter the URL to redirect users in the Redirect to field.
-
Specify the URL lifetime (in seconds).
-
Write your Message for the template.
<p>Hello {{user.given_name}},</p> <p>Your account has been disabled for security reasons. Please <a href="{{link}}">reset</a> your password to reactivate it.</p> -
Don’t forget to Save your input.
If you have configured a custom provider, your templates will be different and only contain the following fields:
| Field | Description |
|---|---|
Enabled |
Checkbox to enable the template.
|
Template ID |
The ID that you assign to the template.
|
Client ID |
The client ID used to perform the API call. This can be either an Identity or Management client. |
Redirect to |
The URL to which you want to redirect the user.
|
URL Lifetime (seconds) |
The URL lifetime in seconds.
|
User lockout
Sent when a user is locked out from their account
When a user gets locked out from their account from something like too many unsuccessful login attempts, an email is automatically sent to them informing them of the steps they need to take to unlock their account.
|
The For example: |
-
Enable the template.
-
Enter the sender’s email in the From field.
-
Write your Subject.
Your account has been locked. -
Enter the URL to redirect users in the Redirect to field.
-
Specify the URL lifetime (in seconds).
-
Write your Message for the template.
<p>Hello {{user.given_name}},<p>You have exceeded the allowed number of login attempts with incorrect credentials. Your account is locked until: <strong>{{ user.lockout_end_date | date: "%B %-d, %Y at %H:%M" }} UTC</strong>.</p> -
Don’t forget to Save your input.
If you have configured a custom provider, your templates will be different and only contain the following fields:
| Field | Description |
|---|---|
Enabled |
Checkbox to enable the template.
|
Template ID |
The ID that you assign to the template.
|
Redirect to |
The URL to which you want to redirect the user.
|
URL Lifetime (seconds) |
The URL lifetime in seconds.
|
Risky Login Notification
Sent to user when login attempt is deemed risky
This template should be used to notify users that a login attempt from their account is considered unusual or risky. For users that haven’t enrolled any identifiers for MFA, the email is sent every time a user attempts to log in.
You can use the {{link}} templating variable in the email template to redirect users to a password reset page.
This is useful when the login attempt is not from the user and the user wants to quickly reset their password.
To learn more, see Risk-based Authentication.
-
Enable the template.
-
Enter the sender’s email in the From field.
-
Write your Subject.
Unusual login attempt -
Enter the URL to redirect users in the Redirect to field.
-
Specify the URL lifetime (in seconds).
-
Write your Message for the template.
<p>Hello {{user.given_name}},</p> <p>We have detected a new connection from this user agent {{user_agent}} and this operating system {{operating_system}}.</p> <p>If this is you, no action is required; otherwise we recommend you change your password by following <a href="{{link}}">this link</a>.</p> -
Don’t forget to Save your input.
If you have configured a custom provider, your templates will be different and only contain the following fields:
| Field | Description |
|---|---|
Enabled |
Checkbox to enable the template.
|
Template ID |
The ID that you assign to the template.
|
Redirect to |
The URL to which you want to redirect the user.
|
URL Lifetime (seconds) |
The URL lifetime in seconds.
|
Leaked Credentials Notification
Sent to user when they attempt to sign in with leaked credentials
This template should be used to notify users that they attempted to sign in with leaked credentials.
To learn more, see Data Breach Detection.
-
Enable the template.
-
Enter the sender’s email in the From field.
-
Write your Subject.
Credentials leaked -
Write your Message for the template.
<p>Hello {{user.given_name}},</p> <p>Your credentials have been identified in a potential data breach. Please consider resetting your password and enabling MFA. Be sure to monitor your account activity.</p> -
Don’t forget to Save your input.
If you have configured a custom provider, your templates will be different and only contain the following fields:
| Field | Description |
|---|---|
Enabled |
Checkbox to enable the template.
|
Template ID |
The ID that you assign to the template.
|
Translate email template
When sending emails, you can use liquid templating language to check the user’s language and send the email in the appropriate language for that user.
| By default ReachFive detects a user’s language from the browser. You can override this at initialization if desired. |
To translate emails based on the user’s specific language, use the user.lang parameter. See the example below for help if needed:
{% case user.lang%} {% when 'fr'%} Bienvenue! {% when 'it'%} Ciao! {% when 'es'%} ¡Bienvenido! {% else%} Welcome! {% endcase%}| Section | Notes |
|---|---|
|
Uses the |
|
Specifies what translation to use based on the specified language.
|
|
Specifies the default content if languages other than the aforementioned translations are used. |
|
Ends the |