Audit logs
Audit logs document changes in a system. In the case of ReachFive, audit logs capture when certain events occur in your ReachFive account.
Currently, you can produce audit logs for the following Action(s) below.
All security-related (settings-update) updates are detected automatically.
|
| Action | Description | ||
|---|---|---|---|
|
Creating a Client. |
||
|
Updating a Client. |
||
|
Deleting a Client. |
||
|
Login on the console. |
||
|
Unbanning a specific IP address with the |
||
|
Creating an export job. |
||
|
Copying an export job. |
||
|
Updating an export job. |
||
|
Deleting an export job. |
||
|
Executing an export job. |
||
|
Creating an on-demand scaling event. |
||
|
Updating an on-demand scaling event. |
||
|
Deleting an on-demand scaling event. |
||
|
Updating a User. |
||
|
Deleting a User. |
||
|
Suspending a user from the console. |
||
|
Unsuspending a user from the console. |
||
|
Updating security settings such as rate limits, SSO, password policy, user lockouts and/or activating (or deactivating) account features.
|
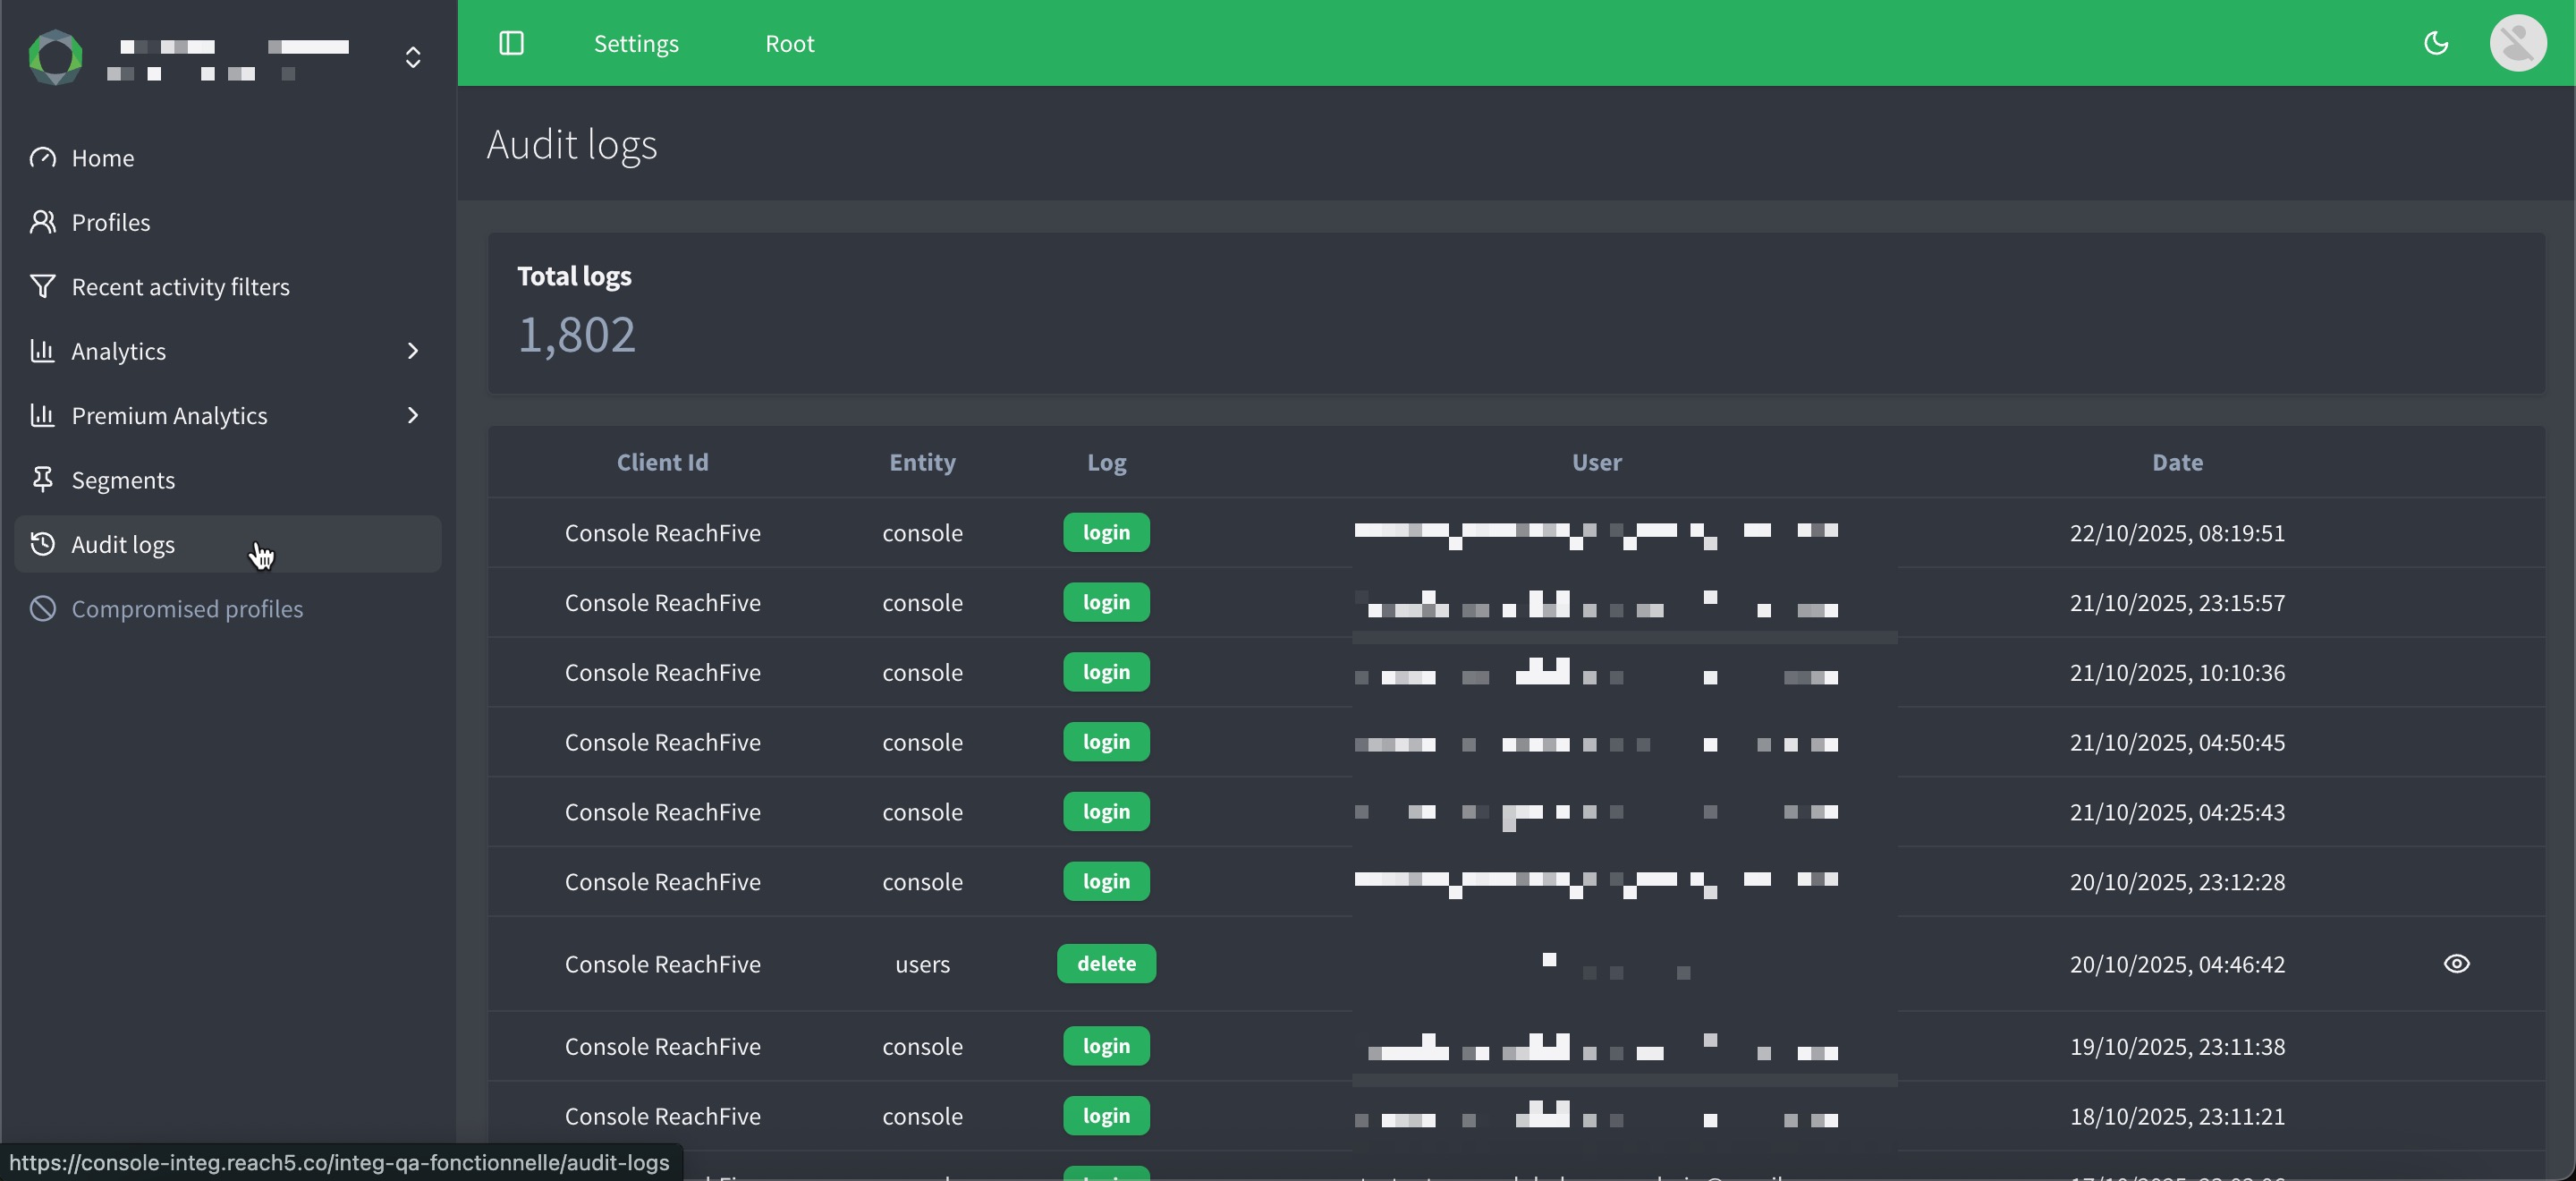
View audit logs from the console as a manager
You can view audit logs directly from the ReachFive Console if you have a Manager or Administrator role.
To view audit logs:
-
In your ReachFive Console, go to Analytics.
-
Click Audit logs. Content includes the Client Id, Entity (such as Console or Login), Log, User, and Date.

Create Pub/Sub hook from console
The Pub/Sub hook that you create in the ReachFive Console is triggered after an event is generated similar to that of a typical Post-event webhook.
| In order for an audit log to be produced for a specified event, you must first create a Pub/Sub hook in the ReachFive Console. |
Prerequisites
-
You must have access to the ReachFive Console.
-
You must have a Developer, Manager, or Administrator role.
-
You must have the Pub/Sub Hooks feature enabled.
Instructions
-
Log in to your ReachFive Console.
-
Go to .
-
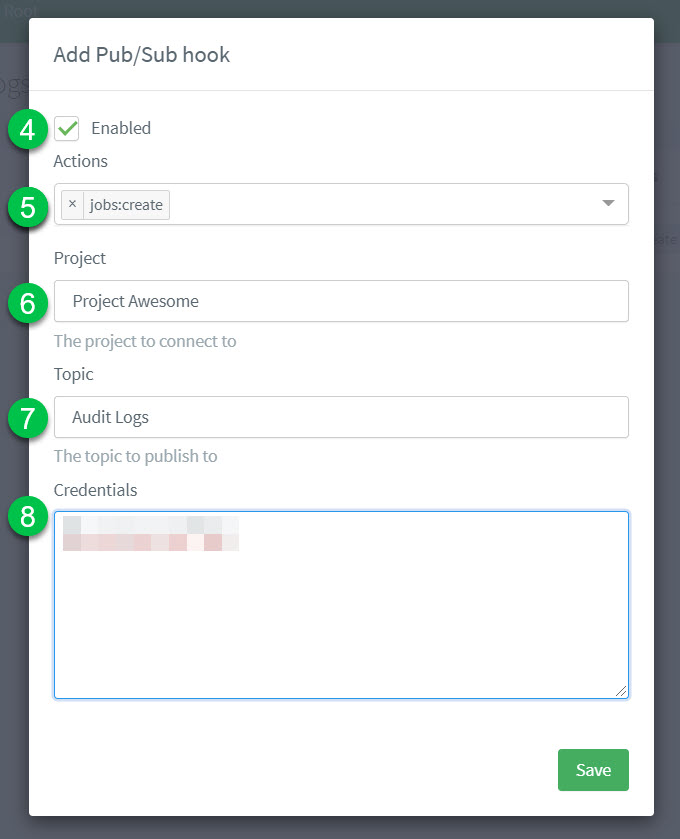
Select New Pub/Sub hook or edit
 an existing Pub/Sub Hook.
 -
Enable your Pub/Sub hook.
-
From the drop-down menu, choose the Action(s) that will trigger the Pub/Sub hook.
-
Enter your Project ID for your Google Cloud account.
-
Enter the Topic where you want requests sent.
-
Enter the Credentials (in
JSONformat) needed to connect to Google Cloud. -
Don’t forget to Save your input.

View Pub/Sub results
To view the Audit Logs, you should go to your Pub/Sub page in your Google Cloud Platform (GCP) account.
-
Go to Topics.
-
Choose the desired Topic ID.
-
Click View Messages.
-
Select the desired Cloud Pub/Sub subscription.
-
Follow the on-screen instructions.
{
  "user_email": "user@gmail.com", (1)
  "entity_name": "jobs", (2)
  "user_name": "My user name", (3)
  "action_name": "create", (4)
  "account_name": "my-account", (5)
  "created_at" : "2021-09-09T09:21:22.107809Z", (6)
  "id": "a040230b-60...998", (7)
  "ip_address": "x.x.x.x", (8)
  "action_data": { (9)
    "jobId": "AXvK4s..UnUYyz",
    "jobType": "export"
  },
  "client_id": "Console ReachFive", (10)
  "user_agent": "Mozilla/5.0 (Macintosh; Intel Mac OS X 10_15_7) AppleWebKit/537.36 (KHTML, like Gecko) Chrome/93.0.4577.63 Safari/537.36" (11)
}| 1 | The email of the ReachFive Console user that produced the audit log. |
| 2 | The name of the entity that produced the audit log. |
| 3 | The user name of the ReachFive Console user that produced the audit log. |
| 4 | The Action name that triggered the Pub/Sub hook that produced the audit log. |
| 5 | account_name specifies the name of the ReachFive account. |
| 6 | The creation date timestamp for the audit log. |
| 7 | The ID of the audit log. |
| 8 | The IP address of the ReachFive Console user that produced the audit log. |
| 9 | The Action data (more information about the trigger). In this case, an export event with the Id AXvK4s..UnUYyz. |
| 10 | The client that produced the audit log. |
| 11 | The user_agent that produced the audit log. |