Identity Fraud Protection
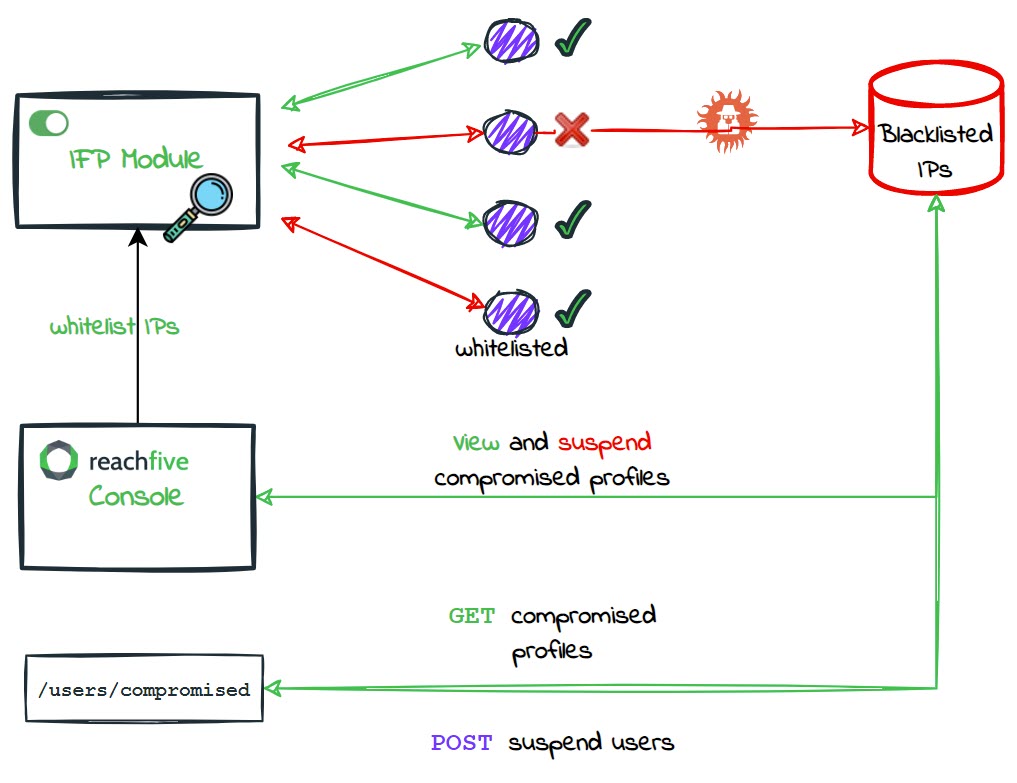
ReachFive’s Identity Fraud Protection (IFP) module analyzes events to determine if a particular IP is exhibiting suspicious behaviour. In particular, the Identity Fraud Protection module consumes login and signup attempts where it determines if the IP is suspicious or not. If the Identity Fraud Protection module determines that the IP is suspicious, the IP is flagged and siloed into a separate database where its access is immediately blocked.
Pair Identity Fraud Protection with clear error messaging in your UI (and, if desired, automated notifications) so legitimate users know why their access was blocked and how to regain it.
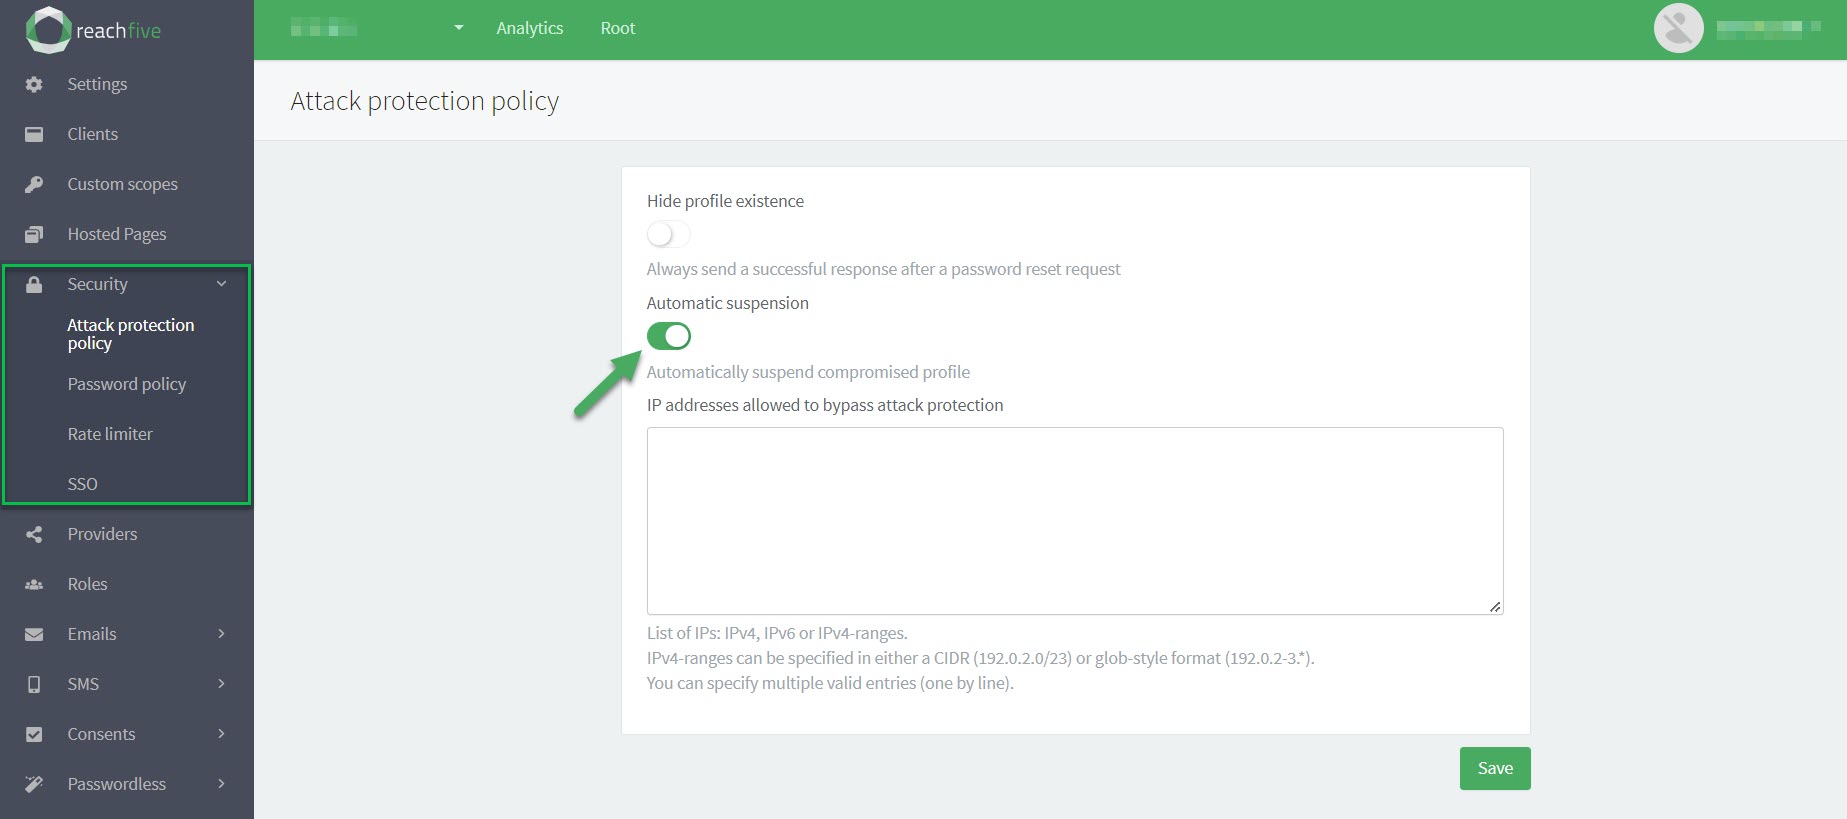
If automatic suspension is enabled on your ReachFive Console and the IFP module detects that malicious IPs have successfully accessed an account, the account is automatically suspended.
|
Administrators can view and manually suspend user accounts that have been compromised by these suspicious IPs directly from the ReachFive Console. You can also whitelist the IPs you may want to bypass the attack protection policy. |
Suspicious signup requests
In some cases, bots attempt bulk signup requests to purchase items rapidly or overwhelm your system.
Our Identity Fraud Protection detects those IPs and assigns a signup_compromised user event type for every signup attempt from a blocked source.
When that event fires, the profile is automatically suspended, all access and refresh tokens are invalidated, and subsequent requests from the flagged IP fail.
Signup requests from flagged IPs fail before the form submits, so users see the generic error you configure (for example, “Please try again later”) and no profile or tokens are ever created.
Suspicious login requests
Blocked IPs never reach the credential evaluation step because Identity Fraud Protection rejects their login attempts immediately. Surface the Identity API error in your UI so users understand the request was blocked and prompt them to retry from a trusted network or contact support for further review.
View compromised profiles
To use the Identity Fraud Protection module, you must have it enabled on your ReachFive Console by a ReachFive administrator.
| If the feature is not activated on your account and you’re interested in using it, please contact your ReachFive Professional Service or CSM contact. |
Prerequisites
-
You must have access to the ReachFive Console.
-
You must have a CRM, Manager, or Administrator role.
-
You must have the IP Blocking feature enabled.
-
You must have the Compromised profiles feature enabled.
Instructions
-
Log in to your ReachFive Console.
-
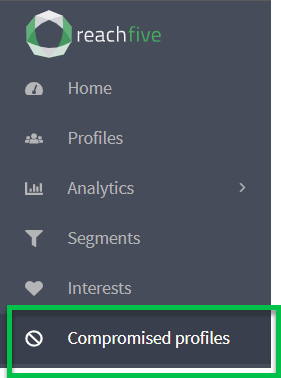
Go to Analytics.
-
Select Compromised profiles.
- The Compromised profiles section
-
-
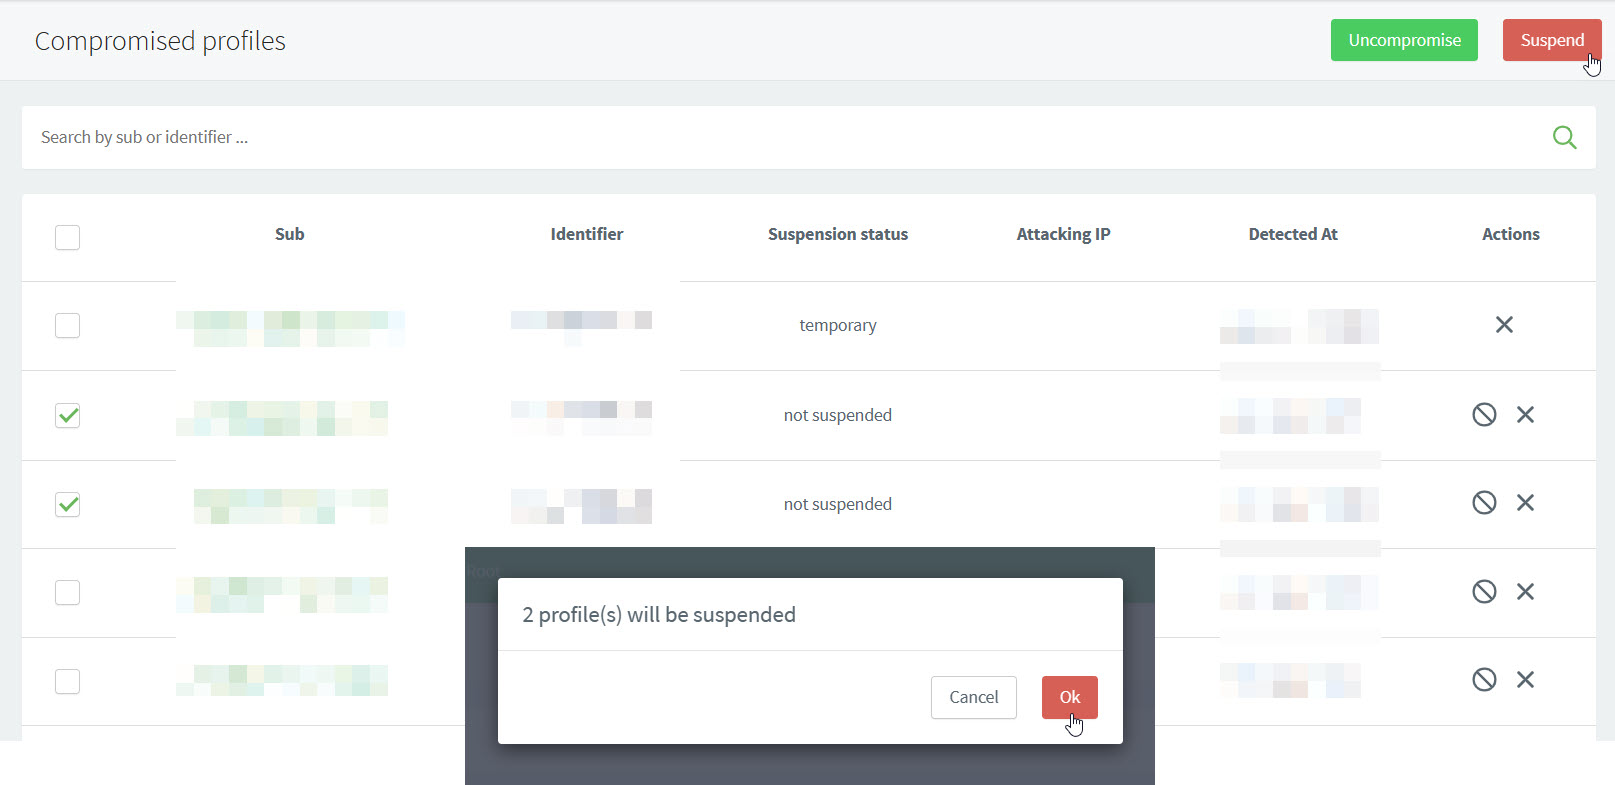
lists all compromised profiles by ReachFive ID, Identifier (like email or mobile), their Suspension status, the Attacking IP, and when the suspicious behaviour was detected.
-
allows you to search by ReachFive ID and/or Identifier.
-
perform actions such as "uncompromise" or suspend the user profile.
-
Suspend compromised profiles
To use the Identity Fraud Protection module, you must have it enabled on your ReachFive Console by a ReachFive administrator.
| If the feature is not activated on your account and you’re interested in using it, please contact your ReachFive Professional Service or CSM contact. |
Prerequisites
-
You must have access to the ReachFive Console.
-
You must have a CRM, Manager, or Administrator role.
-
You must have the IP Blocking feature enabled.
-
You must have the Compromised profiles feature enabled.
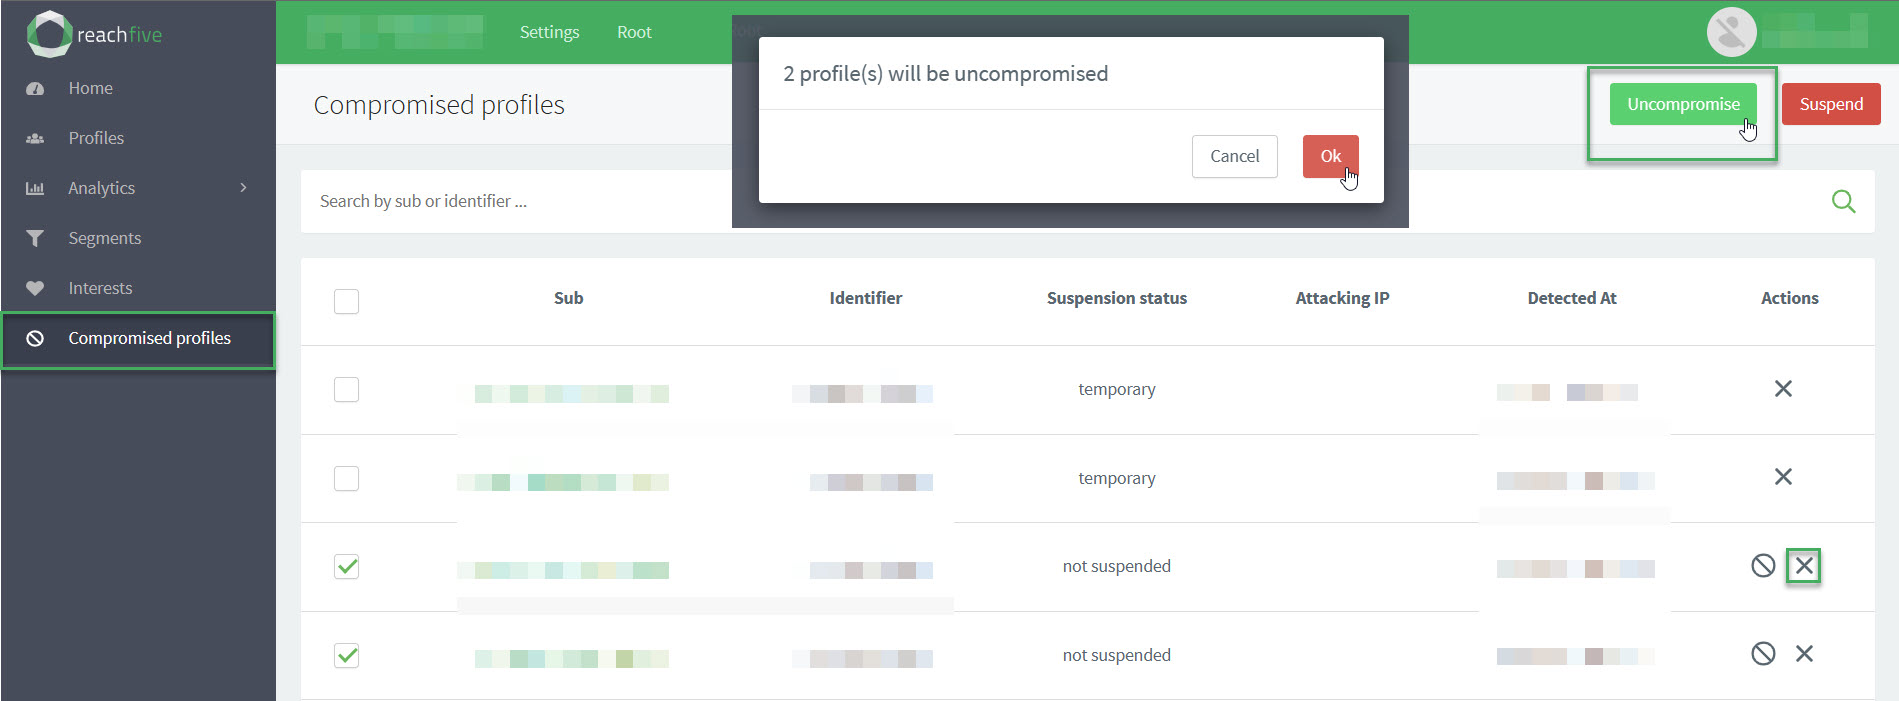
Uncompromise a profile
You can uncompromise[1] a user profile directly from the ReachFive Console.
| If the feature is not activated on your account and you’re interested in using it, please contact your ReachFive Professional Service or CSM contact. |
Prerequisites
-
You must have access to the ReachFive Console.
-
You must have a CRM, Manager, or Administrator role.
-
You must have the IP Blocking feature enabled.
-
You must have the Compromised profiles feature enabled.
Enable Automatic suspension with IFP
You can enable the IFP module the right to automatically suspend accounts associated with a malicious IP.
When a compromised IP successfully authenticates before it is blocked, IFP can suspend the account in the same flow.
All existing access/refresh tokens become invalid, so active sessions are forced to log out the next time they call our APIs. Subsequent logins fail until the user resets their password or you unsuspend the profile.
| If the feature is not activated on your account and you’re interested in using it, please contact your ReachFive Professional Service or CSM contact. |
Prerequisites
-
You must have access to the ReachFive Console.
-
You must have a CRM, Manager, or Administrator role.
-
You must have the IP Blocking feature enabled.
-
You must have the Compromised profiles feature enabled.
Whitelist IPs
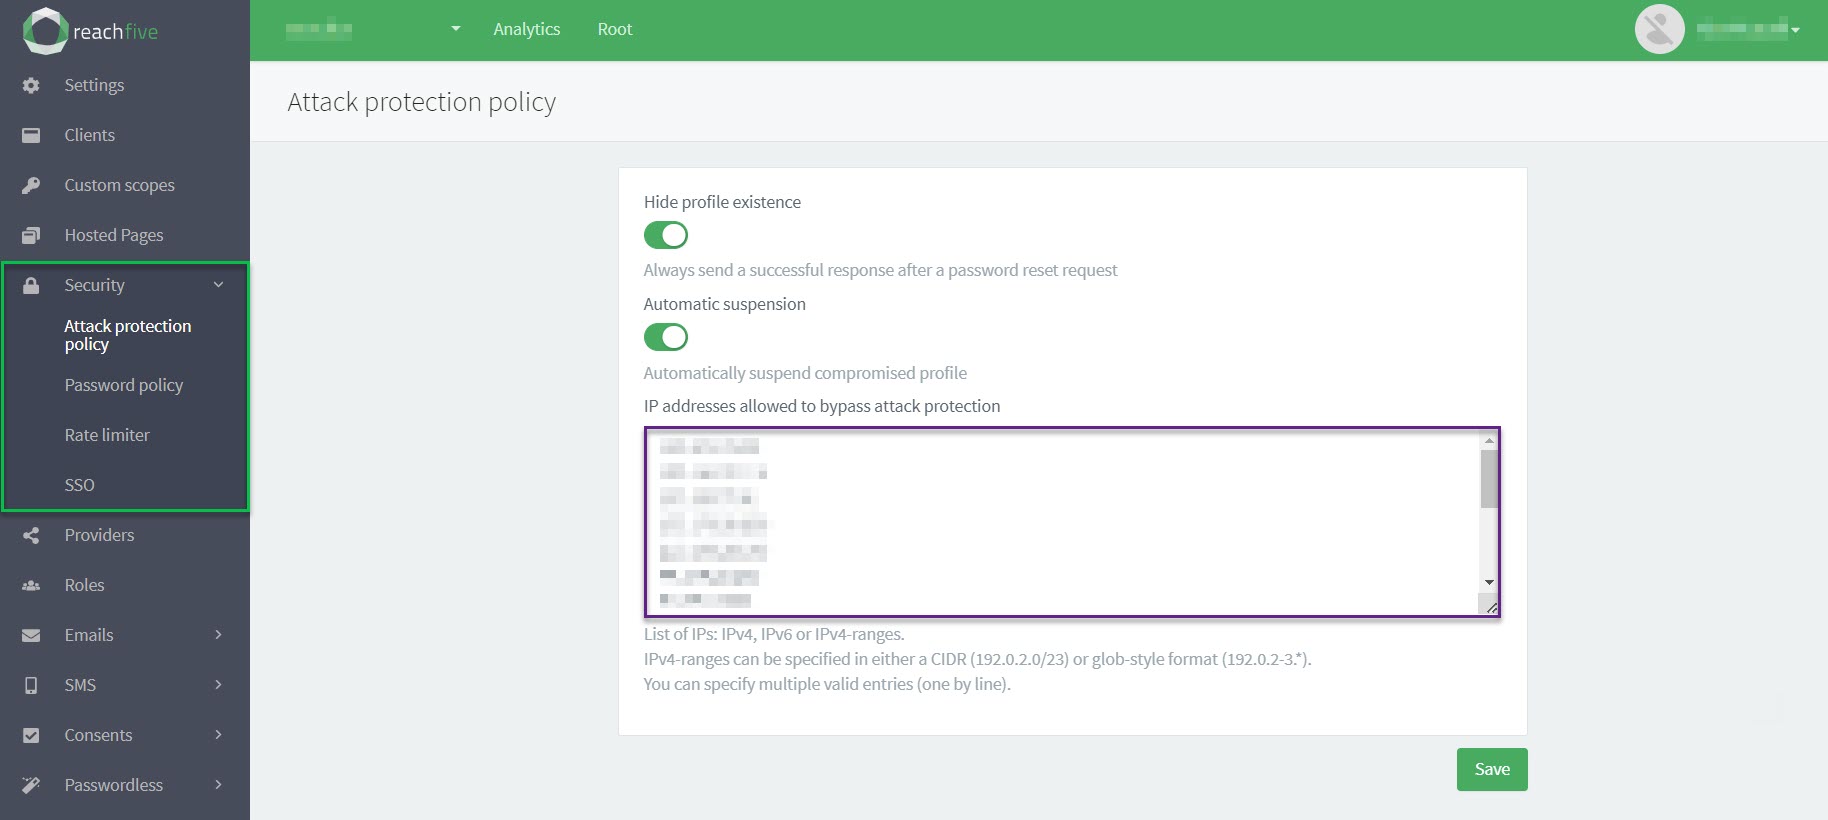
You can whitelist certain IP addresses with for Identity Fraud Protection directly from the ReachFive Console.
| Whitelisted IP addresses will bypass the attack protection policy. Proceed with caution. |
Prerequisites
-
You must have access to the ReachFive Console.
-
You must have a CRM, Manager, or Administrator role.
-
You must have the IP Blocking feature enabled.
-
You must have the Compromised profiles feature enabled.
Attack protection bypass header
To whitelist IPs that are dynamically generated or managed in a pool, you can add an Attack protection bypass header directly in the ReachFive Console. Those attempting to log in with the header will bypass the attack protection policy.
| The header should only be used from the backend for security purposes. |
| Whitelisted IP addresses will bypass the attack protection policy. Proceed with caution. |
Prerequisites
-
You must have access to the ReachFive Console.
-
You must have a CRM, Manager, or Administrator role.

Enable True Client IP key
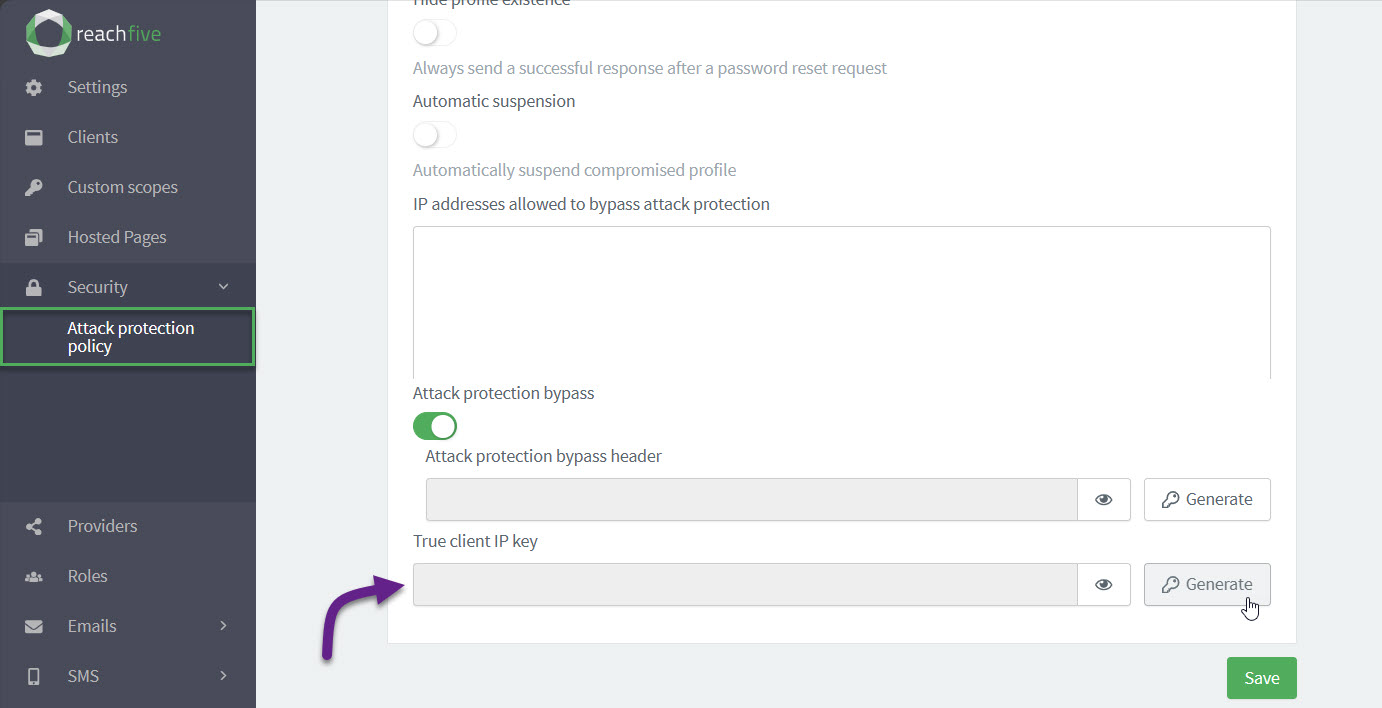
If you want your backend requests to be protected thanks to our security modules, you must enable the option from your ReachFive Console. The True Client IP Key is the key enabled and generated automatically in the ReachFive Console.
Any request coming from a backend that has True-Client-IP in the header must contain a True-Client-IP-Key header along with it.
This True-Client-IP-Key in the header must match the True Client IP Key you enabled and generated in the ReachFive Console.
The True-Client-IP header must contain the IP of the end user.
This IP will be present in the user events generated by the request.
| Requests that do not contain the matching secret are not accepted. |
To enable the option:
-
Go to .
-
Under True client IP key, click Generate.
-
In the dialog, confirm you want to Generate a new secret header.
-
-
Under True client IP key, you can now view and copy the key.
API operations
Use the Management API to:
-
GET compromised users : retrieves a list of compromised users.
-
GET blocked IPs : retrieves a list of blocked IPs.
-
GET IP status : retrieves the status for a specific IP.
-
POST unban IP : unblocks an IP; in other words, it removes the banned status from the IP.
-
POST suspend users : suspends users.