OpenID as a service
Becoming an OpenID provider enables you to safely leverage your existing user base and allows your users to easily sign-in on your partners' sites by using their existing accounts.
You will be able to quickly deploy your own authentication connector just like the most widely used identity providers (Facebook, Google, Apple …). It also allows you to securely share authorized user information with your partners.
- Check out the demo below
-
Configure your authentication flow
There are two different approaches when setting up your authentication flow depending on your requirements.
| Approach | Instructions | ||
|---|---|---|---|
You use ReachFive as your identity provider. Recommended |
Configure the following from your ReachFive Console:
|
||
Your have your own identity provider. |
Configure the Third-party identity client from the ReachFive Console.
|
Set up a client
Setting up a client follows generally the same process whether it’s for a first-party, third-party, or management client. This is done via your ReachFive Console. The instructions here cover each type of client setup.
Prerequisites
-
You must have access to your ReachFive Console.
-
You must have a Developer, Manager, or Administrator role.
-
You must have the OAuth and Open ID Connect as a Service feature enabled.
-
You must have the Hosted Pages feature enabled. Hosted Pages authenticate and grant authorization requests.
-
You must have the SSO feature enabled. SSO uses existing session information and improves user experience.
Instructions
- Get to clients
-
-
Go to .
-
Select New client.
-
Give the client a name and select the Client type from the dropdown menu. Don’t forget to Save your input.
-
- Jump to your client
- Configure the First-party Identity client
-
-
Set your desired scopes by selecting them from the dropdown menu.
-
Choose the Token Endpoint Authentication Method.
The options are Post, Basic, or None. Post is the default and recommended choice. -
Specify the Allowed Origins (CORS). These are the origin URLs allowed to access and use the ReachFive SDK.
-
Specify the Allowed Callback URLs. These are the URLs where the user is taken after authentication.
-
Specify the Token lifetime (in seconds).
-
If desired, set the configuration for the implicit flow, PKCE, ROPC flow, and refresh tokens.
-
You can disable the ROPC flow directly from the ReachFive Console so that the
grant_typeofpasswordis unable to be used on First-party Identity clients.-
Simply click the checkbox next to Disable ROPC Flow.
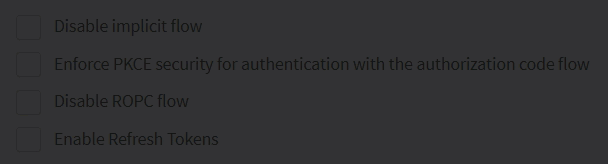
We offer this ability to disable the flow, because we do not recommend this flow especially for public clients.
-
-
For more on refresh tokens, see here.
-
-
Choose the JWT Algorithm. HS256 is the default option.
-
Specify the Login URL. Users whose authentication failed are sent to this URL.
-
Enable the Attach orchestration token option. This token is detected by the web SDKs and is automatically included in authentication flows.
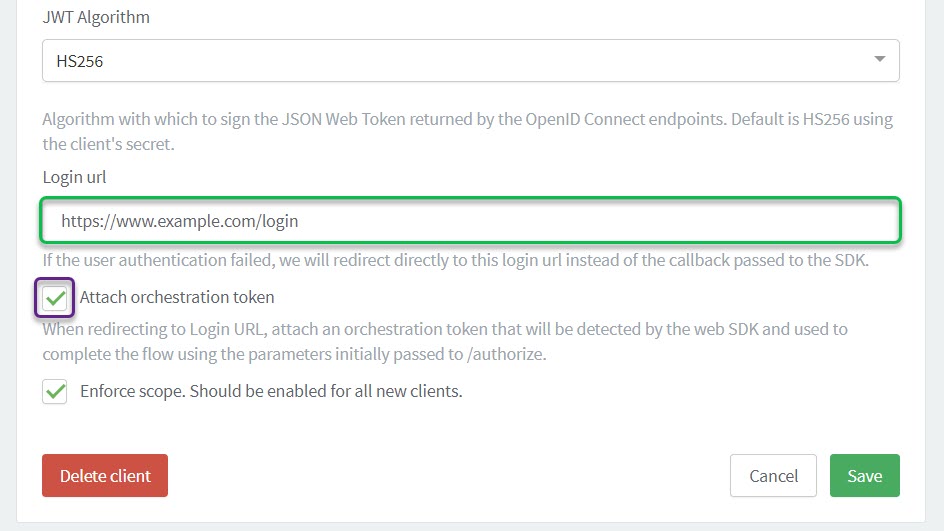
For more, see the dedicated orchestration token page. -
-
If you’re using our Trusted providers feature, enable Allow token exchange from trusted external provider.
-
If needed, check the box for Include SSO cookie in token endpoint response.
-
For new clients, ensure that you check the Enforce scope box.
-
- Configure the Third-party Identity client
-
-
Select the logo that will be displayed in the consent page.
-
Set the Website URL. This is where users will go if they click the logo.
-
Set your desired scopes by selecting them from the dropdown menu.
-
Choose the Token Endpoint Authentication Method.
The options are Post, Basic, or None. Post is the default and recommended choice. -
Specify the Allowed Origins (CORS). These are the origin URLs allowed to access and use the ReachFive SDK.
-
Specify the Allowed Callback URLs. These are the URLs where the user is taken after authentication.
-
Specify the Token lifetime (in seconds).
-
If desired, set the configuration for PKCE and refresh tokens.
More information can be found at Refresh tokens. -
Choose the JWT Algorithm. HS256 is the default option.
-
Optionally, enter a Custom login page if you do not want to use the Hosted Pages login page.
-
Hosted Pages configuration
You can choose the Hosted Pages to handle the authentication in the OaaS flow.
We support both the Authentication and Passwordless Hosted Page as part of the OaaS flow.
The enabled Hosted Page in the ReachFive account configuration will be used in the OaaS flow.
If both Hosted Pages are activated, the Authentication page takes precedence and is displayed.
You can also use the Third party consents Hosted page to customise how your users see consents.
| See Hosted Pages for more details. |
Implement OaaS /auth flow
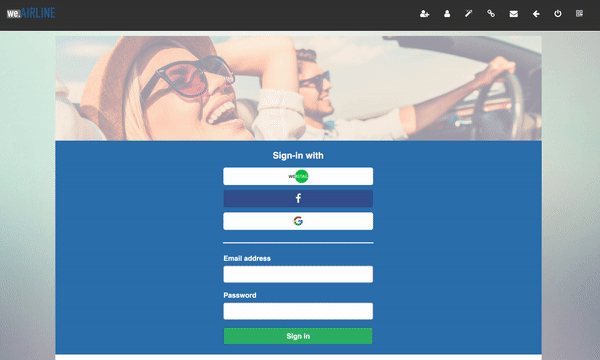
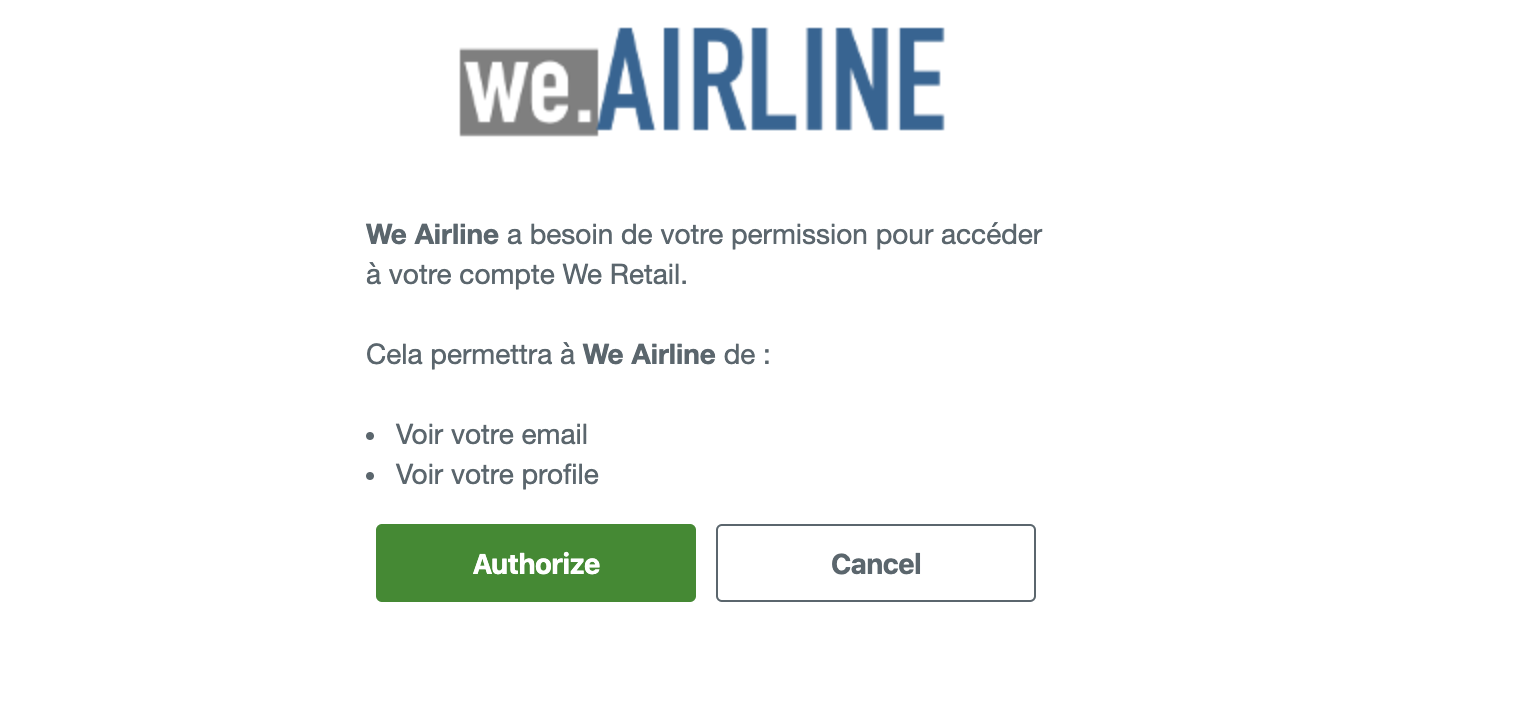
Consider an identity provider We Retail (first-party site) and the partner We Airline (third-party site).
If you do not define a Custom URL login in your Third-party Identity client, we use the Hosted Pages authentication (login) page as part of the flow.
If you define a Custom URL login in your Third-party Identity client, we use your Custom URL login page as part of the flow.
If using our API directly, you must pass the r5_request_token, also known as the Orchestration Token, as a query parameter with oauth/authorize when in the First-party context.
See the flow for more details.
oauth/authorize?r5_request_token=ORCHESTRATION_TOKEN&redirect_uri=REDIRECT_URI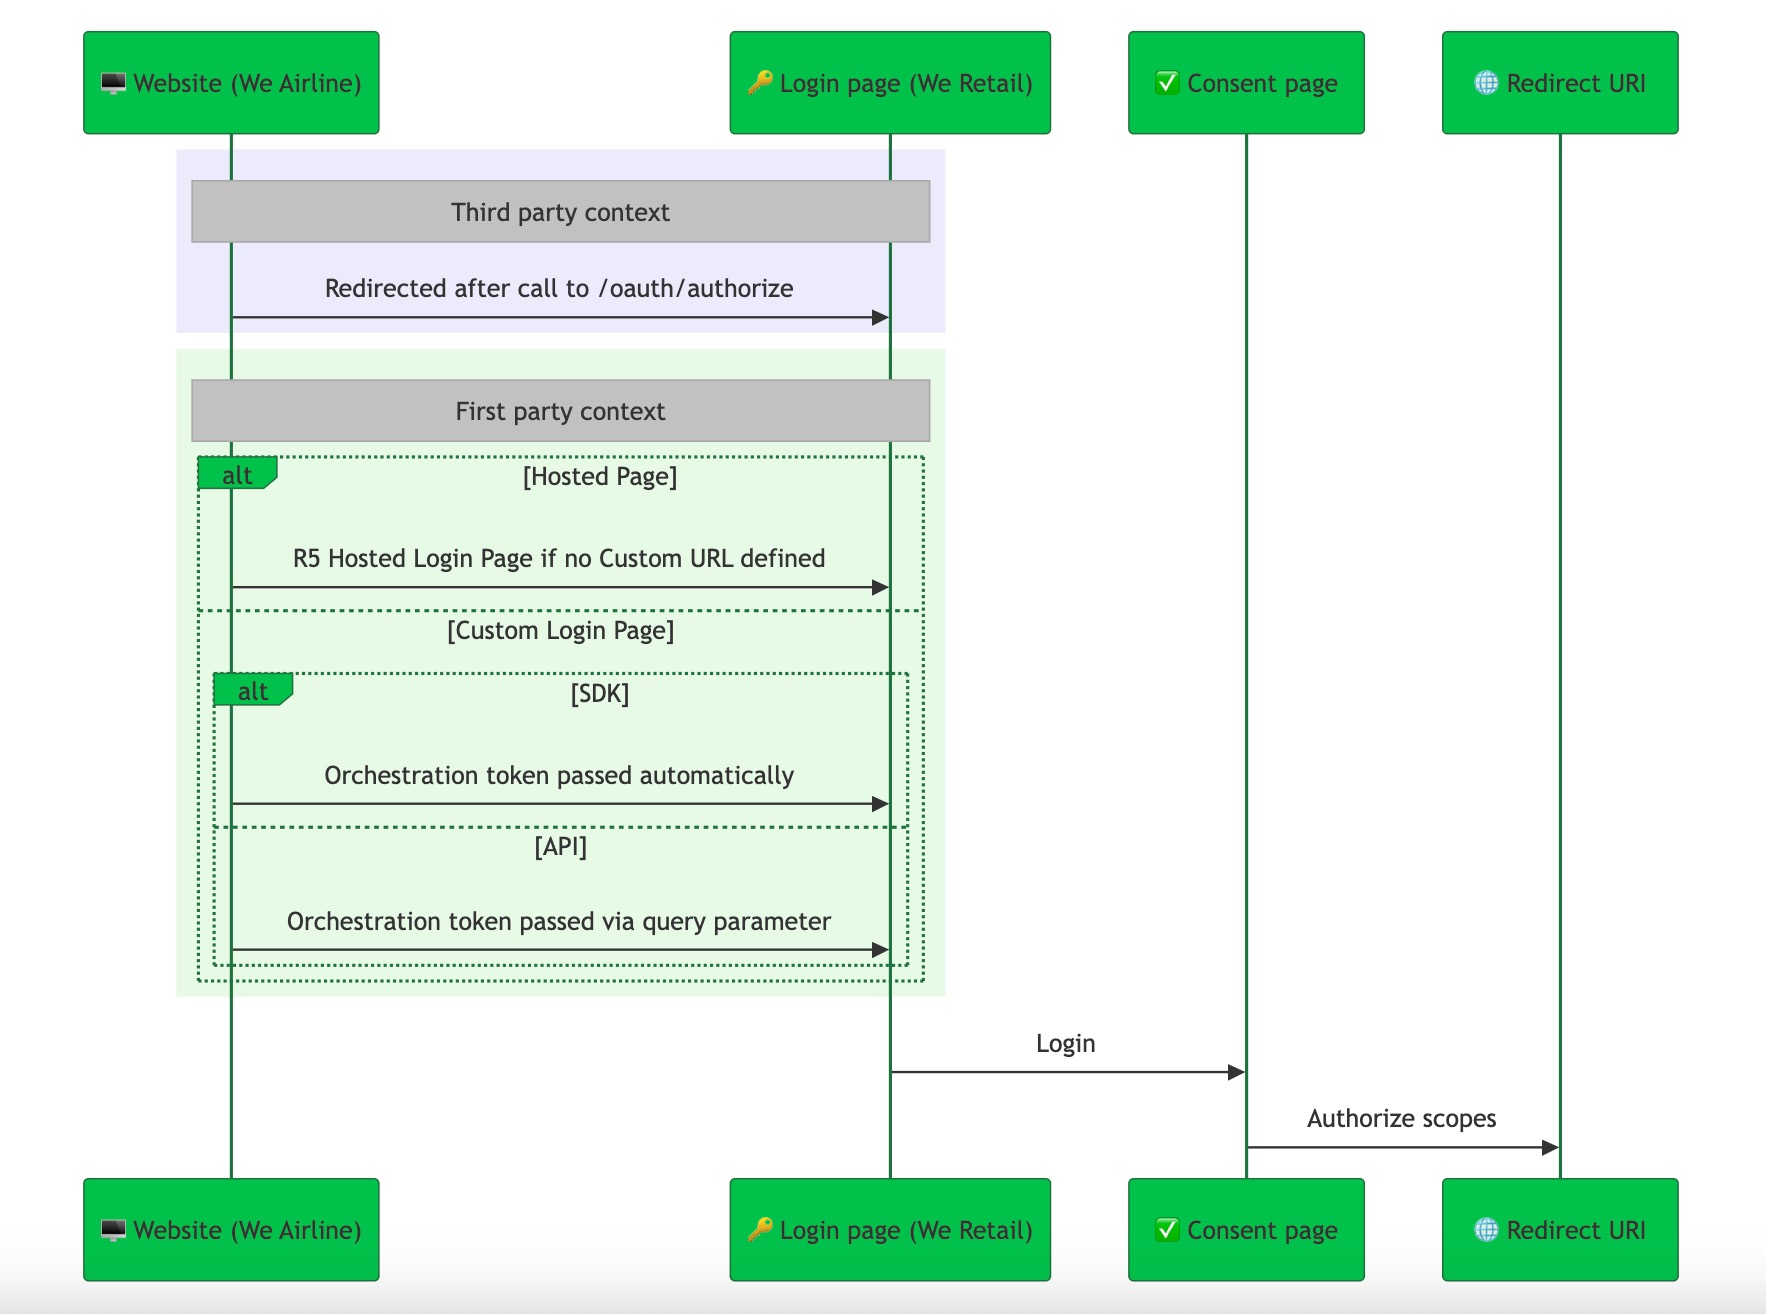
-
Website (We Airline) calls /oauth/authorize from the context of a third-party client.
curl --request GET \ --url https://YOUR_DOMAIN/oauth/authorize?\ client_id=CLIENT_ID& \ scope=openid%20email%20phone%20profile& \ redirect_uri=REDIRECT_URI& \ response_type=code-
Custom Login URL, now part of the First-party context:
-
SDK: The
r5_request_token(Orchestration Token) is automatically passed when redirecting tooauth/authorize. -
API: You must include the
r5_request_tokenas a query parameter (oauth/authorize?r5_request_token=TOKEN&redirect_uri=REDIRECT_URI) as it is not automatically done as with the SDK.
-
-
If using the Hosted Login Page, the user is redirected to the Hosted Login page (We Retail) for authentication.
-
-
After successfully logging in, users are taken to the consent page where they can grant authorization to the third-party site for the requested scopes. Users with an active session are automatically redirected to the consent page.
-
Finally, the user is redirected to the Redirect URI specified in /oauth/authorize, where the authorized scopes are provided.
In both the SDK and API flows, the first-party context is maintained when the user is taken to the oauth/authorize endpoint.
The key difference is that with the SDK, the r5_request_token is passed automatically, while with the API, the r5_request_token must be added as a query param during the oauth/authorize call.
|
Grants management API
Your users can view and manage their authorizations to third-party sites using:
- The management Grants API
- The identity Grants API if the user is connected and has a first-part access token
Get authorized user information
You can use the /identity/v1/userinfo endpoint to get authorized user’s information.
It is also possible to decode the id_token obtained after a successful login. In this case, you will only get the authorized attributes in the token.
| For more information, see Decode tokens. |