Custom fields
Custom fields are fields other than the default User profile fields. Typically, these fields contain user information specific to your business needs such as a loyalty card number. You can create standalone custom fields or structured custom fields to suit your needs as well as search for custom fields directly in the ReachFive Console. You can add these custom fields to ReachFive widgets in order to gather even more information regarding users.
Here, we show you how to create a custom field via the ReachFive Console, explain the different custom field data types, and show you how to implement the custom fields using the UI SDK and through Hosted pages.
| You can create custom fields for the User Profile object as well as the Addresses object (which is part of the User Profile model). |
Create custom fields
You can create custom fields from the ReachFive Console.
Prerequisites
-
You must have access to the ReachFive Console.
-
You must have a Developer, Manager, or Administrator role.
Instructions
-
Go to .
-
Select + New field.
-
Provide a name for the field.
-
Give the field a key for the key:value pair.
-
Specify the type for the key. The dropdown menu contains all possible types. See Custom field data types for examples.
-
Add your desired scopes to the field.
-
Read access: By default, no scope is required to read a custom field. If you add a Read-only scope, that specific scope becomes required to read the custom field value.
-
Write access: The
full_writescope is always required to update a custom field. If you add a Read-Write scope, both thefull_writescope and the dedicated Read-Write scope(s) are required to update the custom field value.
-
-
Go to .
-
Select + New field.
-
Provide a name for the field.
-
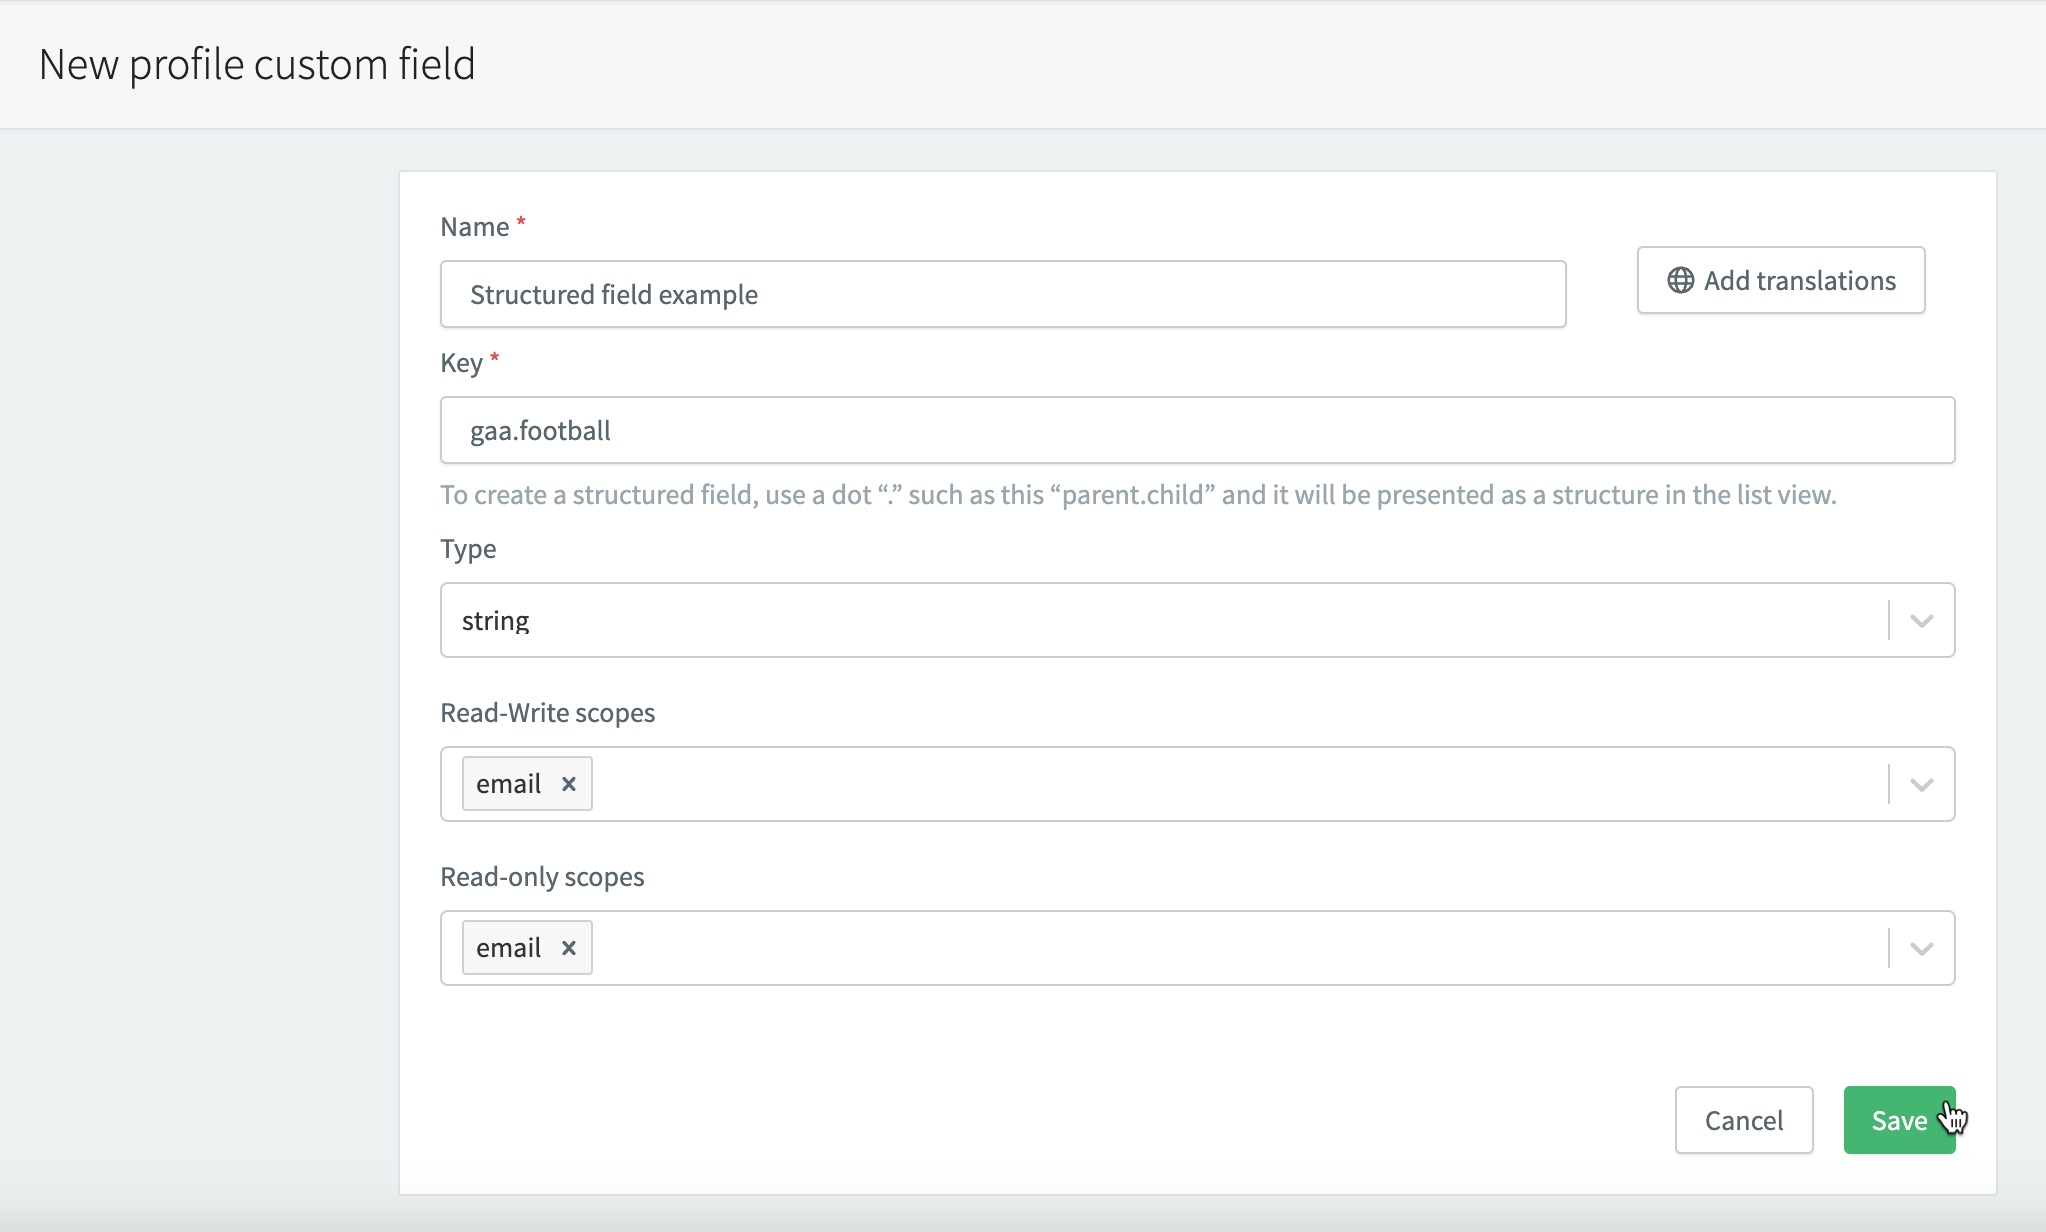
Give the field a key for the key:value pair. This must contain a full stop (e.g.,
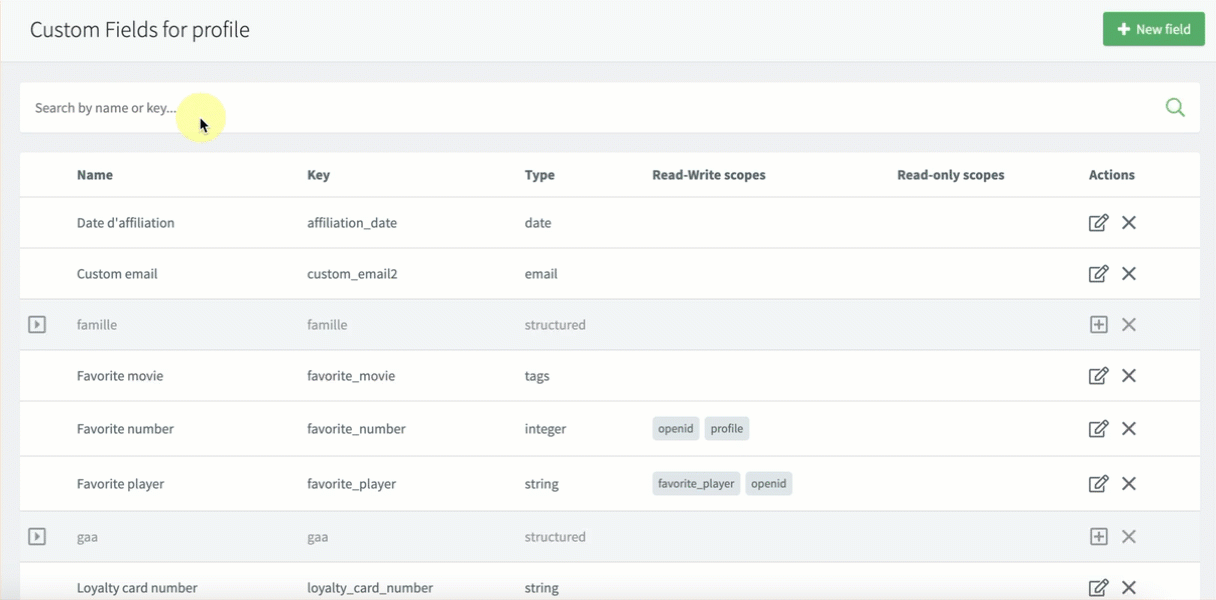
parent.child). Fields with the same prefix path are grouped into an object. You cannot create aparent.*for an existing field. -
Specify the type for the key. The dropdown menu contains all possible types. See Custom field data types for examples.
-
Add your desired scopes to the field.
-
Read access: By default, no scope is required to read a custom field. If you add a Read-only scope, that specific scope becomes required to read the custom field value.
-
Write access: The
full_writescope is always required to update a custom field. If you add a Read-Write scope, both thefull_writescope and the dedicated Read-Write scope(s) are required to update the custom field value.
-
Create custom address fields
You can create custom fields for addresses from the ReachFive Console.
Prerequisites
-
You must have access to the ReachFive Console.
-
You must have a Developer, Manager, or Administrator role.
Instructions
-
Go to .
-
Select + New field.
-
Provide a name for the field.
-
Give the field a key for the key:value pair.
-
Specify the type for the key. The dropdown menu contains all possible types. See Custom field data types for examples.
-
Add your desired scopes to the field.
-
Read access: By default, no scope is required to read a custom field. If you add a Read-only scope, that specific scope becomes required to read the custom field value.
-
Write access: The
full_writescope is always required to update a custom field. If you add a Read-Write scope, both thefull_writescope and the dedicated Read-Write scope(s) are required to update the custom field value.
-
Manage custom field schemas with API
You can manage profile custom field schemas via the Management API with the following operations:
| Method | Operation |
|---|---|
POST |
|
GET |
|
PUT |
|
DELETE |
Custom field data types
The table below shows examples of the data types used when creating custom fields.
| Type | Display | ||||
|---|---|---|---|---|---|
|
|
||||
|
|
||||
|
|
||||
|
|
||||
|
|
||||
|
|
||||
|
An array of strings (tags).
|
||||
|
At ReachFive, we use a dedicated library to validate a user’s phone number.
|
||||
|
|


Use custom fields
To implement the custom fields that you create from the ReachFive Console, you can use the UI SDK and add the custom fields as part of the showAuth method or you can configure Hosted pages to use custom fields.
UI SDK
The example below shows the implementation of the custom field loyalty_card_number.
| See the showAuth page for more information. |
client.showAuth({
    container: 'auth-widget',
    auth: {
      redirectUri: 'https://example.com/auth-callback'
    },
    allowForgotPassword: false,
    initialScreen: 'login',
    signupFields: [
      'email',
      'password',
      'passwordConfirmation',
      'custom_fields.loyalty_card_number' // Ask customer to supply number
    ],
    socialProviders: ['facebook', 'google'],
    showLabels: true,
    theme: {
      primaryColor: "#00bf48",
      borderRadius: "5",
      socialButton: {
        inline: true,
      }
    }
})
Hosted Pages
The example below implements custom_fields as a value under the signupFields parameter, calling the loyalty_card_number custom field. This is the JSON format you would use in the JSON config for widget at page on the ReachFive Console.
|
To call a specific custom field, use the format For more information, see how to configure the display of hosted pages. |
{
  "showSocialLogins": true,
  "socialProviders": ["facebook", "google"],
  "theme" : {
    "primaryColor" : "#229955",
    "borderRadius" : "3",
    "socialButton" : {
      "inline" : true
    }
  },
  "initialScreen": "signup",
  "allowLogin": true,
  "allowForgotPassword": true,
  "allowSignup": true,
  "signupFields" : ["birthdate", "email", "password", "custom_fields.loyalty_card_number"]
}
Search custom string fields
When working with custom fields of type string, you can search them in two different ways.
In both cases, replace <key> with the name of your custom field key.
-
Exact match search: Use the base field key:
custom_fields.<key>. This requires an exact match of the stored value and is case and accent sensitive.ExampleGET /api/v2/users?filter=custom_fields.loyalty_id == "ABC123" (1)1 Returns only profiles that exactly match the full string "ABC123". -
Full-text search: Use the
.ANALYZEDsuffix with your field key:custom_fields.<key>.ANALYZED. This performs a full-text search that is case and accent insensitive.ExampleGET /api/v2/users?filter=custom_fields.birthplace.ANALYZED == "Île de Ré" (1)1 Returns profiles with matching values even if the search string ignores accents or casing. For example, searching for "Ile de Re"or"ile"also returns results.
|
The |