SCIM on the console
The System for Cross-domain Identity Management, better known as SCIM, is a specification that is specifically designed to simplify managing user identities in cloud-based settings. The primary purpose of SCIM is to automate (in a secure fashion) exchanging user identities between cloud applications and service providers.
On this page, you’ll learn how to:
Prerequisites
-
You must have the SCIM feature enabled at the organization level.
-
You must have have root access to your organization’s ReachFive Console.
| Currently, only ReachFive administrators can configure and set mappings. This could change in the future. Please check this page for further updates. |
SCIM workflow
The SCIM workflow with ReachFive goes as follows:
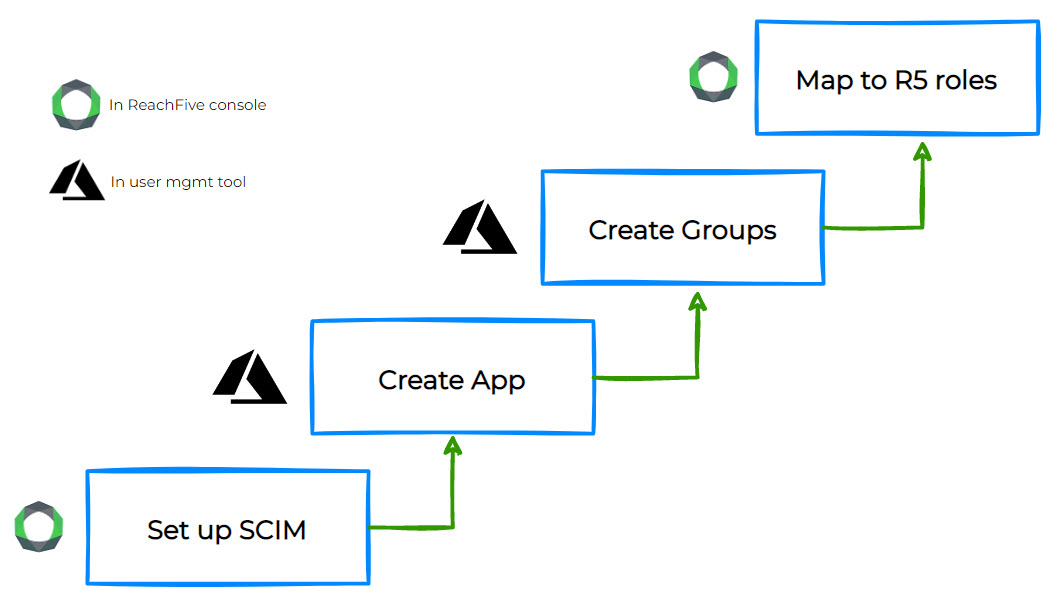
-
You must first create the SCIM configuration and get your API key in the console.
See Set up SCIM for more details. -
Then, you create the App in your internal user management tool and define provisionning with the API key generated in Step 1.
-
Next, you should create your groups within your user management tool.
-
Finally, you’ll need to map those groups to give ReachFive roles.
See Configure SCIM mappings for more details on mapping in the console. Or for a general overview of mapping, see System for Cross-domain Identity Management (SCIM).
Set up SCIM
To use SCIM with ReachFive, you must first set it up.
To configure SCIM from the ReachFive Console:
-
Go to the
rootlevel for your organization’s ReachFive account. -
Go to SCIM > Configuration.
-
Click New SCIM configuration or
 edit an existing configuration.
 -
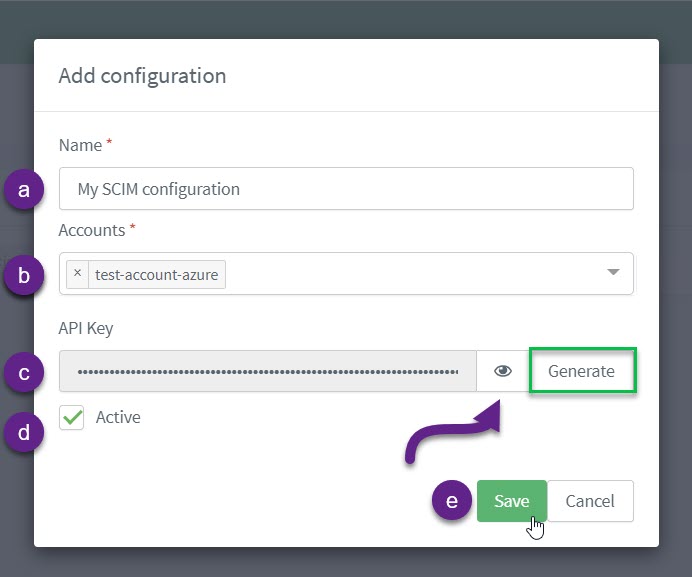
In the dialog:
-
Add a Name for your SCIM configuration.
-
Select the ReachFive accounts you want to include in the configuration.
-
Generate the API Key for the configuration by clicking Generate.
-
Ensure the Active box is checked.
-
Don’t forget to Save your input.
-
Next steps
Go to your internal user management tool and ensure the API key generated in in the configuration above is properly brought across so that your user management tool can make calls to the ReachFive SCIM API endpoints.
The steps needed at this point vary as each customer uses a different internal user management tool. If you have any questions, reach out to your ReachFive support contact.
After you complete the step of connecting the ReachFive SCIM API with your internal user management tool, you can move on to mapping your brand employees.
Microsoft Entra ID (Azure AD) configuration
If you are using Microsoft Entra ID (formerly Azure AD) as your identity provider, you must append a specific compatibility flag to your Tenant URL. This only applies to automatic provisioning and not on-demand provisioning.
Entra ID’s default SCIM implementation does not fully comply with the SCIM 2.0 specification regarding group updates. Without this flag, removing a single user from a group in Entra ID may cause the entire group to become empty in ReachFive.
To fix this:
When configuring the Tenant URL in the Microsoft Entra ID portal, add the query parameter ?aadOptscim062020 to the end of your ReachFive SCIM URL.
-
Standard URL:
https://<scim-url>/scim/v2 -
Required URL for Microsoft Entra ID (Azure AD):
https://<scim-url>/scim/v2?aadOptscim062020
| For details, refer to the Microsoft documentation on SCIM compatibility. |
Configure SCIM mappings
User mappings are an integral part of SCIM. With ReachFive’s SCIM offering, you can easily map your brand’s users with roles on the ReachFive Console. This typically means that you can take your user groups, for example admins, developers, read-only users, and so on and forth and map them to ReachFive roles.
If a user belongs to multiple groups that are mapped to different roles, we apply a least privilege logic, meaning the user is assigned the lowest role among the various mappings.
To configure your SCIM mappings on the ReachFive Console:
-
Go to the
rootlevel for your organization’s ReachFive account. -
Go to SCIM > Mappings.
-
Click New mapping or
edit an existing mapping. -
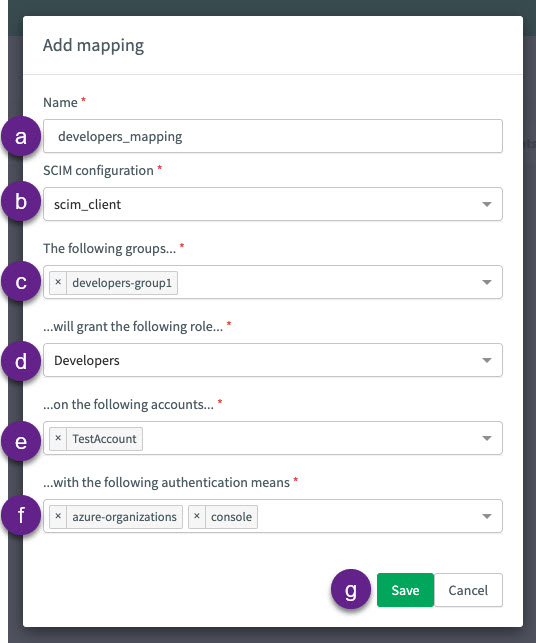
In the dialog:
-
Add a Name for your SCIM mapping.
-
Select an existing SCIM configuration from the dropdown.
-
Select the groups you want to map from the dropdown.
These groups are from your internal user management tool and are available because you copied across the API Key generated during your SCIM setup from the console. -
Select the ReachFive roles you want to grant the groups.
-
Select the accounts you want these groups to have access to.
-
Finally, select the means by which you want users to authenticate.
This allows you to choose the console, the user management tool (like Azure), or both. Later, if a user tries to authenticate with a means not defined here, you’ll receive an error log stating access is denied for the user.
-
Don’t forget to Save your input.
-