Import job definition
You can import user profiles from the ReachFive Console. This makes using existing user profiles that you may already have easier as well as enabling you to batch update users via a JSONL or CSV file.
JSON Lines (JSONL), represents each JSON object on a new line where each line is a valid JSON object.
We use JSONL to optimise performance since it’s better for processing large datasets and easier to append additional JSON objects.
This page shows you all you need to know regarding formatting for importing profiles as well as the validation process, import and merge logic, and import limitations in the following sections:
| For instructions on how to create and run an import job from the ReachFive Console, check out the Import profiles page. |
Import format
Here, we look at how you need to format import files.
JSONL
The schema for the imported user is based off of the user profile object. In this format, all fields are optional.
{
  "external_id": "1",
  "email": "foo@gmail.com"
} \n (1)
{
  "email": "bar@gmail.com",
  "name": "Joe",
  "gender": "M",
  "enroll_email_as_mfa_credential": true, (2)
  "enroll_phone_as_mfa_credential": true, (2)
  "custom_fields": { (3)
      "has_loyalty_card": true
  },
  "consents": { (4)
    "exampleConsent": {
      "date": "2021-11-23T11:42:40.858Z",
      "consent_version": {
        "language": "fr",
        "version_id": 1
      },
      "granted": true,
      "consent_type": "opt-in",
      "reporter": "managed"
    }
  },
  "addresses": [ (5)
    {
      "id": 0,
      "default": true,
      "address_type": "billing",
      "street_address": "10 rue Chaptal",
      "address_complement": "4 étage",
      "locality": "Paris",
      "postal_code": "75009",
      "region": "Île-de-France",
      "country": "France",
      "recipient": "Matthieu Winoc",
      "phone_number": "0723538943",
      "custom_fields": {
        "custom_field_example": "custom_field_example_value",
        "custom_field_example_2": 42,
      }
    }
  ]
}| 1 | Each profile must separated by a line feed character (\n). |
| 2 | Enrolling email for MFA (only registers if identifier is verified). |
| 3 | Import custom_fields as an object containing a series of fields. |
| 4 | Import consents as an object or as a flattened field with the format consents.<consent>.<parameter> shown below.
|
| 5 | You can import addresses including custom address fields. |
CSV
The CSV format uses a free format where columns are flattened JSON paths.
For example a path { "foo" : { "bar" : "test" } }` becomes foo.bar in the CSV header.
| If a column has no value, then the corresponding field will not be used for the current line. |
email,name,gender,custom_fields.has_loyalty_card,consents.newsletter.consent_type,consents.newsletter.granted,consents.newsletter.date,consents.newsletter.reporter,addresses.0.custom_fields.custom_field_example
bar@gmail.com,Joe,M,true,opt-in,true,2018-05-25T15:41:09.671Z,managed,custom_field_example_valueImport and merge logic
This section details various import and merge logic details for import jobs.
Subsections:
Multi-threaded imports
Our import jobs are multi-threaded. This means that many profiles are imported simultaneously. Therefore, it’s important that you ensure all profiles are unique; otherwise, you may get duplicate profiles.
We strongly encourage you to check the following fields to ensure each profile is unique:
-
email -
phone_number(if the SMS feature is enabled) -
external_id -
custom_identifier
See the User Profile for more on these fields.
Delete existing fields
If you want to delete an existing field, you need to pass a null value as part of the import file.
|
{
  "updated_at": "2021-06-04T14:16:34.658Z",
  "email": "bar@gmail.com",
  "name": "Joe",
  "family_name": null, (1)
  "gender": "M"
}| 1 | Pass null to delete the existing family_name field. |
external_id,updated_at,email,name,family_name,gender
1,2021-06-04T14:16:34.658Z,foo@gmail.com,,,,,,bar@gmail.com,Joe,__null__,M (1)| 1 | Pass __null__ to delete the existing family_name field. |
Delete an address
If you want to delete an existing address, you need to pass the to_delete boolean as part of the address object in your import file.
{
  "email": "test@example.com",
  "addresses": [
    {
        "id": 1,
        "to_delete": true (1)
    }
  ]
}| 1 | Pass to_delete as true along with the desired address id to delete the address. |
email;addresses.0.id;addresses.0.to_delete (1)
test@example.com;1;true (1)| 1 | Pass to_delete as true along with the desired address id to delete the address. |
Create a user via import file
You can create a user via an import file. When you create a user this way, the created_at and updated_at fields are automatically set to the profile creation date.
If the created_at and/or updated_at fields are already present in the file for the particular user being created, the dates in the file are used.
|
Import A = You create a user and the file has no created_at or updated_at fields. The profile creation date is used for the fields.
Import B = You create a user and the file does contain the created_at or updated_at fields. The dates currently in the file are used for the fields.
Encrypt import file
When importing files with ReachFive, it is inherently secure and encrypted. However, you may wish to provide additional encryption for the import process.
To encrypt your desired import file, run the following command from the root of the file location:
openssl aes-256-cbc -salt -pbkdf2 -iter 10000 -in file_to_import -out file_to_import.enc| Command section | Notes |
|---|---|
|
Salts the password. |
|
Declares use of PBKDF2 function. |
|
Specifies the number of iterations of PBKDF2. Example: |
|
The name of the original file to import. Example: |
|
The name of the output file (encrypted). Example: |
Social Login
You can import multiple social login profiles using the Identities object.
The provider name must be a valid provider name, and the user_id field should be the ID of the user from the provider’s site.
identities.0.provider,identities.0.user_id,identities.1.provider,identities.1.user_id
facebook,178004054721041,apple,111132.533549f15bb54f7cbe19b1dcc1b0fd8b.1347 (1)| 1 | This example shows how to import two social logins for the same user, one for Facebook and one for Apple. Note it is a partial example and not all CSV fields are shown. |
{
  "identities": [ (1)
    {
      "provider": "facebook",
      "user_id": "178004054721041"
    },
    {
      "provider": "apple",
      "user_id": "111132.533549f15bb54f7cbe19b1dcc1b0fd8b.1347"
    }
  ]
}| 1 | This example shows how to import two social logins for the same user, one for Facebook and one for Apple. Note it is a partial example and not all JSONL fields are shown. |
| The user’s profile is populated with provider information after the first login of the user using the corresponding social provider. |
Merge
If a corresponding profile is found during a merge, the profile will not be created but merged with the existing profile. The matching is based on the following fields:
-
id(corresponding to the profile id), -
email(verified or unverified), -
phone_number(if the SMS feature is available, verified or unverified), -
provider
| A profile should never match more than one other profile, or an error will be returned, since there is no way to know the merge priority in a 3+ way merge. |
The merge is a safe merge, meaning that (following the priority) no field is overwritten. Fields can either be completed when they are lists or free objects (consents, custom_fields), created if empty, or completely ignored if already defined.
Import limitations
Notification limitations
The Import Module does not trigger or send any notifications via an import. It only brings in the necessary information as defined in the CSV or JSONL file as it relates to user profiles and consents.
Any status that would trigger a notification typically within the ReachFive architecture and flow would need a follow-up action after the import itself.
-
Email confirmation of email address
-
SMS confirmation of phone number
-
Double opt-in consent confirmation (SMS or email)
-
Webhook and Pub/Sub hook triggers
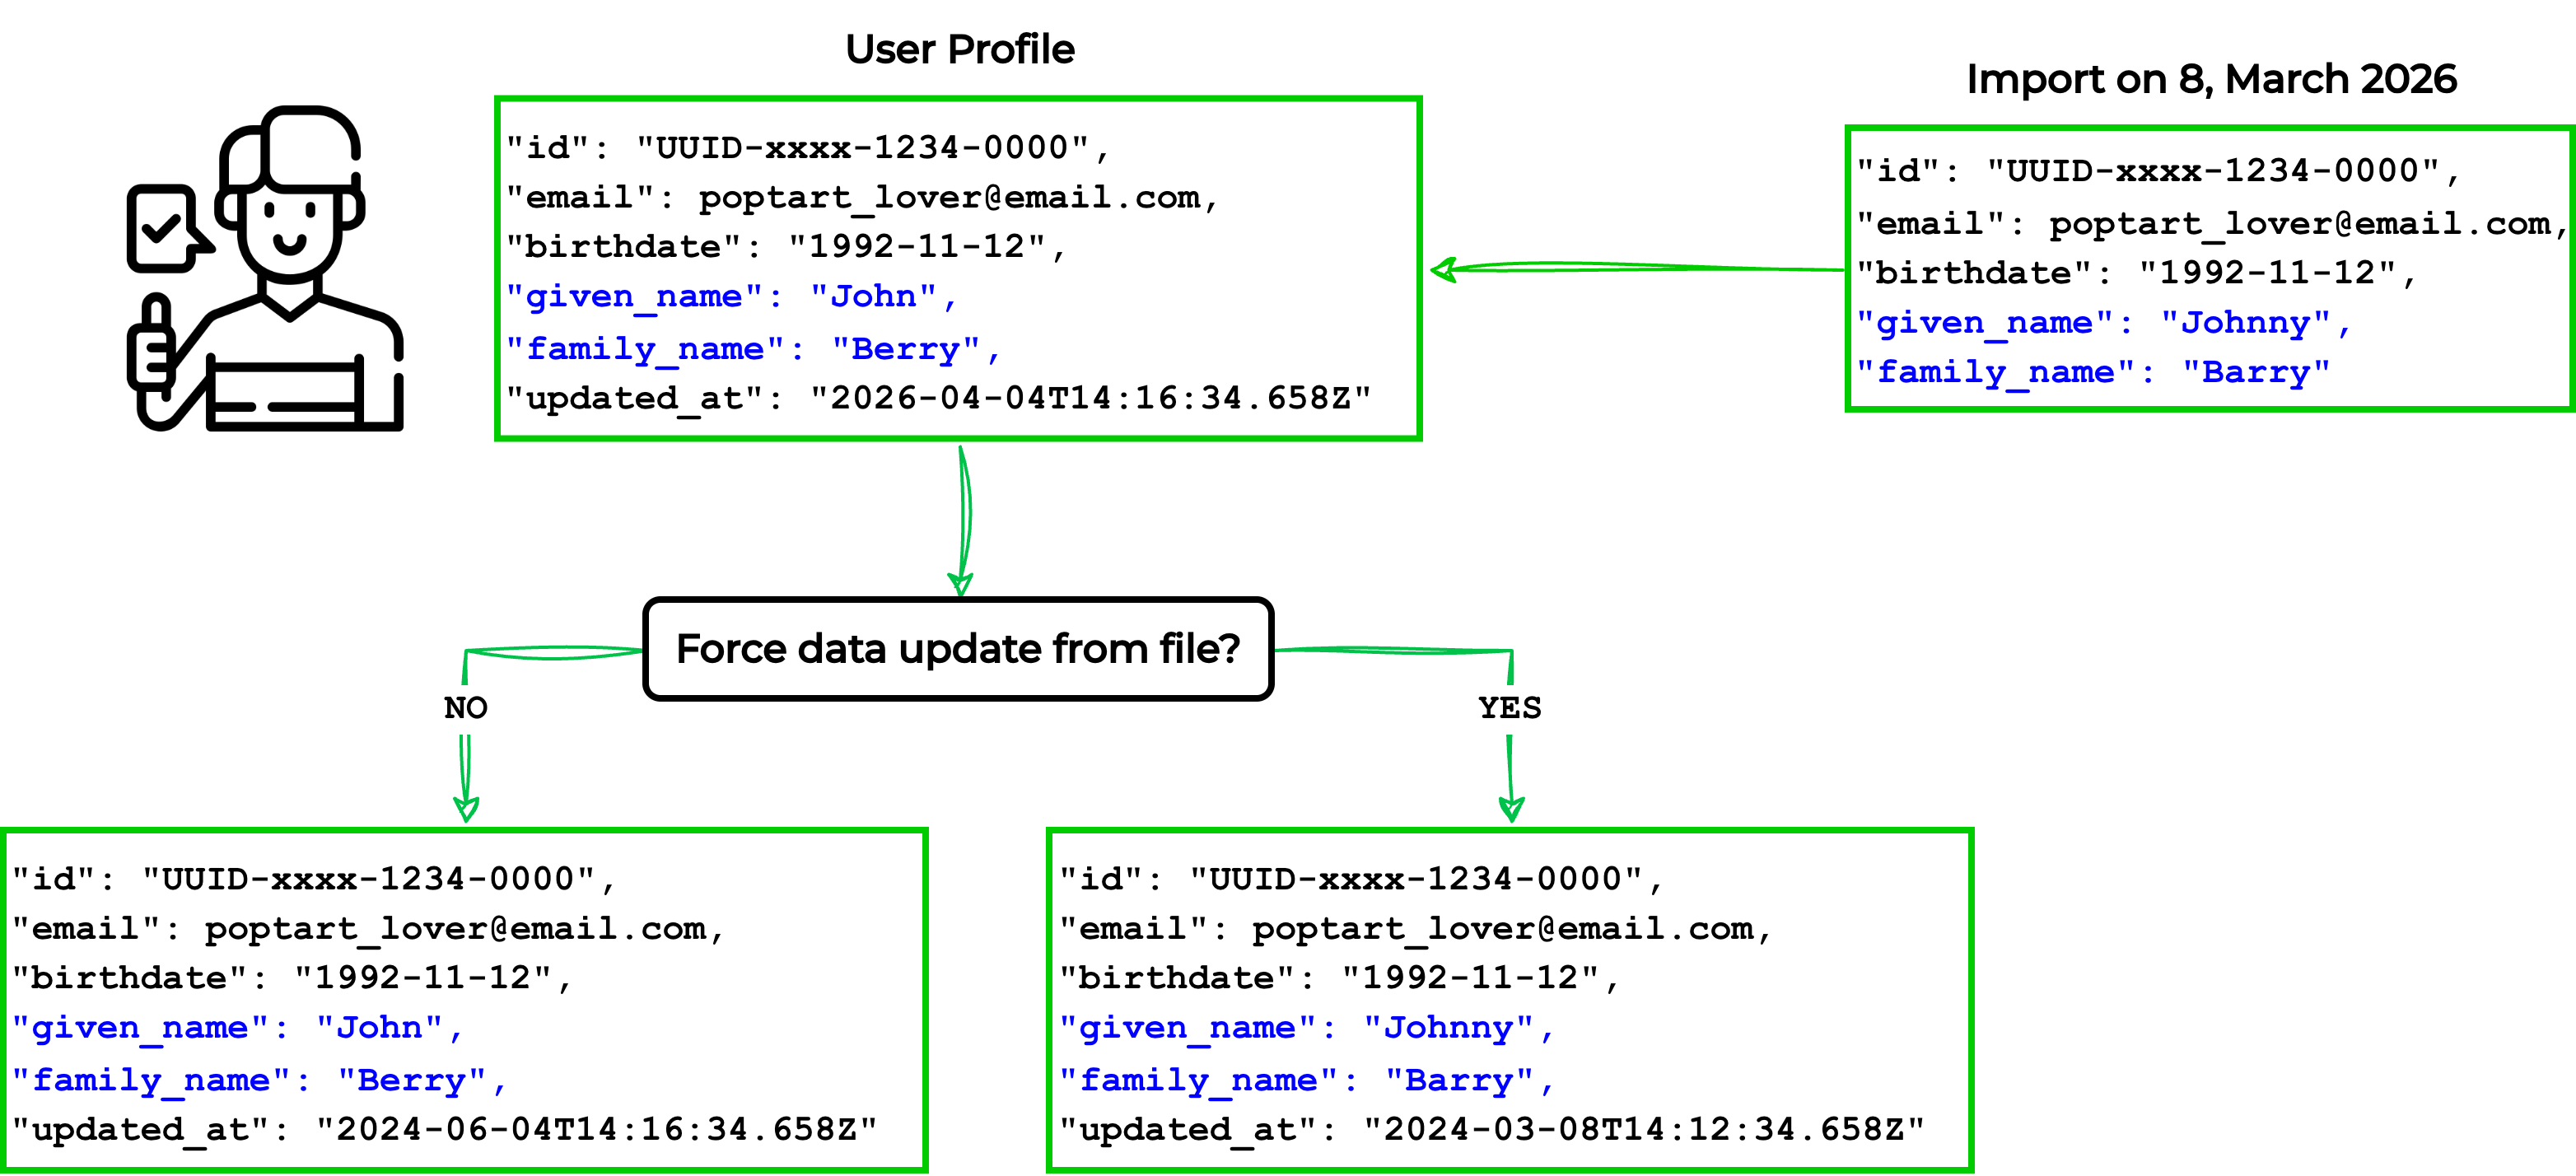
Force data update from file
The Force data update from file option is available on the ReachFive Console when importing profiles.
This option does not use the typical merge logic for user profiles but instead forces the data you import to update all existing user profile fields.
The Force data update from file option does not apply to the consent date.
This data always reflects the date at which the consent decision occurred.
Some fields are protected such as email and password_hash.
You must use the Force data update from file option to update these fields.
If the updated_at value in the import is more recent than the existing user profile’s updated_at value, any changed fields are imported regardless of whether Force data update from file is enabled or not.
| There may be unwanted behaviour if you use this option so be sure you understand your requirements before choosing this approach. See the import and merge logic section for more details on standard merge logic. |
If there are fields with values in the current ReachFive profile that are not in the import, these fields retain their current value. However, all fields with values replace the existing fields in ReachFive.
When Force data update from file is enabled, the import updates all fields in the user profile with the values from the import file.
When Force data update from file is disabled, the import only updates fields if the updated_at value in the import is more recent than the updated_at value in the user profile.
Import profiles in Testing mode
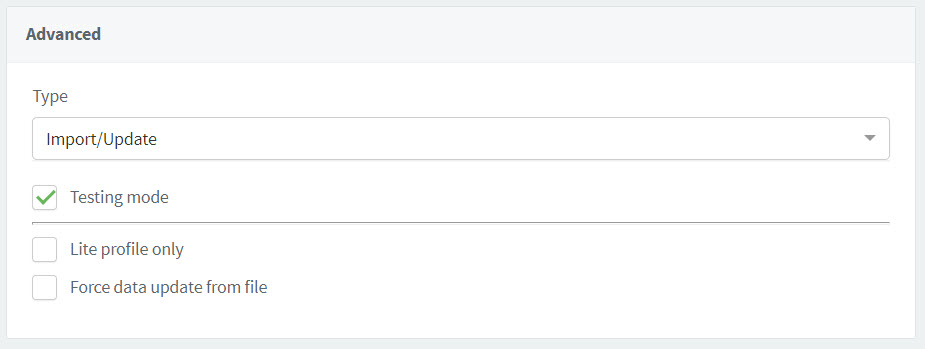
When you import profiles in Testing mode, ReachFive tests:
-
access to the server
-
access to the import file
-
whether the the import file content is valid
| Testing mode does not handle database modifications. |
Import Lite profiles only
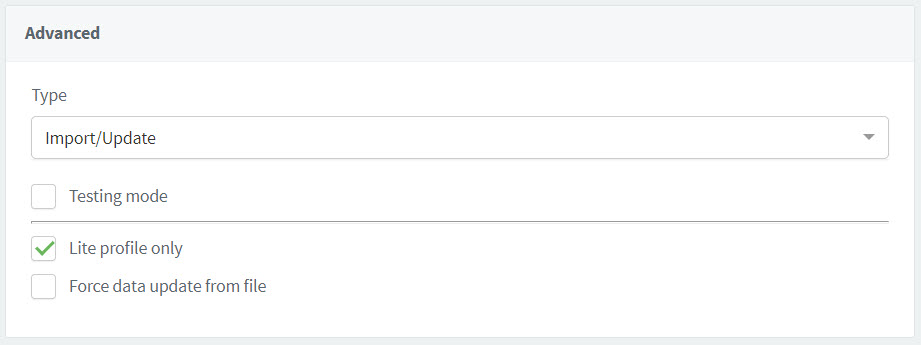
When you import Lite profiles only, you are not importing the fully managed profiles, but rather those lite profiles that registered with your site.
You can import Lite profiles by id, email, phone_number, or external_id.
You have to import Lite profiles separately from managed profiles.
|
Import IDs into ReachFive
If you wish to keep user IDs from your system when importing user profiles into ReachFive, you can do so by checking the Use customer IDs from file under the Advanced section when importing user profiles.

For more instructions, see Import user profiles.
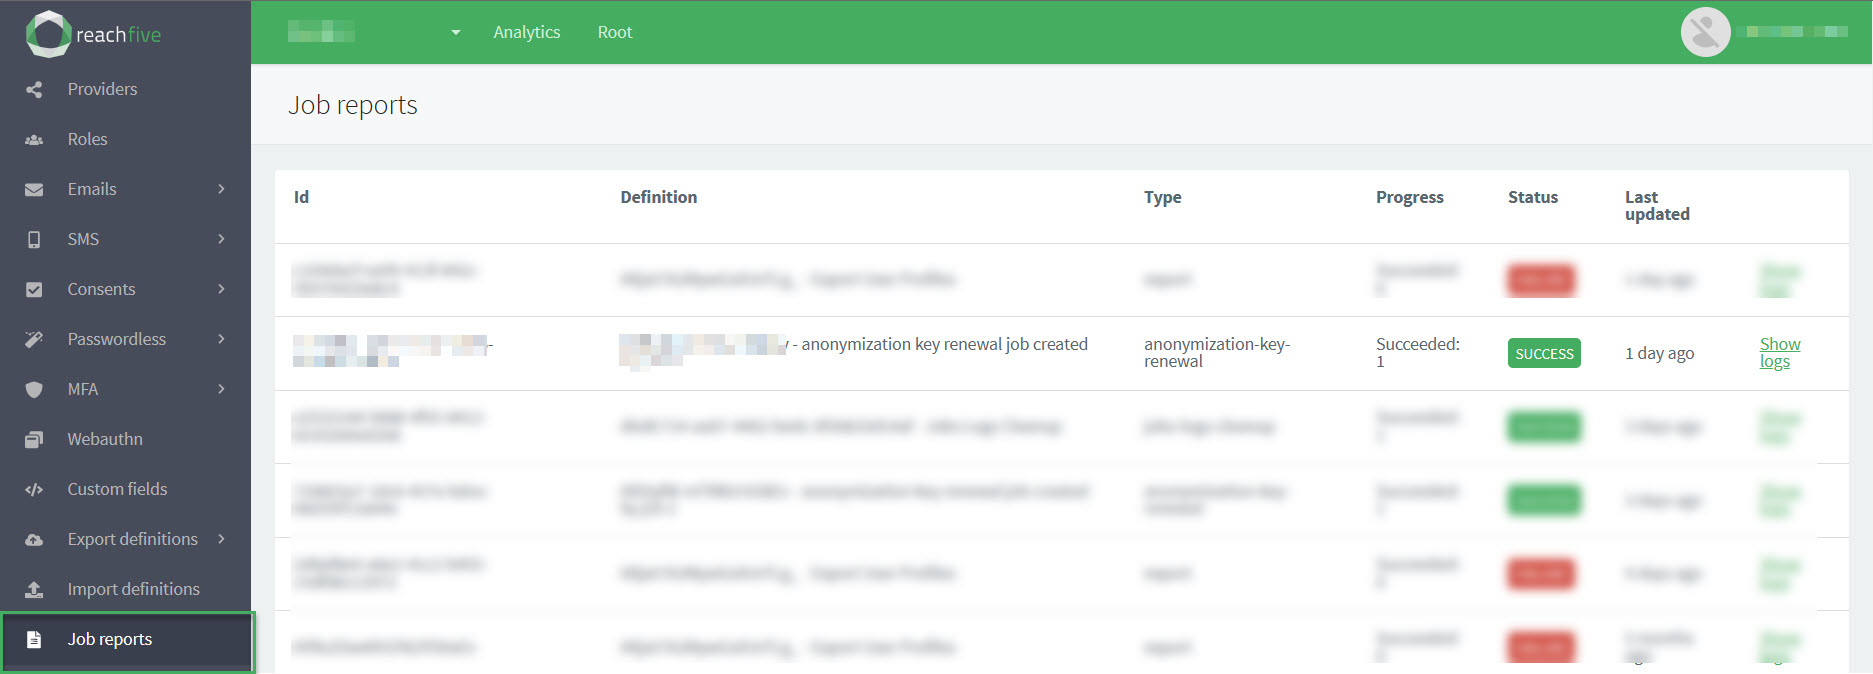
Job reports
Job reports provide a snapshot of the different export and import jobs that you have run.
Information such as the id, a definition, the job type, the progress of the job, the job’s status, and when the job was last run is provided for you so you can get a quick look at the latest jobs.
To find more information about the job, you can view the job logs.
Only job reports run in the last 6 months are displayed on the Job reports page in the ReachFive Console. Older jobs are automatically deleted.
To access job reports:
-
Open your ReachFive Console.
-
Go to .
 Report statuses
The following statuses are possible for job reports:
-
FAILURE which indicates the job has failed. Check out the logs for more information.
-
WAITING which indicates the job has yet to finish.
-
SUCCESS which indicates the job was successfully run.
-
Filter job reports
You can filter job reports from the ReachFive Console. Filtering the reports helps you more easily find the job report you’re looking for. The job report filters offers several ways to filter as shown in the table below. This includes setting a timeframe and how the results are displayed.
To filter job reports:
-
Open your ReachFive Console.
-
Go to .
-
Click Filters in the top right corner.
-
Enter your desired filters in the dialog.

Filter Description Job IDFilter by a specific job ID that has been run.
This filter is particularly useful when you need to look into a specific job. Perhaps, you obtained the ID through logs or need to investigate further.
Job definition IDFilter by a job definition ID.
This filter is useful when you want to look at a particular job definition. Maybe, you want to see how often it’s been run, or why a specific job definition is succeeding or failing.
Job typeFilter by the type of job such as export or import.
The job type filter is good to filter out only the type of jobs you want to see.
Job statusFilter by the status of the job.
Statuses-
SUCCESS -
RUNNING -
WAITING -
WAITING_CANCELLATION -
CANCELED -
FAILURE
-
-
If desired, select a timeframe by clicking From for the starting date and To for the end date.
-
Choose the Order of how you want your results displayed.
-
Click Apply.
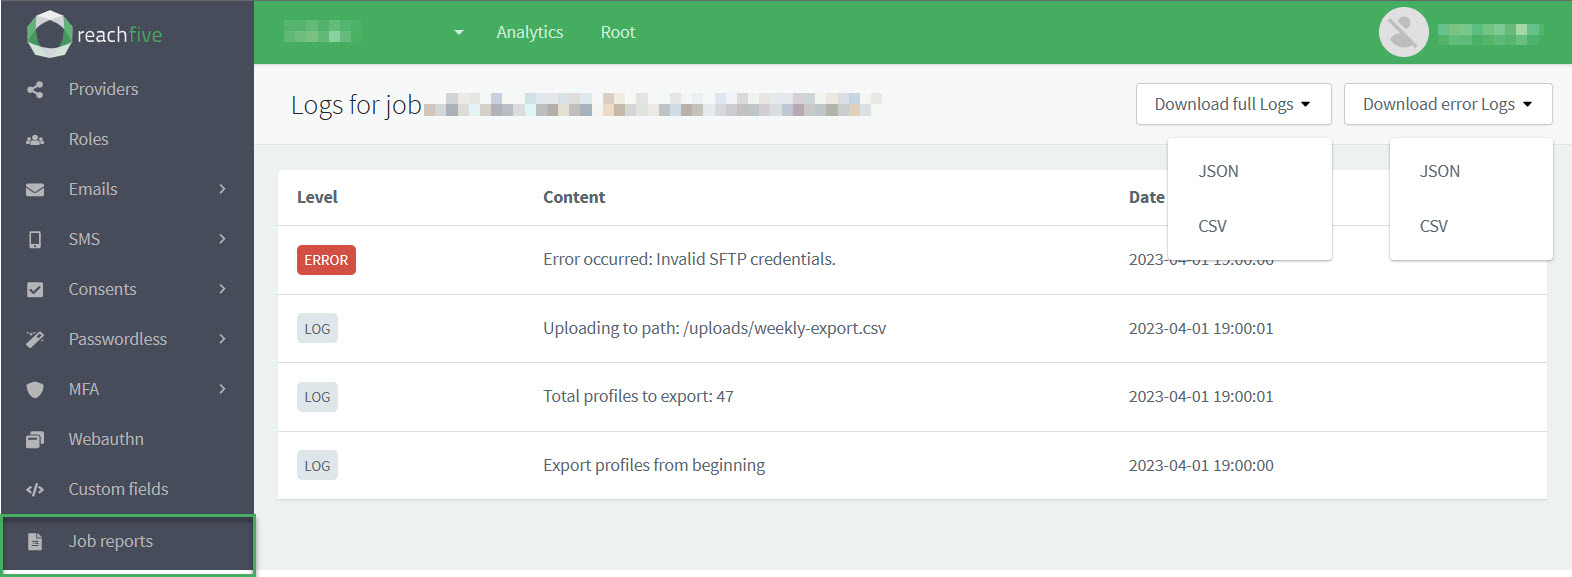
Job logs
To view more information on the job itself or download the logs, click Show logs found on the far right hand side of the table.
In the job logs, you can see the information Level, the Content of the information, and the Date on which it occurred.
| Category | Description | Example |
|---|---|---|
Level |
Denotes the level of the log information. possible values
|
ERROR |
Content |
Gives a description of the log information. |
"Export profiles from beginning" |
Date |
The timestamp for the log information. |
|
Download logs
You can download full logs or just the errors by clicking the desired dropdown and choosing the format for the download.
{"Level":"LOG","Content":"Export profiles from beginning","Date":"2023-04-02T00:00:00.899Z"}
{"Level":"LOG","Content":"Total profiles to export: 47","Date":"2023-04-02T00:00:01.296Z"}
{"Level":"LOG","Content":"Uploading to path: /uploads/weekly-export.csv","Date":"2023-04-02T00:00:01.298Z"}
{"Level":"ERROR","Content":"Error occurred: Invalid SFTP credentials.","Date":"2023-04-02T00:00:06.991Z"} (1)| 1 | Shows where the ERROR occurred and gives details on what the error was. |
Export logs
You can export logs for a specific job using the Management API’s Export job logs endpoint.