Export user profiles
You can export user profiles using the ReachFive Console.
This export allows you to retrieve all data or just the latest data for your users.
Exports are handled by jobs and can be executed on demand or scheduled as needed.
You can export data in CSV or JSONL format.
Exporting user profiles
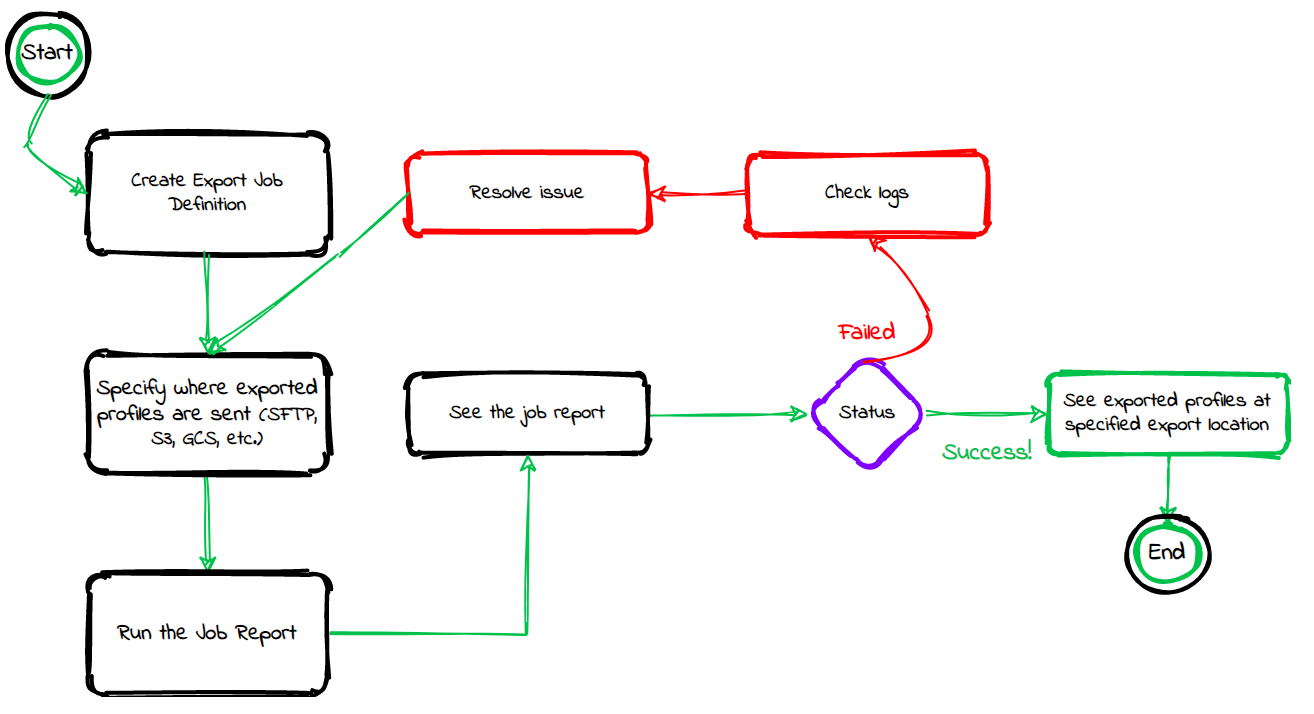
The instructions below guide you step-by-step in exporting your users from the ReachFive Console. The visual below shows you a high-level flow of the process.
Prerequisites
-
You must have access to the ReachFive Console.
-
You must have a Developer, Manager, or Administrator role.
-
You must have the Export Jobs feature enabled.
Instructions
The instructions below apply to both creating and editing an export job definition.
|
If editing an existing export job, be sure to select the |
-
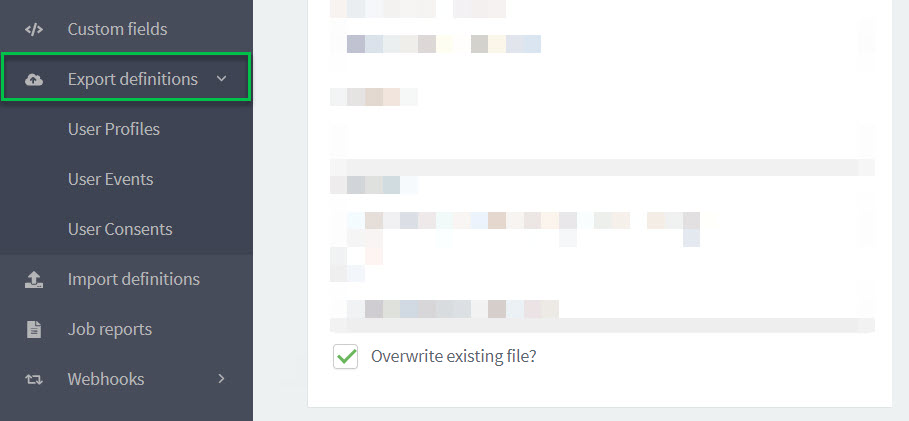
Go to .
-
Select New definition.
-
Under General, give the export job a name and description. Don’t forget to Enable the job.
-
Under Destination, choose the protocol you wish to use to export the file.
-
Specify the Server host for the secure FTP site.
-
Specify the Server port.
-
Under Authentication method, choose the authentication method type:
Username and password:
-
Enter the Username for the server.
-
Enter the Password for the server.
OpenSSH:
-
Enter the Username for the server.
-
Enter the OpenSSH private key.
example-----BEGIN ENCRYPTED PRIVATE KEY----- MIIBpjBABgkqhkiG9w0BBQ0wMzAbBgkqhkiG9w0BBQwwDgQI5yNCu9T5SnsCAggA MBQGCCqGSIb3DQMHBAhJISTgOAxtYwSCAWDXK/a1lxHIbRZHud1tfRMR4ROqkmr4 kVGAnfqTyGptZUt3ZtBgrYlFAaZ1z0wxnhmhn3KIbqebI4w0cIL/3tmQ6eBD1Ad1 nSEjUxZCuzTkimXQ88wZLzIS9KHc8GhINiUu5rKWbyvWA13Ykc0w65Ot5MSw3cQc w1LEDJjTculyDcRQgiRfKH5376qTzukileeTrNebNq+wbhY1kEPAHojercB7d10E +QcbjJX1Tb1Zangom1qH9t/pepmV0Hn4EMzDs6DS2SWTffTddTY4dQzvksmLkP+J i8hkFIZwUkWpT9/k7MeklgtTiy0lR/Jj9CxAIQVxP8alLWbIqwCNRApleSmqtitt Z+NdsuNeTm3iUaPGYSw237tjLyVE6pr0EJqLv7VUClvJvBnH2qhQEtWYB9gvE1dS BioGu40pXVfjiLqhEKVVVEoHpI32oMkojhCGJs8Oow4bAxkzQFCtuWB1 -----END ENCRYPTED PRIVATE KEY-----
-
-
Specify the Path where the import file is located.
- For example
-
<serverhost>/path-to-file/file.csv. - Example w/variables
-
<serverhost>/path-to-file/file-{{datetime}}.csvSee Export path variables for more details.
-
Specify the URL for the S3 bucket.
-
Specify the name Bucket.
-
Enter the Region for the server.
-
Enter the Access key for AWS.
-
Enter the Secret key for AWS.
-
Specify the Path where the export file is to be sent.
- For example
-
<serverhost>/path-to-file/file.csv. - Example w/variables
-
<serverhost>/path-to-file/file-{{datetime}}.csvSee Export path variables for more details.
-
Specify the Project ID for the Google Cloud Storage.
-
Specify the App name.
-
Enter the User name for the server.
-
Specify the name Bucket.
-
Enter the Credentials in JSON format.
-
Specify the Path where the export file is to be sent.
- For example
-
<serverhost>/path-to-file/file.csv. - Example w/variables
-
<serverhost>/path-to-file/file-{{datetime}}.csvSee Export path variables for more details.
-
-
Still under Destination, if desired, click Overwrite existing file.
-
When you check the box, the existing file is replaced by the new file. Data in the existing file is completely replaced.
-
If left unchecked, the new data is added to the existing file.
CSV exampleemail;given_name;family_name (1) bruce@superheroes.com;Bruce;Wayne peter@superheroes.com;Peter;Parker email;given_name;family_name (1) clark@superheroes.com;Clark;Kent1 Note now the header is added again for CSV files. JSONL example{"given_name":"Bruce","family_name":"Wayne","email":"bruce@superheroes.com"} {"given_name":"Peter","family_name":"Parker","email":"peter@superheroes.com"} {"given_name":"Clark","family_name":"Kent","email":"clark@superheroes.com"} -
-
Under Schedule, if desired, use a Quartz scheduler for scheduling the job.
-
Under File format, select the file format type you wish to export. This will be either JSONL or CSV.
-
Define the fields to include in the export. You can include all attributes of the user profile data model including custom fields and consents.
-
Choose the Encoding standard for your JSONL file. This is either
UTF-8orISO-8859-1.If using
ISO-8859-1, note that there are limitations around characters that it encodes. It is primarily for Western European languages. It is not intended for non-Western European languages and also has limitations for certain digital characters and symbols. When a character is unrecognized, it is replaced with a question mark,?in the export. If in doubt, chooseUTF-8.
All fields of the user profile data model will be exported, including consents and custom_fields.-
Define the columns to include in the export. You can include all attributes of the user profile data model including custom fields and consents.
You can drag and drop the fields to sort the order in which you want the columns displayed as part of the export job.
-
Choose the Encoding standard for your CSV file. This is either
UTF-8orISO-8859-1.If using
ISO-8859-1, note that there are limitations around characters that it encodes. It is primarily for Western European languages. It is not intended for non-Western European languages and also has limitations for certain digital characters and symbols. When a character is unrecognized, it is replaced with a question mark,?in the export. If in doubt, chooseUTF-8. -
Enter your Delimiter. The default is
;. -
Enter your Quote char. The default is
". -
Enter your Escape character. The default is
\.
The data for custom fields that contain the multipletype (such astags) are separated by the sameDelimiterthat is configured in the job definition. -
Filter export jobs
If you want to minimise database impact, you can filter what to export to limit the size of files that are generated. Filters allow you to define a range of values to export only user profiles that meet certain requirements.
|
The more filters you add, the more refined the data becomes. Check out all the user profile fields you can filter. You can also filter custom fields and consents. |
| Operator | Description | Supports | ||
|---|---|---|---|---|
|
Equal to/equivalent. Example: |
|
||
|
Greater than. Example: |
Dates & Integers |
||
|
Greater than or equal to. Example: |
Dates & Integers |
||
|
Less than. Example: |
Dates & Integers |
||
|
Less than or equal to. Example: |
Dates & Integers |
||
|
Between (inclusive) two specified values. Example: |
Dates & Integers |
||
|
The value for the specified filter is not empty. Example: |
|
||
|
The value for the specified filter is empty. Example: |
|
||
|
The filter includes any of the specified values. Example:
|
|
||
|
The filter excludes any of the specified values. Example:
|
|
||
|
Filter values that start with the specified value. Example: |
String |
||
|
Filter values that end with the specified value. Example: |
String |
||
|
Filters values that contain the specified value. Example: |
String |
||
|
Filters values that have occurred before the specified time. You must specify a unit (such as This operator can be used on all date fields such as:
Format: Example: |
String |
||
|
Filters values that have occurred since the specified timeframe. You must specify a unit (such as Format: Example: |
String |
Filterable user profile fields
You can filter the following User Profile fields for export jobs, User-event webhooks, and Pub/Sub hooks.
-
user email -
user email verified -
user verified emails -
user unverified emails -
user phone number -
user phone number verified -
user username -
user first name -
user last name -
user name -
user nickname -
user gender -
user age -
user external id -
user authentication types -
user providers -
user devices -
user city -
user country -
user nb of logins -
user nb of friends -
user nb of local friends -
user first login -
user last login -
user last login type -
user created at -
user updated at -
user lite only -
user suspension status -
user title -
user locality -
user region -
user country -
user recipient -
user company -
user address_complement -
user custom fields -
user consents -
user Kakao Age range -
user Kakao Connecting Information -
user third party grants client id -
user third party grants date -
user session devices -
user session devices client id -
user session devices created at -
user session devices device class -
user session devices device name -
user session devices ip -
user session devices city -
user session devices country -
user session devices last connection -
user session devices operating system -
user session devices token type -
user session devices user agent name -
identities -
identities id
Run export job
Click ![]() next to the export definition.
next to the export definition.
When you start a run, logs are created and available in Show job reports.
| All job logs are accessible in the . |
Export path variables
In some cases, you might want to add meta information to the path of an export file for identification and analysis purposes. With export path variables, you can do just that. Wherever you would like a variable in the path, simply add it to the name of the file as shown here:
<serverhost>/path-to-file/{{datetime}}-file-{{job_execution_id}}.csv (1)| 1 | In this example, {datetime} and {job_execution_id} are inserted as part of the file name as part of the export. |
| The export path variable feature is available for all export types including exporting profiles, user events, and consents. |
Available export path variables
The following variables are available for you to use as part of your export.
-
{{datetime}}is the job execution date in the format ofyyyy-MM-dd HH-mm-ss. -
{{date}}is the job execution date in the format ofyyyy-MM-dd. -
{{time}}is the job execution time in the format ofHH-mm-ss. -
{{*datePattern}}lets you set the date pattern as shown here. -
{{account}}is the name of the account where the export occurred. -
{{job_execution_id}}is the specific id of the export being executed.