Connect with Azure AD
Azure Active Directory is a commonly used identity platform. It is easy to integrate with Azure AD using ReachFive. To connect with Azure, you need to provide details from Azure to a ReachFive administrator. The instructions below details this process.

Connect to ReachFive with Azure AD via console
To connect with Azure AD via the ReachFive Console, follow the instructions here.
Prerequisites
-
You must have access to the ReachFive Console.
-
You must have an Azure account.
-
You must use and understand Azure Active Directory.
| In most instances, the ReachFive Console steps must be completed by a ReachFive team member. In this case, reach out to ReachFive Support. |
Instructions
- From your Azure Portal
-
-
Register ReachFive as an application1.
-
In the Authentication > Platform Configurations section, create a Web platform.
-
In the Web platform settings, add the required Redirect URLs2.
Formathttps://<console_domain>.reach5.co/<organization-name>/azuread-callback -
Copy your Tenant ID, Client ID and Client Secret from Azure AD.
Be sure to give this information to your ReachFive admin contact so they can complete the following steps. -
In the Authentication > Implicit grant and hybrid flows section, check the box for ID tokens (used for implicit and hybrid flows).
-
Access tokens (used for implicit flows)
-
ID tokens (used for implicit and hybrid flows)
-
-
In the API permissions section, grant the
User.Readpermission to all stakeholders who need the permission.
-
- ReachFive admin from ReachFive Console
-
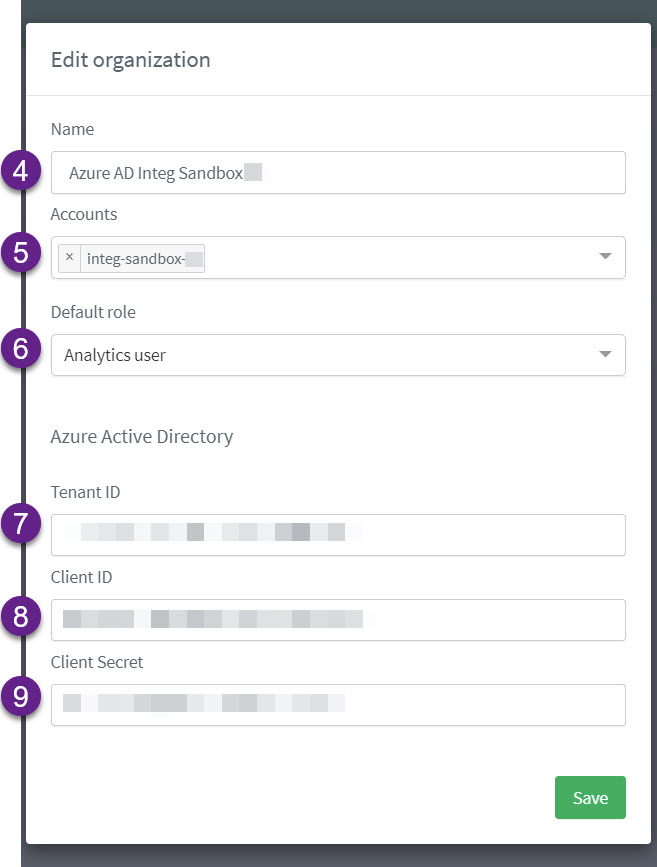
Create or edit a current organization.
Go to
https://console.reach5.co/root/organizationsfrom your ReachFive Console and select New Organization or select to edit an existing organization.
If you are using the staging URL, be sure to add
-stagingafterconsolein the URL as shown in the steps above. -
Add the ReachFive accounts that are associated with your organization.
-
Choose the Default role for the associated accounts from the dropdown menu. This can be a user with no rights.
If you choose the User with no rights, this prevents them from seeing any other data related to your ReachFive account. -
Under Azure Active Directory, add your Azure AD Tenant ID.
-
Enter your Azure AD Client ID.
-
Enter your Azure AD Client Secret.
Once the ReachFive administrator has completed the tasks above, they will inform you that this is ready. You can then go to https://console.reach5.co/<organization-name>/azuread-login where you are redirected to your Microsoft login. If you are using the staging URL, be sure to add -staging after console in the URL as shown in the steps above.