Roles
The roles listed on this page are available by default. The table below provides a high level overview of the type of permissions that are associated with the particular role. The roles specified in each category correspond to particular management scopes which allows the role to perform certain actions or view certain information within the ReachFive Console.
Add a role to a user
You can add a role to a user in the ReachFive Console.
-
Go to your ReachFive Console.
-
Navigate to .
-
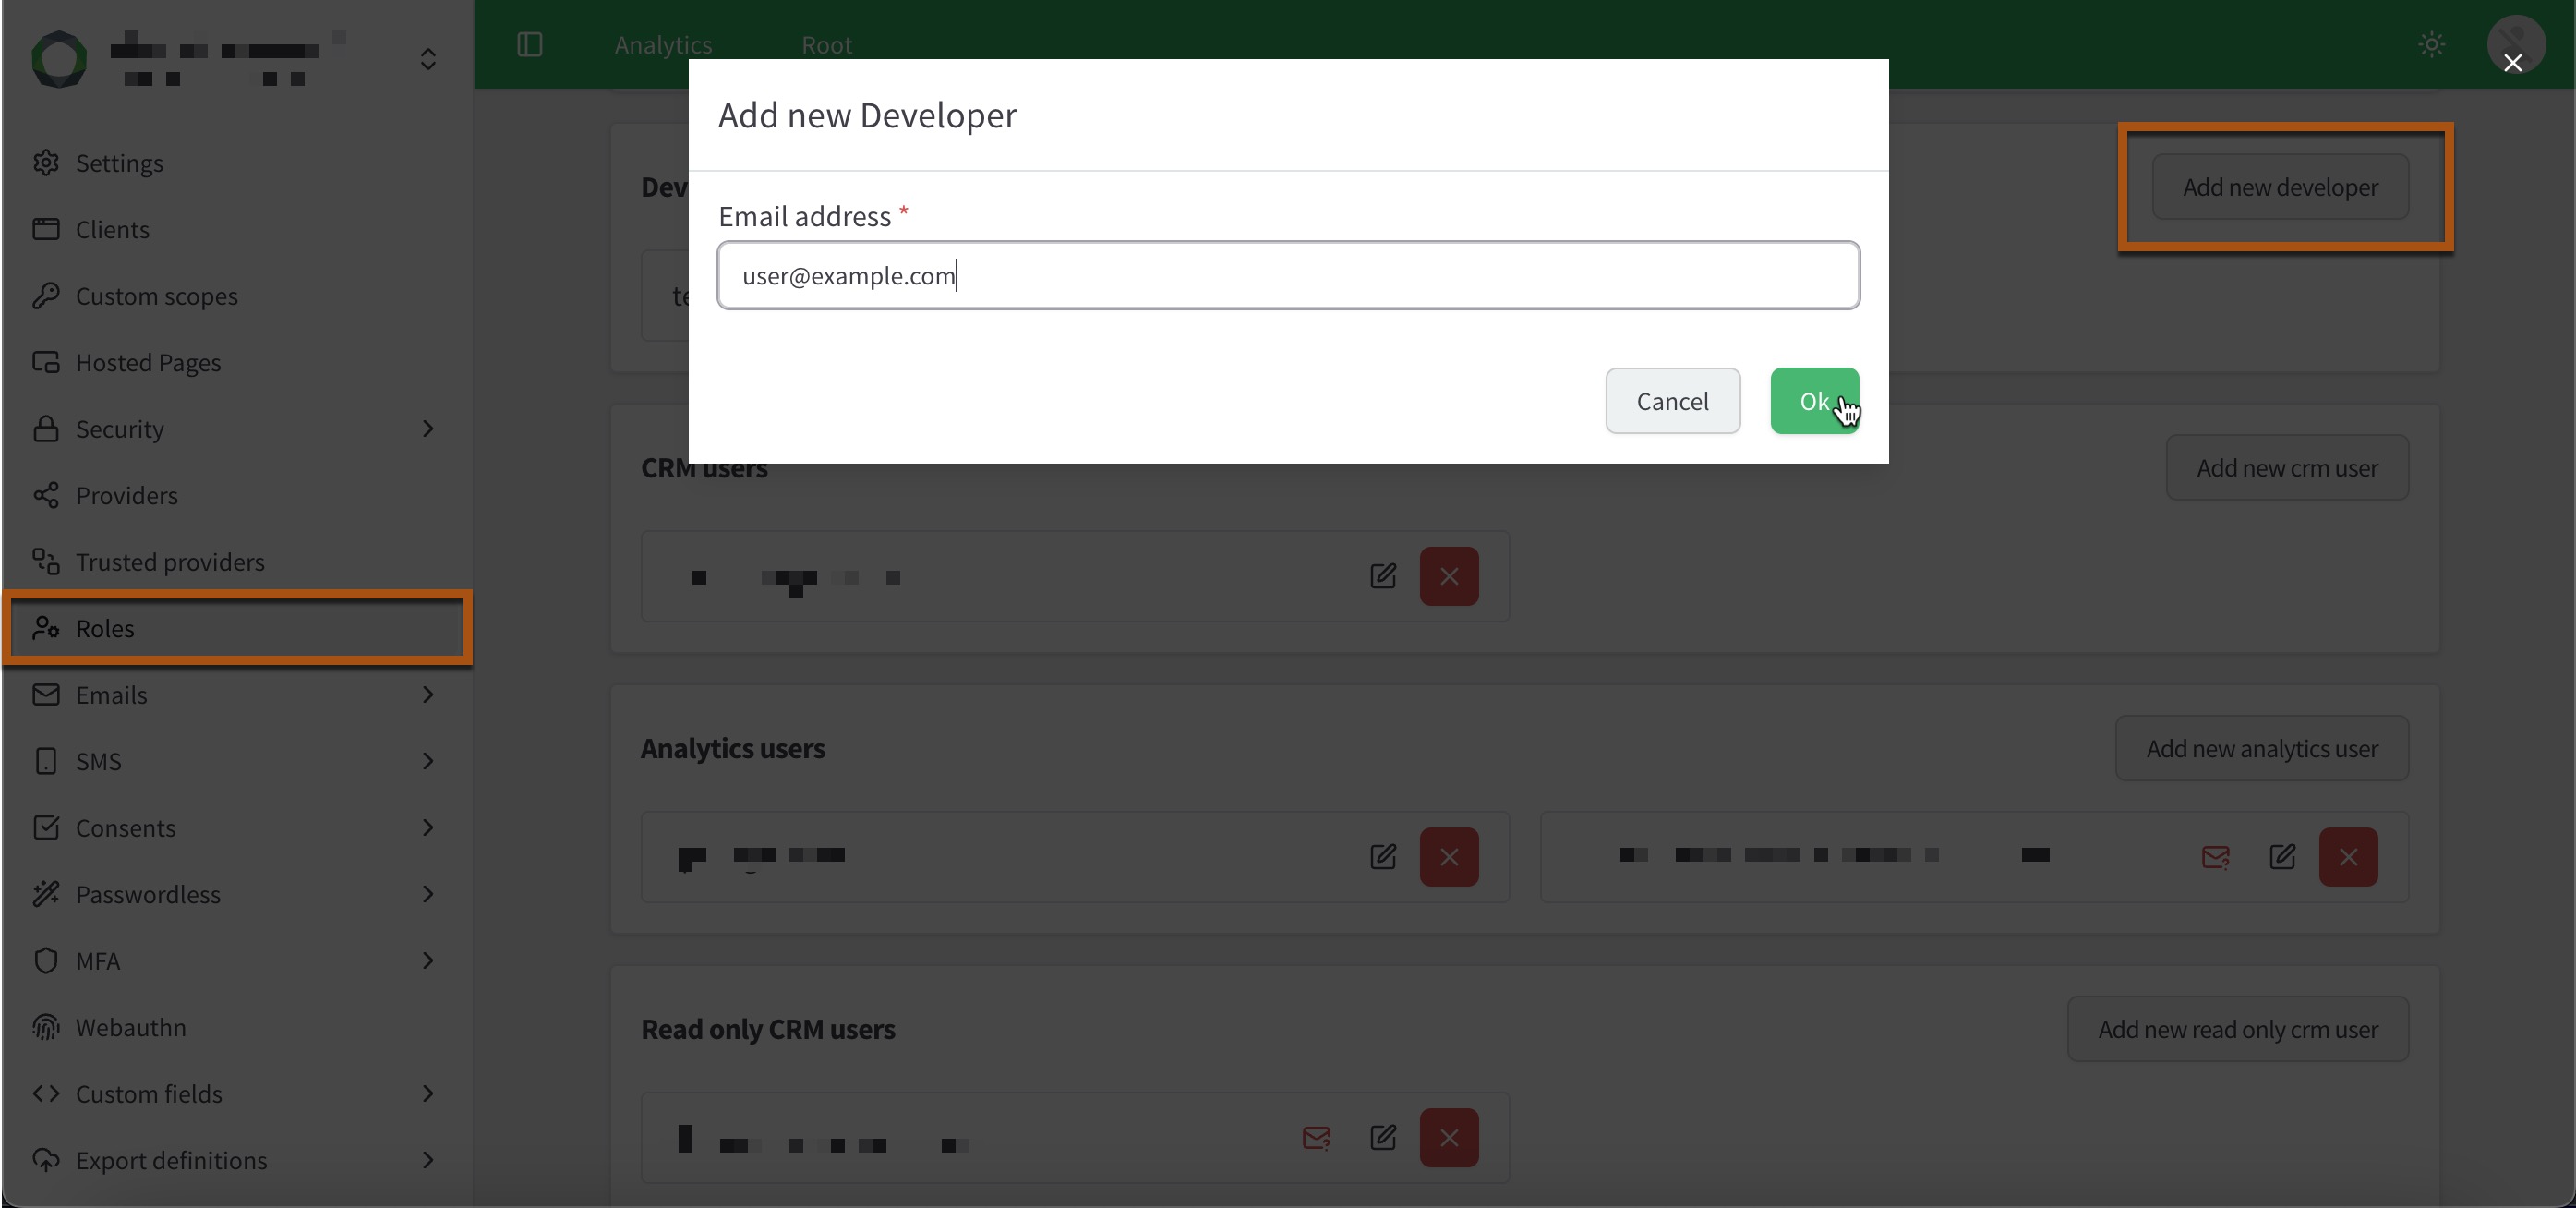
Scroll to the role where you want to add a user (e.g., Developer, CRM User).
-
Click Add new <role> user.
-
Enter the email address of the user.
-
Click Ok.
Roles overview
-
The Analytics column refers to the Analytics section in the ReachFive Console.
-
The Settings column refers to the Settings section in the ReachFive Console.
-
Manageusers have the right to manage the feature. -
Viewusers have the right to view the feature. -
No rightsfor a user.
| Analytics | Settings | |||||||||
|---|---|---|---|---|---|---|---|---|---|---|
Profiles |
Analytics |
Segments |
Audit logs |
Jobs |
Custom fields |
Hooks |
Accounts |
Consents |
Clients |
|
Administrator See more. |
||||||||||
Manager See more. |
||||||||||
Developer See more. |
||||||||||
CRM user See more. |
||||||||||
Read only CRM user See more. |
||||||||||
Analytics user See more. |
||||||||||
User with no rights See more. |
||||||||||
Administrator
The Administrator (admin) role allows you to:
-
Manage their own user account.
-
View analytics.
-
Manage users.
-
Import user profiles.
-
Export user profiles.
-
Manage consents.
-
View user events.
-
View custom fields.
-
Manage custom field schemas.
-
Manage webhooks.
-
Manage clients.
-
Manage ReachFive Console user accounts.
-
View audit logs.
Manager
The Manager role allows you to:
-
Manage their own user account.
-
View analytics.
-
Manage users.
-
Export user profiles.
-
Manage consents.
-
View user events.
-
Manage custom field schemas.
-
Manage webhooks.
-
Manage clients.
-
View ReachFive Console user accounts.
-
Request and manage On-demand scaling.
-
View audit logs.
Developer
The Developer role allows you to:
-
Manage their own user account.
-
View analytics.
-
View consents.
-
Manage custom field schemas.
-
Manage webhooks.
-
Manage clients.
CRM user
The CRM role allows you to:
-
Manage their own user account.
-
View analytics.
-
View segments.
-
Delete segments.
-
Manage users.
-
View consents.
-
View user events.
-
View custom fields.
Read only CRM user
The Read only CRM user role allows you to:
-
Manage their own user account.
-
View analytics.
-
View segments.
-
Delete segments.
-
View users.
-
View consents.
-
View user events.
-
View custom fields.