Sign in with Apple
iOS mobile apps must display the Sign in with Apple option if they also use other social providers such as Meta Connect (Facebook Login), Google Connect or some other social login provider. For more, see the Apple guidelines.
To use Sign in with Apple with ReachFive, you need your Apple App ID, Service ID, and Key.
These are found in your Apple Developer account.
| You must have an Apple Developer Program membership with the App Manager role to use the Sign in with Apple feature and follow these instructions. |
Apple data
This is the collectable data for Sign in with Apple.
User consent needed
-
Email Address (
email) - The user’s email address, which may be a private relay email.
-
Email Verified (
emailVerified) - Indicates whether the user’s email is verified.
-
Private Email Indicator (
isPrivateEmail) - Indicates if the email is a private relay email.Users have the option to share their real email or use Apple’s private email relay service, which provides an anonymous email address that forwards to their real email.
-
First Name (
givenName) - The user’s first name.
-
Last Name (
familyName) - The user’s last name.
Create Apple Developer IDs
If you want to use Sign In with Apple using ReachFive, you, of course, need to have an Apple app ID. The instructions here guide you on setting up the necessary IDs and keys to seamlessly integrate Sign In with Apple with ReachFive.
The flow is as follows:
| Though every effort is made to keep up-to-date instructions for the Apple side of things, some screenshots and steps may not reflect the latest Apple on-screen instructions. For the latest, see Apple’s developer documentation. |
Prerequisites
-
You must have an Apple Developer Program membership to use the Sign In with Apple feature.
-
You must have the App Manager role.
Access Apple Developer
-
Log in to your Apple Developer account.
-
Navigate to your Account overview page.
-
Go to Certificates, Identifiers & Profiles.
This is typically on the center of the page or in the sidebar. 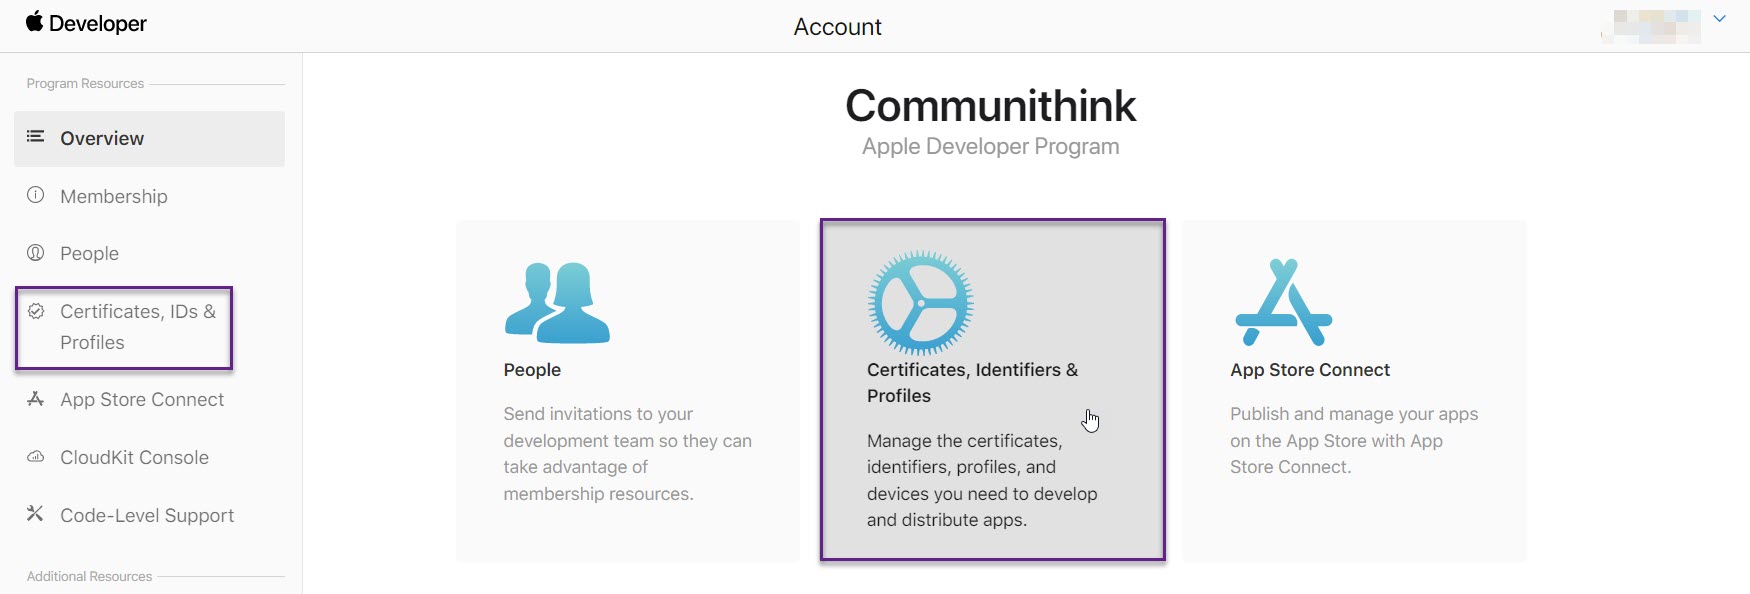
- Next Step
Create your App ID
-
Go to the Identifiers section.
-
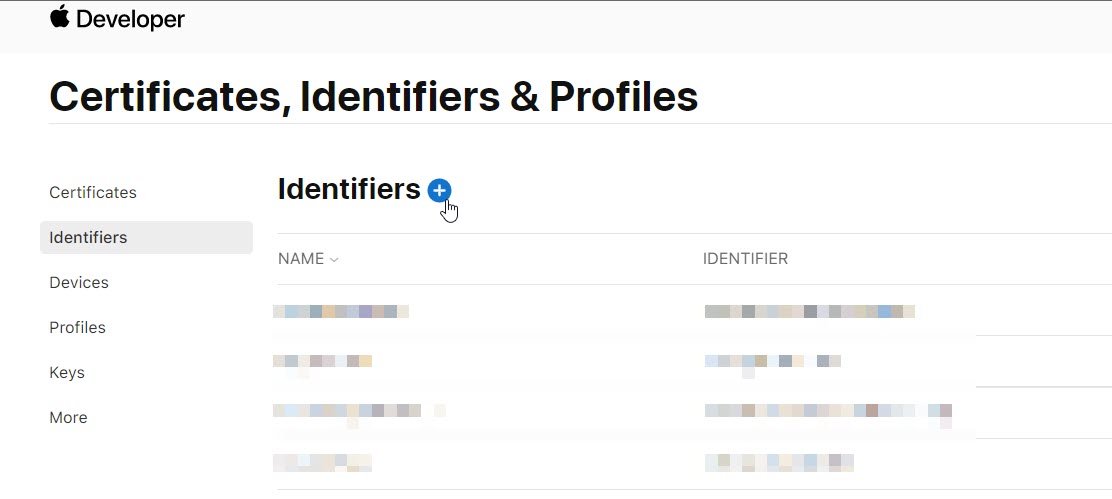
Click the plus sign.
-
Select App IDs from the list and click Continue.

-
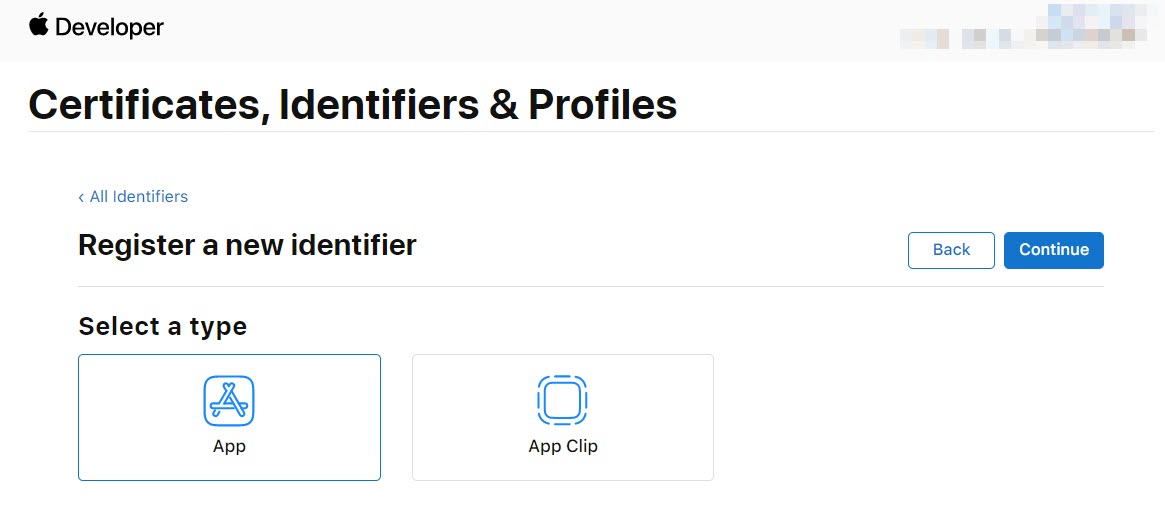
Under Register a new identifier, select the type, App and click Continue.
-
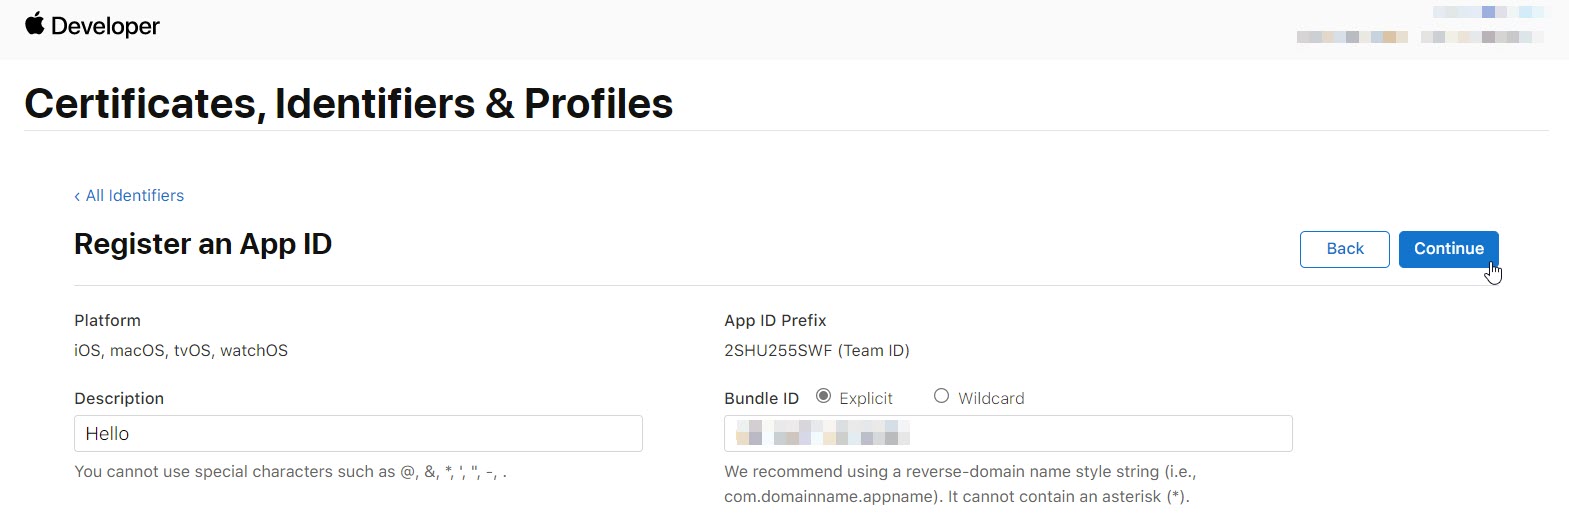
Under Register an Apple ID, add a Description and Bundle ID.
-
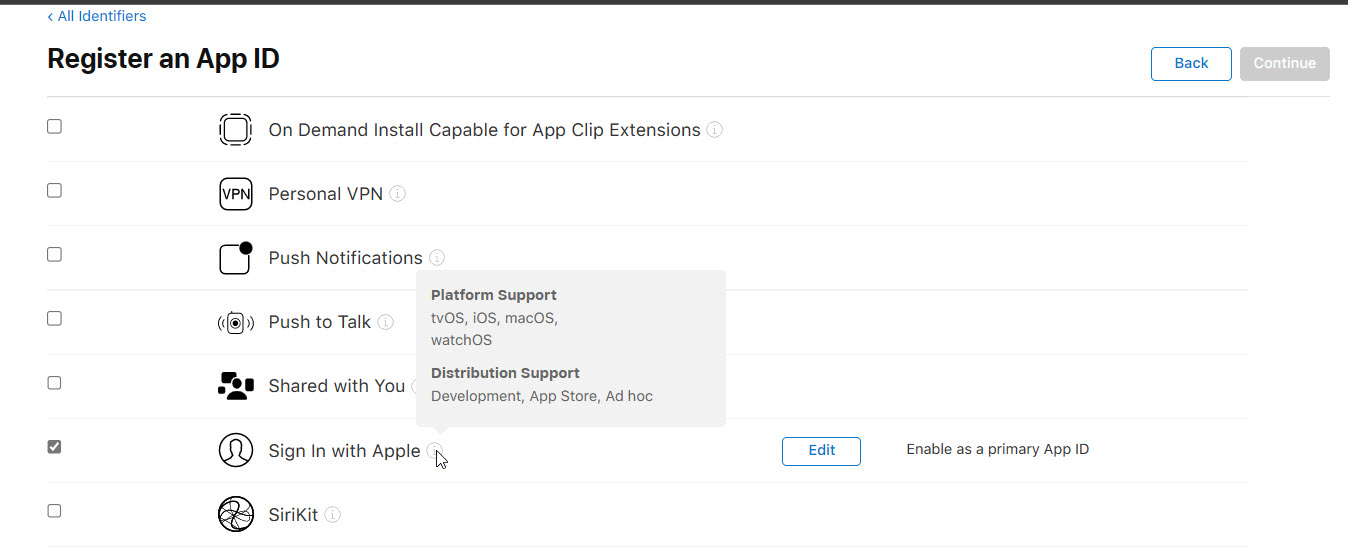
Be sure to add the Sign in with Apple capability to your app by scrolling down and selecting Sign in with Apple.
-
-
To Confirm your App ID, click Register.

- Next Step
Create your App Services ID
You can associate as many service IDs with your app as your want. In this case, we’re going to set up Sign In with Apple.
-
Go to the Identifiers section.
-
Click the plus sign.

-
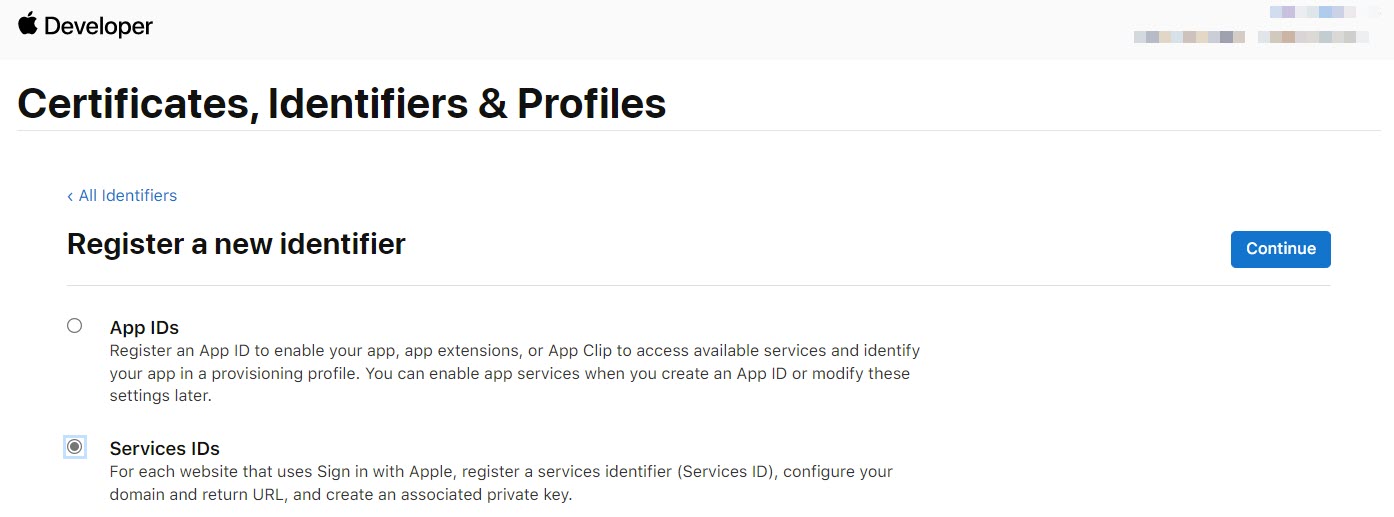
Select Services IDs from the list and click Continue.
-
Under Register a Services ID, add a Description and the Identifier you want associated with the Service ID.
The Description is what your users will see when signing in via Sign in with Apple. To edit this field after creation, see Edit your Apple app name.
The Identifier is typically similar to the Bundle ID you entered when creating the App ID. However, it must be different than the Bundle ID.
Examplenet.reach5.integ-appName (1) net.reach5.integ-appName.service (2)1 Example of Bundle ID. 2 Example of Service ID. 
-
Go back to the Identifiers section and select your newly-created Service ID.
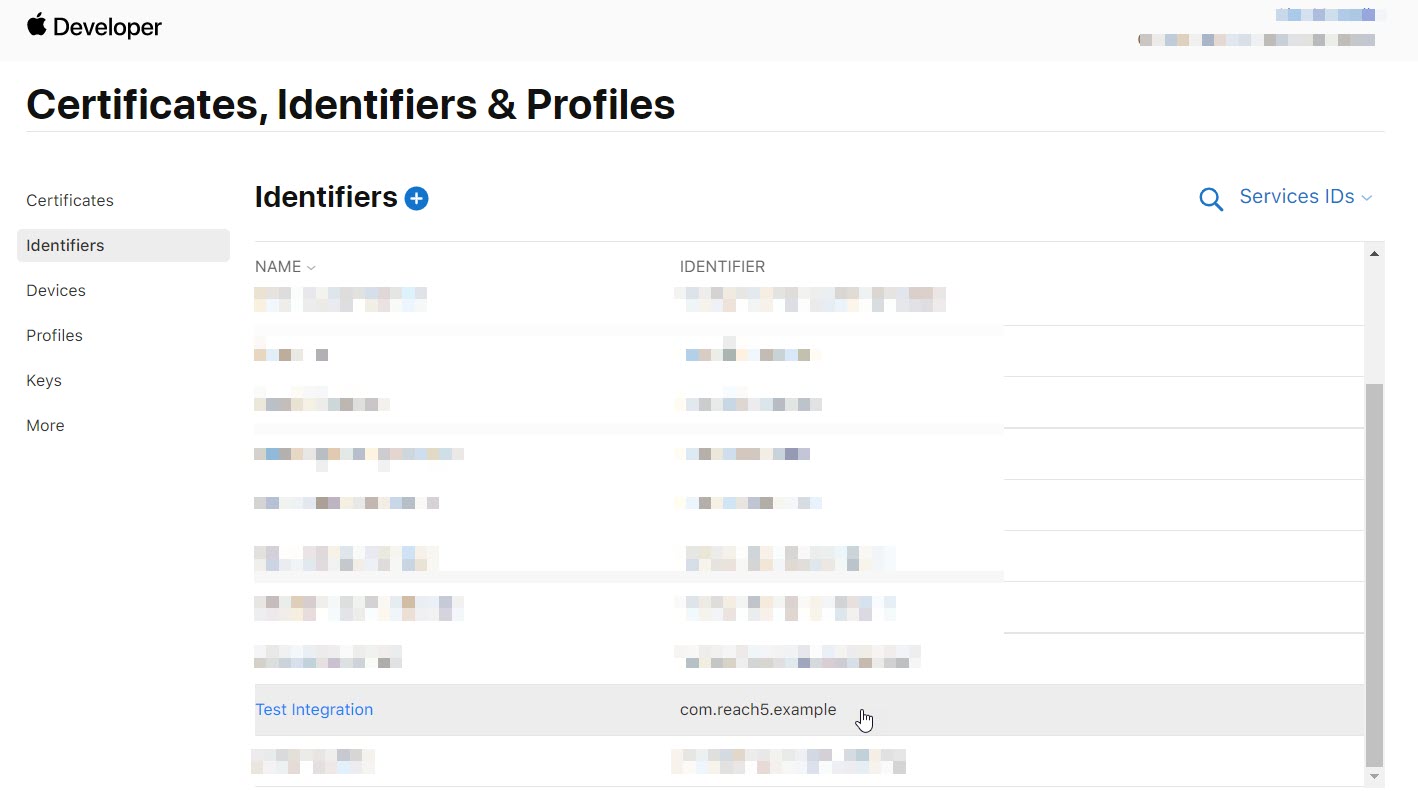
-
Under Edit your Services ID Configuration, enable Sign In with Apple and click Configure.
-
Sign In with Apple
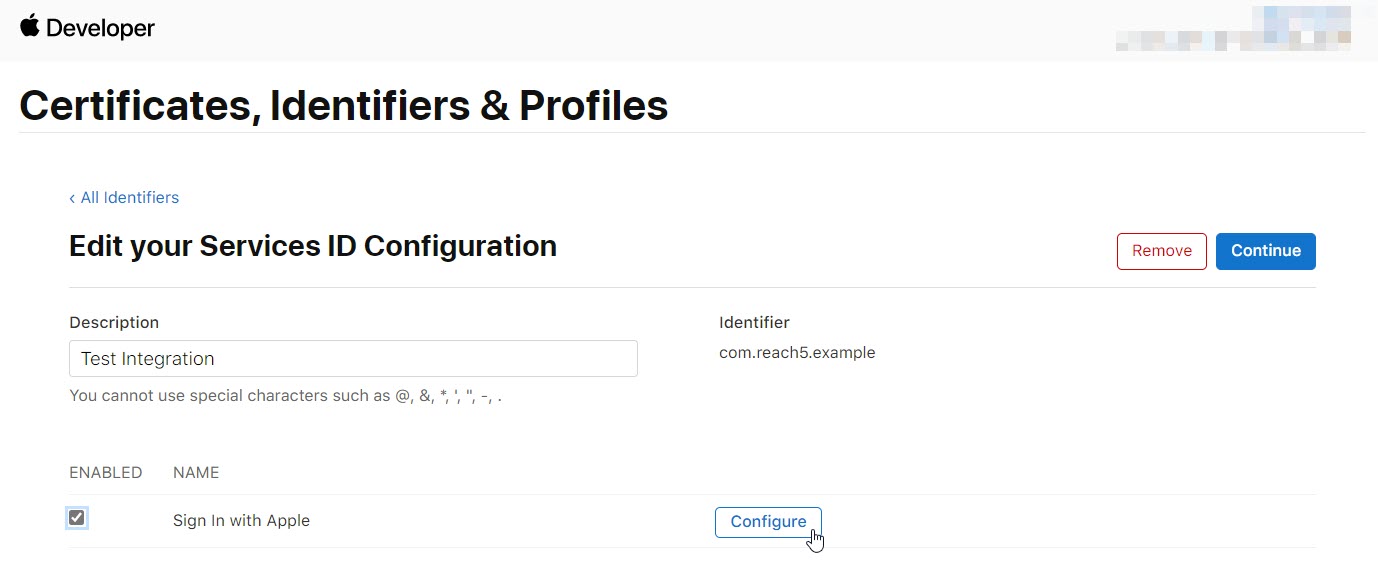
-
-
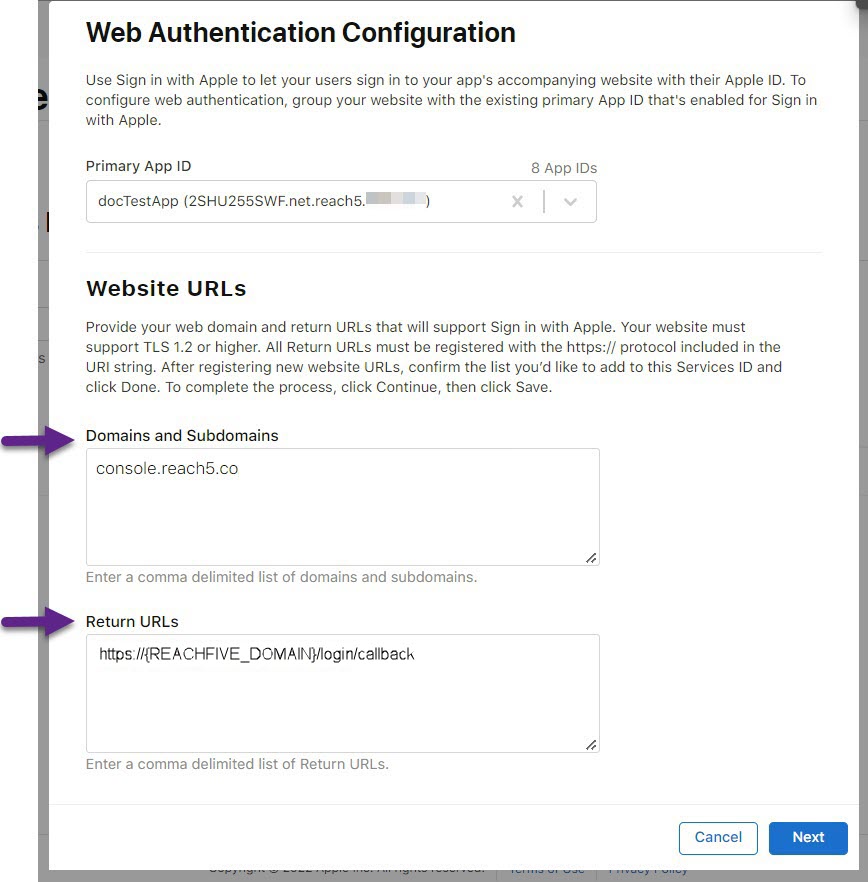
In the Web Authentication Configuration pop-up:
- Next Step
Create your Private Key
-
Go to Keys.
-
Click the plus sign.
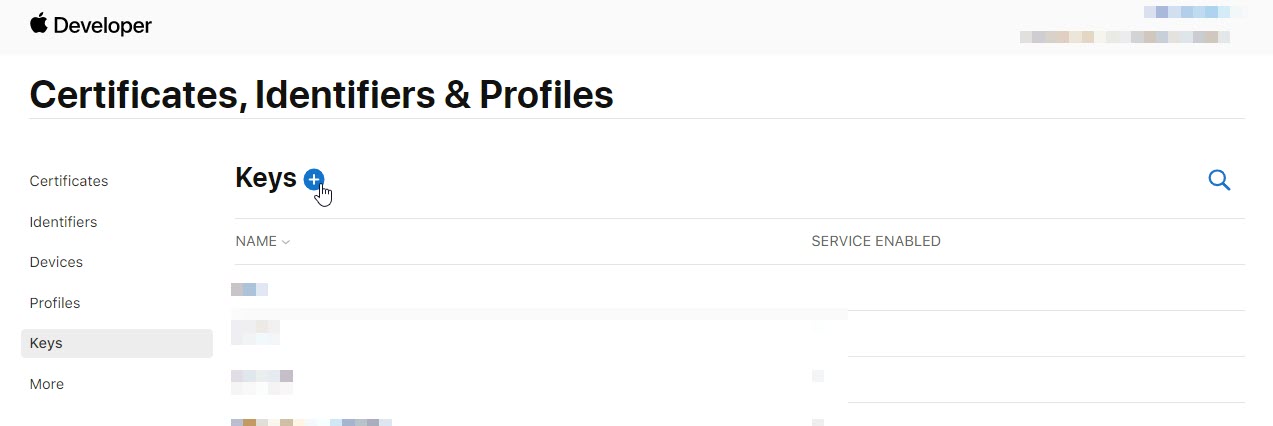
-
Under Register a New Key:
-
Select Sign In with Apple and click Configure.
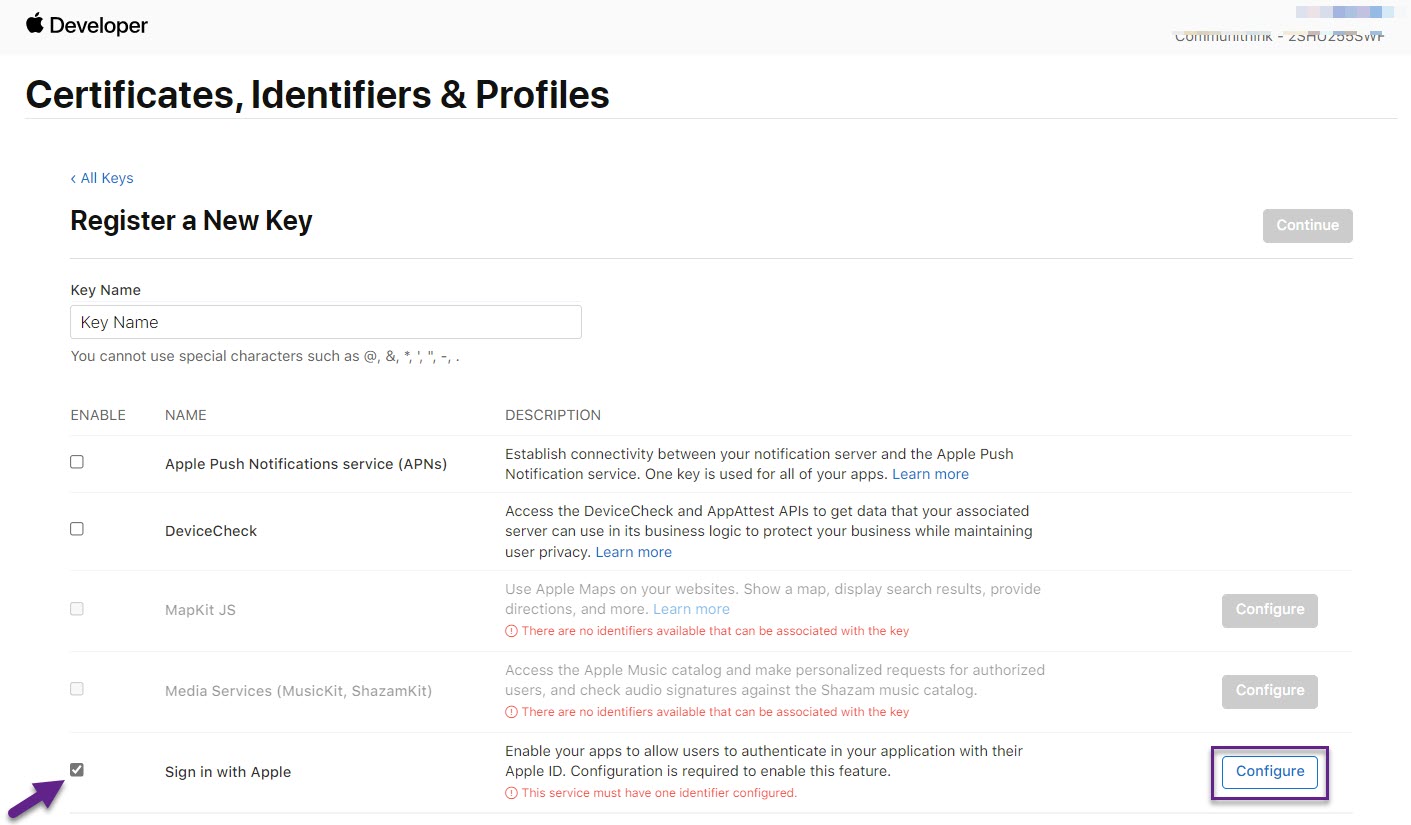
-
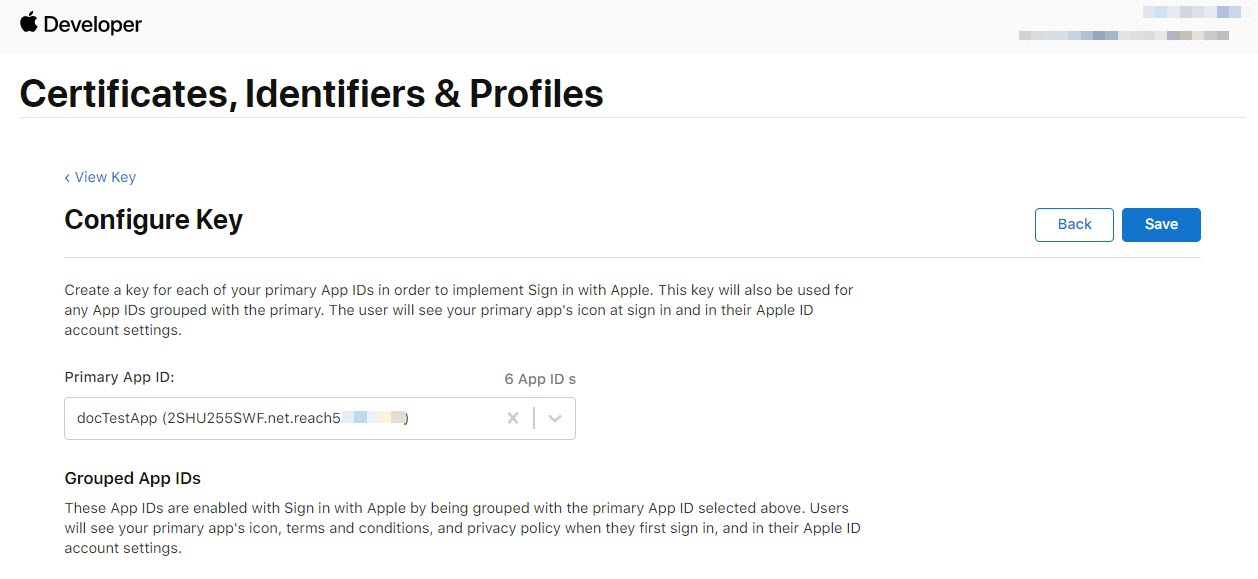
Under Configure Key, select your Primary App ID from the drop-down list and click Save.
-
-
Click Continue under Register a New Key now that you have configured Sign in with Apple.
-
On the next screen, click Register to register the key.
-
You now have a chance to download the key.
From Apple : After downloading your key, it cannot be re-downloaded as the server copy is removed. If you are not prepared to download your key at this time, click Done and download it at a later time. Be sure to save a backup of your key in a secure place. -
If you are ready, click Download to download your key.
Make sure you do not lose this key as you’ll need it when you are <<connecting ReachFive to your Apple IDs.
- Next Step
Connect ReachFive to Apple
Now that you have set up what you need in your Apple Developer account, you can use those values to sync ReachFive with your Apple account, allowing you to finally leverage Sign in with Apple.
|
The data that you collect requires user consent. Users can choose to mask their email address, so you will need to configure your SMTP server to be able to use Apple’s private email relay service. For more on how to do this, see Anonymized emails. |
Variants
Only available for those using 7.1.0+ of our iOS SDK.
You can add variants of your Sign in with Apple provider, in case you have both web and native app use cases.
You should follow the instructions below on how to add a variant as there are some differences.
Instructions
You should repeat these instructions for each variant you create in the ReachFive Console.
-
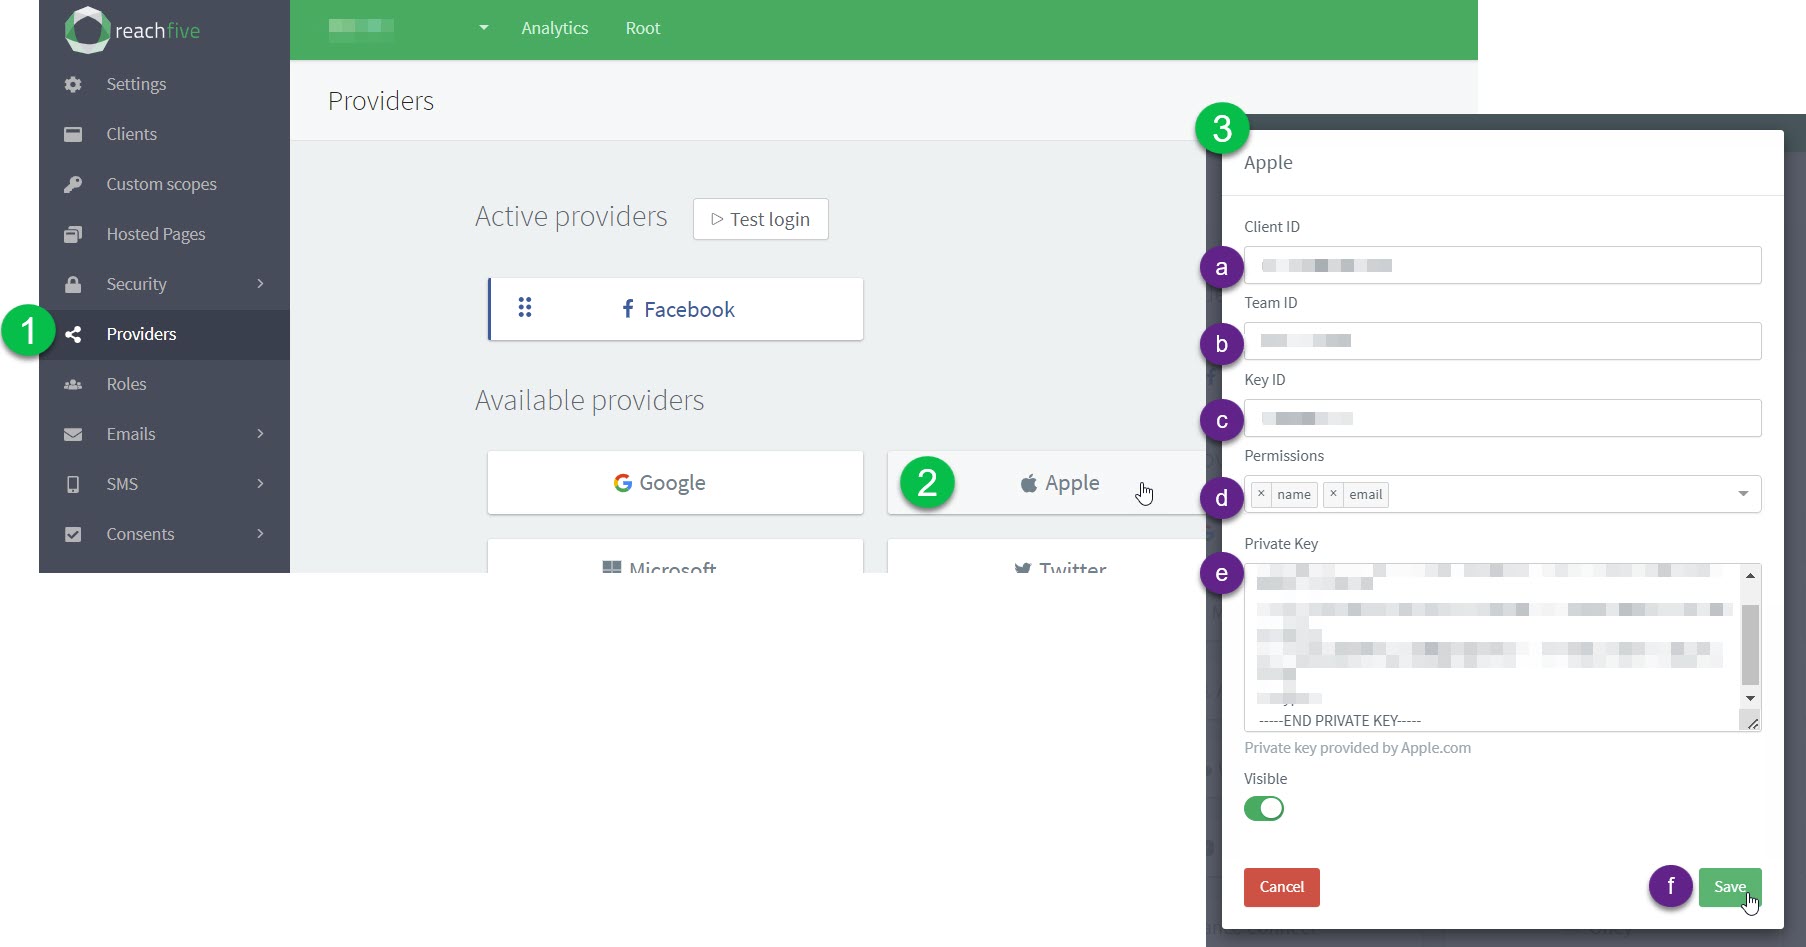
Go to Providers.
-
Click Apple.
-
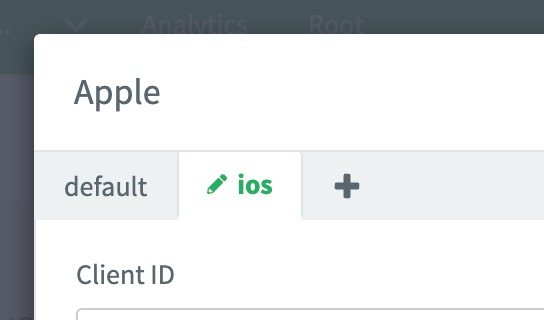
Edit the default tab or add a variant.
To create a variant, click the plus sign next to current tab in the dialog.
-
Fill in the dialog.
-
Enter your Client ID.
-
Enter your Team ID.
-
Enter your Key ID.
-
Select
nameandemailfor your Permissions. These are the default public profile values for Apple. -
Paste the private key (
.p8extension) that you downloaded earlier. -
Don’t forget to Save your input.
-
Go further
Want to make sure your users see your App Name while authenticating or need to make an edit on the Apple side of things? Check out Edit your Apple app name.
Implementing your own buttons
If you want to implement your own button and not use our widget, be sure to closely follow the Apple Guidelines.
