Managing users from the ReachFive Console
You can manage users directly from the ReachFive Console. This includes being able to view a user’s recent activities and important information about the user such as ID, name, email, and other identifiable information. You can also login as a user for testing, revoke tokens, and more.
User profiles
When viewing a user profile from the ReachFive Console, you’re able to see critical information such as:
| Profile fields | Example card |
|---|---|
|

|
This is all viewable in the user profile card. To view this card:
-
Log in to your ReachFive Console.
-
Go to .
-
Click your desired user.
-
View the user information on the card.
Search user profiles
You can search for user directly from the ReachFive Console. To do so:
-
Log in to your ReachFive Console.
-
Go to .
-
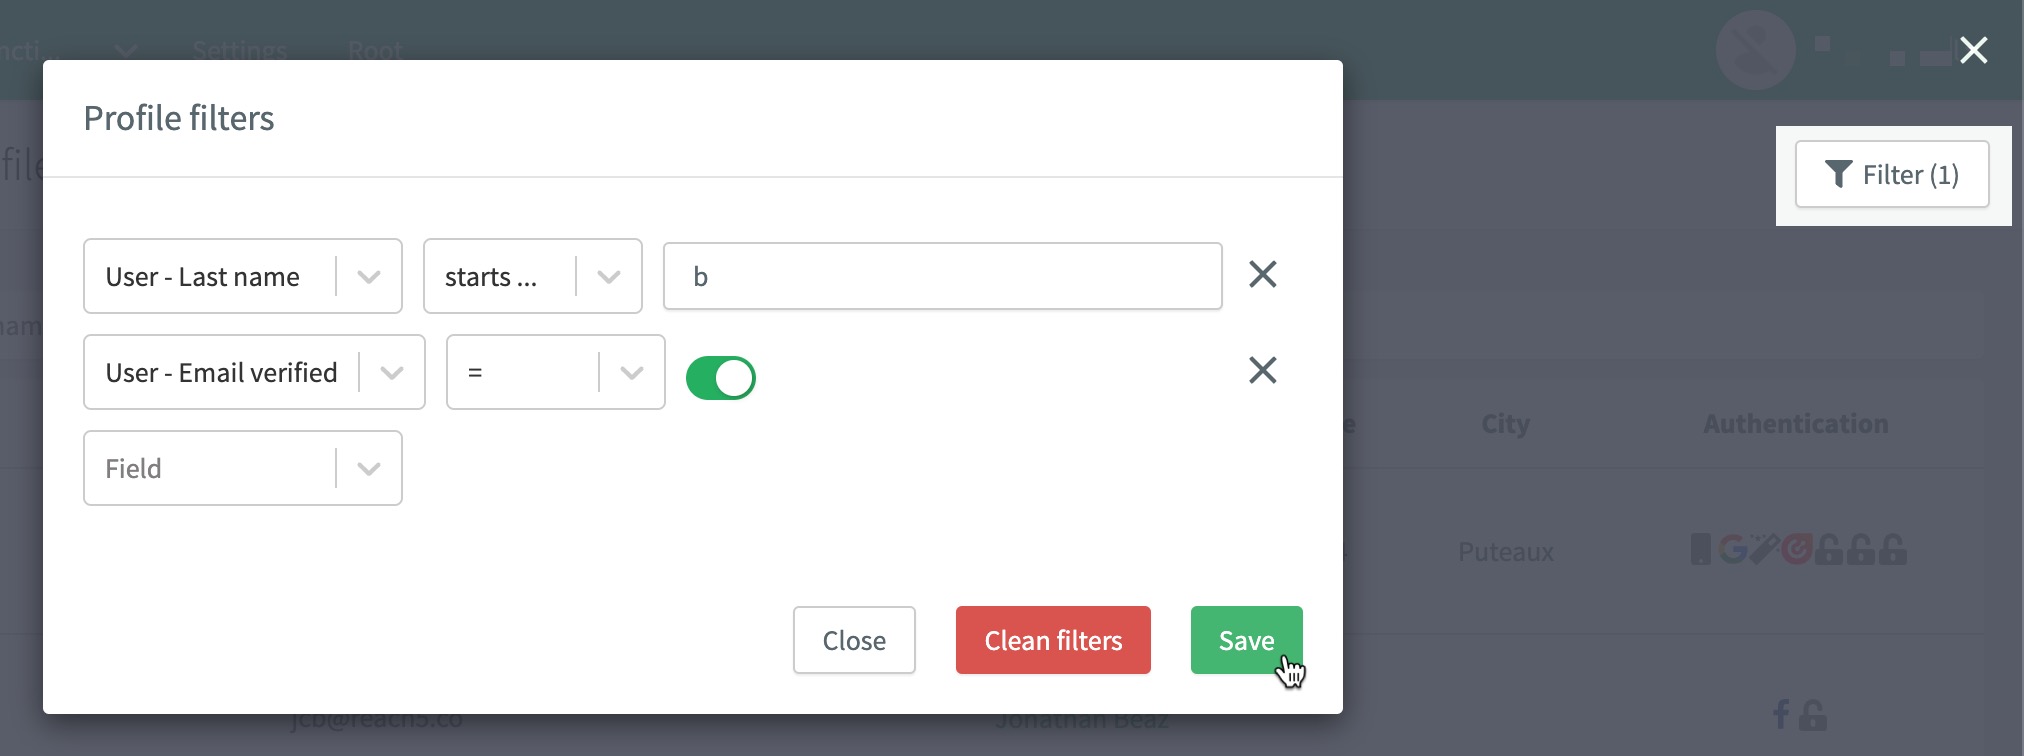
Use the search bar to search for users by name, email, phone number, or ReachFive ID. Apply filters as needed.

|
When searching for a string that is a custom field, you can toggle on full text search to ensure it returns all relevant results. 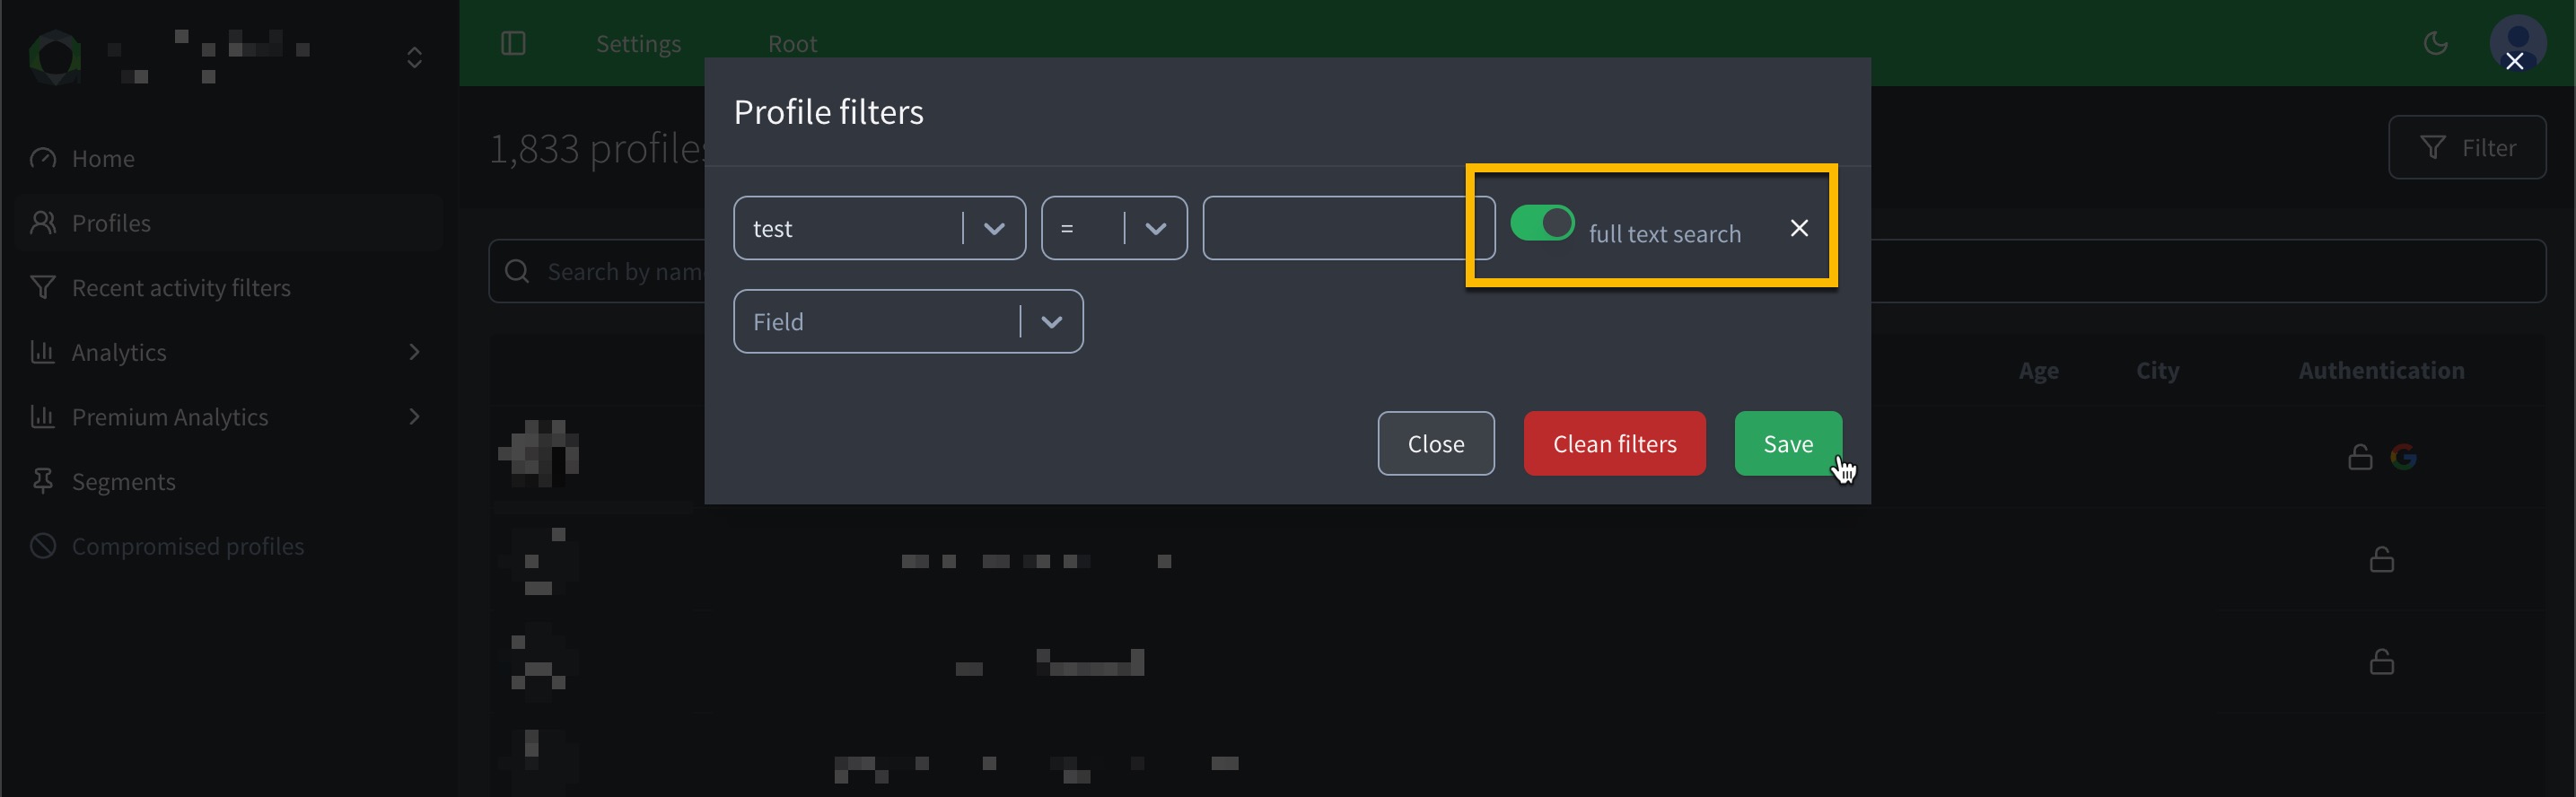
|
Default profiles view
By default, all user profiles are shown in your ReachFive Console. However, if you want to show no profiles by default and force your ReachFive Console users to use the filter options, you can enable the "Mandatory search filters" feature flag.
To enable the feature, you should contact your ReachFive Support or PS representative.
ReachFive User IDs
UUID v4 (Universally Unique Identifier) version 4 is a type of identifier used in ReachFive to ensure uniqueness across different entities. UUIDs are 128-bit values and are represented as a sequence of 32 hexadecimal digits with 4 hyphens, displayed in five groups separated by hyphens.
550e8400-e29b-41d4-a716-446655440000 (1)| 1 | There are 36 characters in total length for the user ID in this format. |
Currently in ReachFive, you should see most of your users' IDs in UUID v4 format meaning they are 36 characters and you can anticipate this for API responses and other use cases. However, some legacy lengths still exist, typically 20 characters for a user ID.
In the case where you see 20 characters, this is also acceptable as it is the timeBase64UUID format.
AOPgRfJ3a2f4FgH_5v9e (1)| 1 | There are 20 characters in total length for the user ID in this format. |
| If you are unsure about your users' IDs and the associated lengths, feel free to contact ReachFive support. |
Recent activity
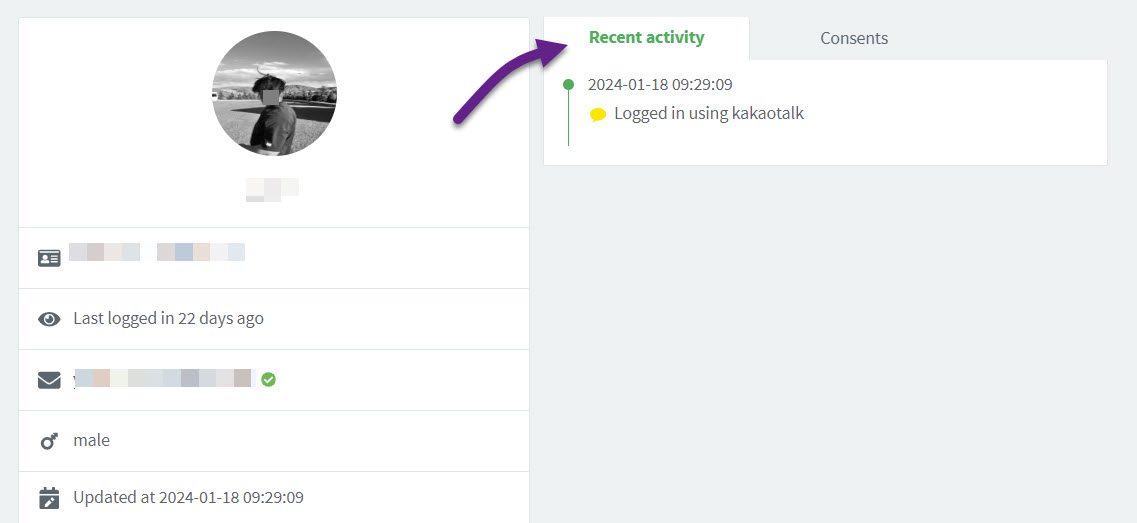
You can also view a user’s recent activity to see what actions a user is taking. This ranges from logins and users unlinking social providers, to requesting password resets, and more. Notably, it also includes information when it is detected that a user has leaked credentials and specifies the channel through which it was detected. The User events expandable below shows a representative list. You can always see more details in User Events.
To view this card:
-
Log in to your ReachFive Console.
-
Go to .
-
Click your desired user.
-
Click the Recent activity tab.
-
If desired, filter the activity list by clicking Filter.
The steps below are an excerpt from Recent activity filter.
To apply a recent activity filter:
-
Go to .
-
Select the user profile to which you want to apply the filter.
-
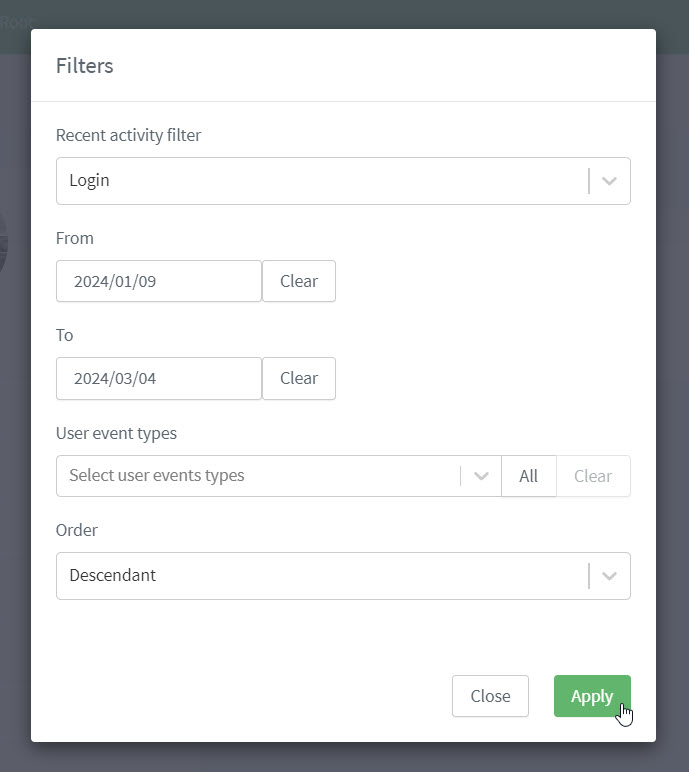
Click Filters.
-
Choose a predefined Recent activity filter.
-
optional Choose the date range for the filter from the date pickers.
-
optional You can apply a bespoke filter (or add additional events):
-
Select more User event types..
-
Choose if you want to display the results in reverse chronological order (descending) or chronological order (ascending).
-
== Set default filter
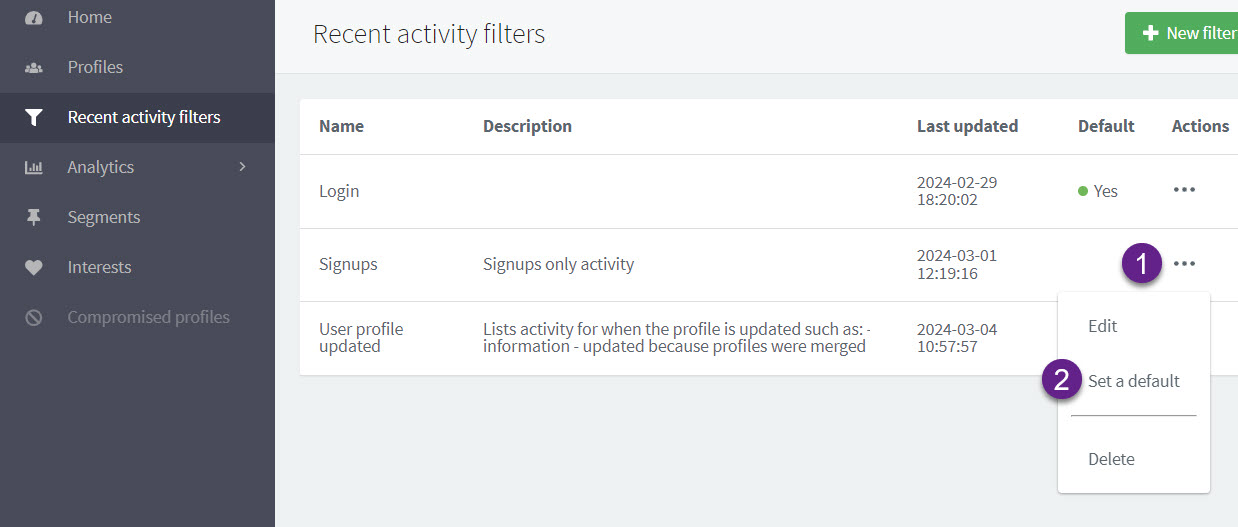
If you have multiple filters configured, you can choose the default filter.
-
Go to in your ReachFive Console.
-
Go to your desired filter.
-
Under the Actions column, click the ellipsis (three dots).
-
Click Set as default.
-
-
-
View the user’s activities. You can see full details on an individual event by clicking Show more. You can see details for all events by enabling the new Show all details toggle.
User consents
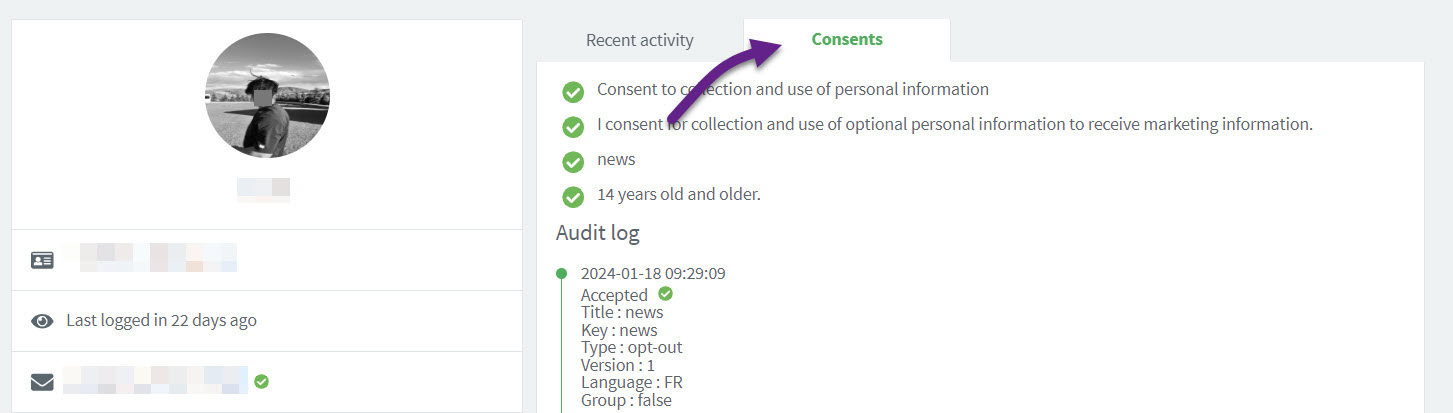
You can also view user consents to see what a user has consented to (or opted out of). This is viewable in the user’s Consents tab.
To view this card:
-
Log in to your ReachFive Console.
-
Go to .
-
Click your desired user.
-
Click the Consents tab.
-
View the consents.
Third-party consents
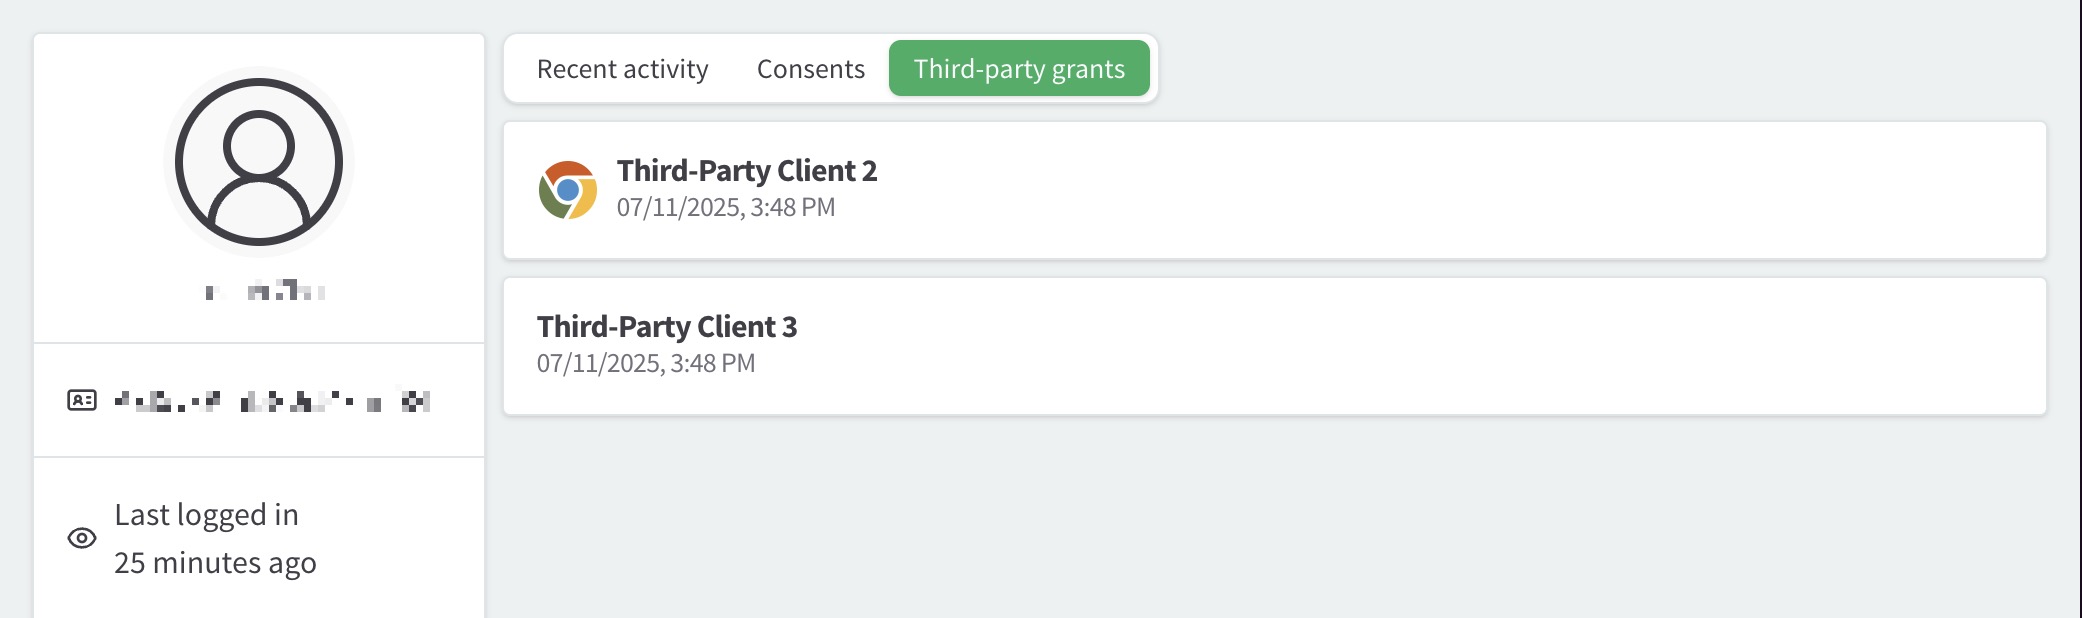
You can view third-party consents in the user’s Third-party consents tab.
To view this card:
-
Log in to your ReachFive Console.
-
Go to .
-
Click your desired user.
-
Click the Third-party consents tab.
-
View the third-party consents.
Actions
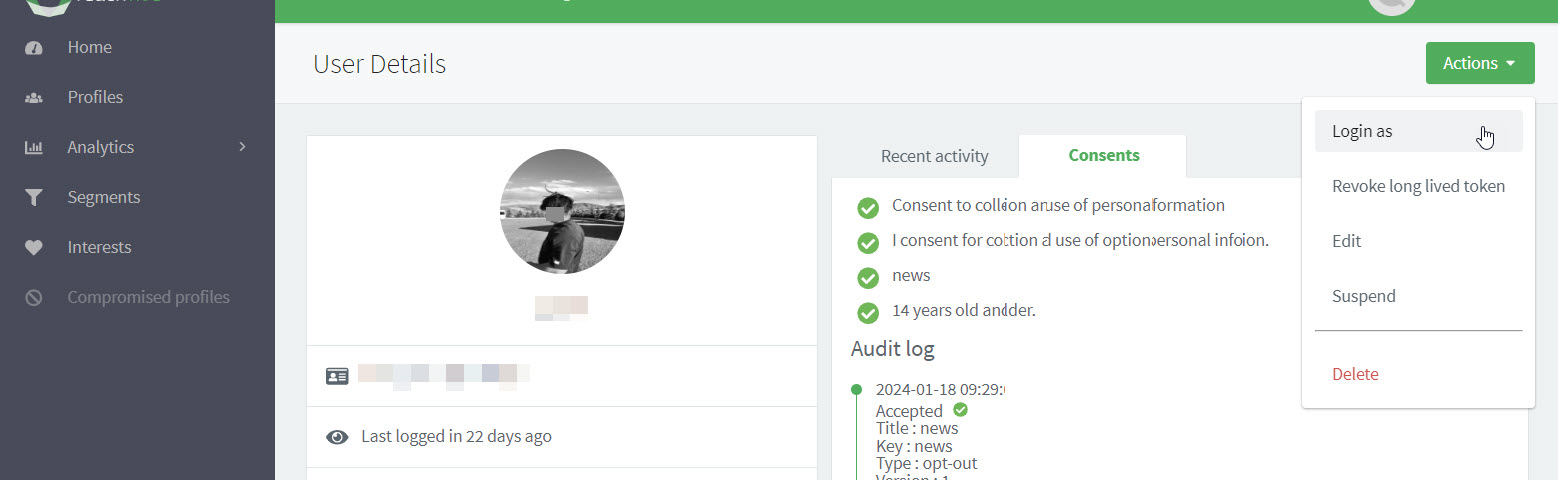
In case you need to take actions for a particular user profile, you can do this directly from a user’s profile page.
-
Log in to your ReachFive Console.
-
Go to .
-
Click your desired user.
-
Click the Actions button.
-
Choose your desired actions.
-
Login as: Login as a user. See Login as for more details.
-
Revoke long lived token: Invalidates refresh tokens so a user must login again.
-
Edit: Edit the user profile page.
-
Suspend: Suspend a user. See User suspension for more details.
-
Delete: Delete the user.
-
Session devices
You can view and manage a user’s active session devices directly in the ReachFive Console.
For full details on session device management, endpoints, and programmatic usage, see Session device management.