Shopify integration
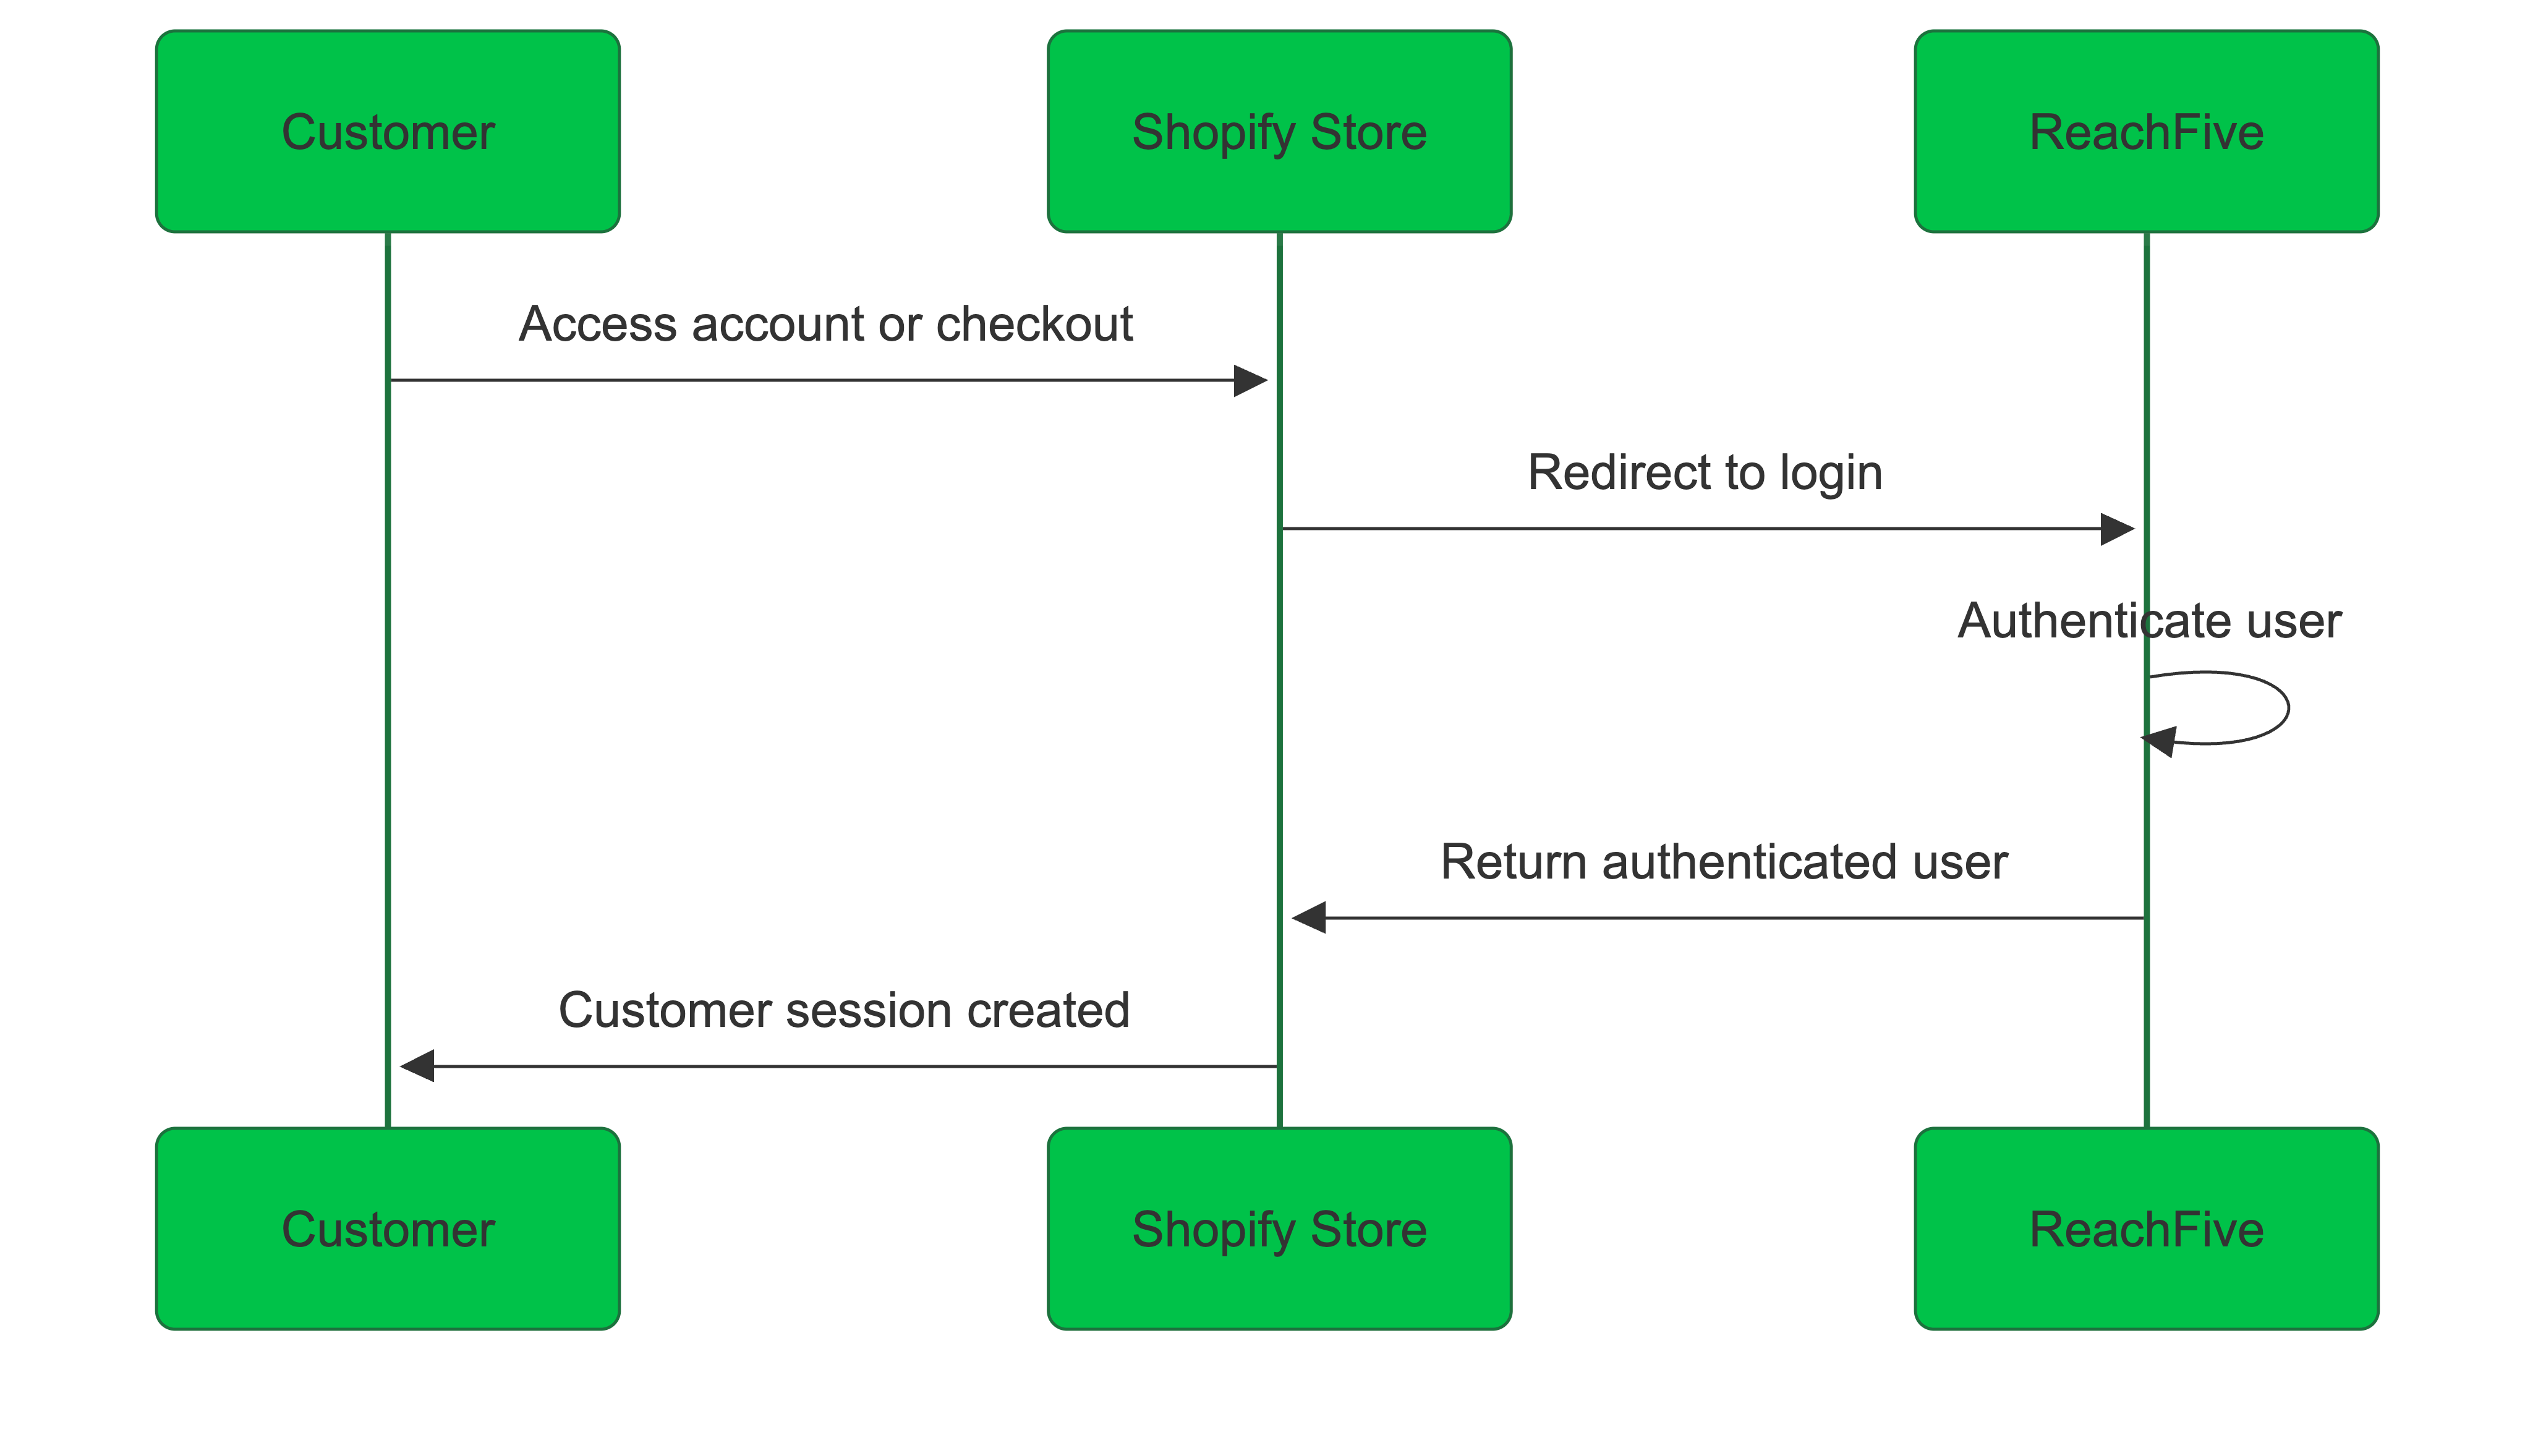
This document outlines how to configure Shopify as an OpenID Connect provider on ReachFive. This allows you to leverage ReachFive’s CIAM capabilities within your Shopify store, providing a seamless authentication experience for your customers.
| If you use Shopify Multipass for your legacy store, see the Legacy Shopify stores section for integration details. |
Prerequisites
To configure the Shopify integration, you need the following:
-
Access to your Shopify admin panel with permissions to manage customer accounts and authentication providers.
-
Access to the ReachFive Console with permissions to create and manage identity clients.
Shopify Configuration
First, you need to configure a new identity provider within your Shopify settings.
| The instructions here cover the steps necessary to set up the identity provider for Shopify integration. For full details on managing authentication providers in Shopify, refer to the Shopify documentation. |
-
In your Shopify admin panel, navigate to .
-
In the Authentication section, click Manage, and then Manage providers.
-
Click Connect a provider to create a new identity provider.
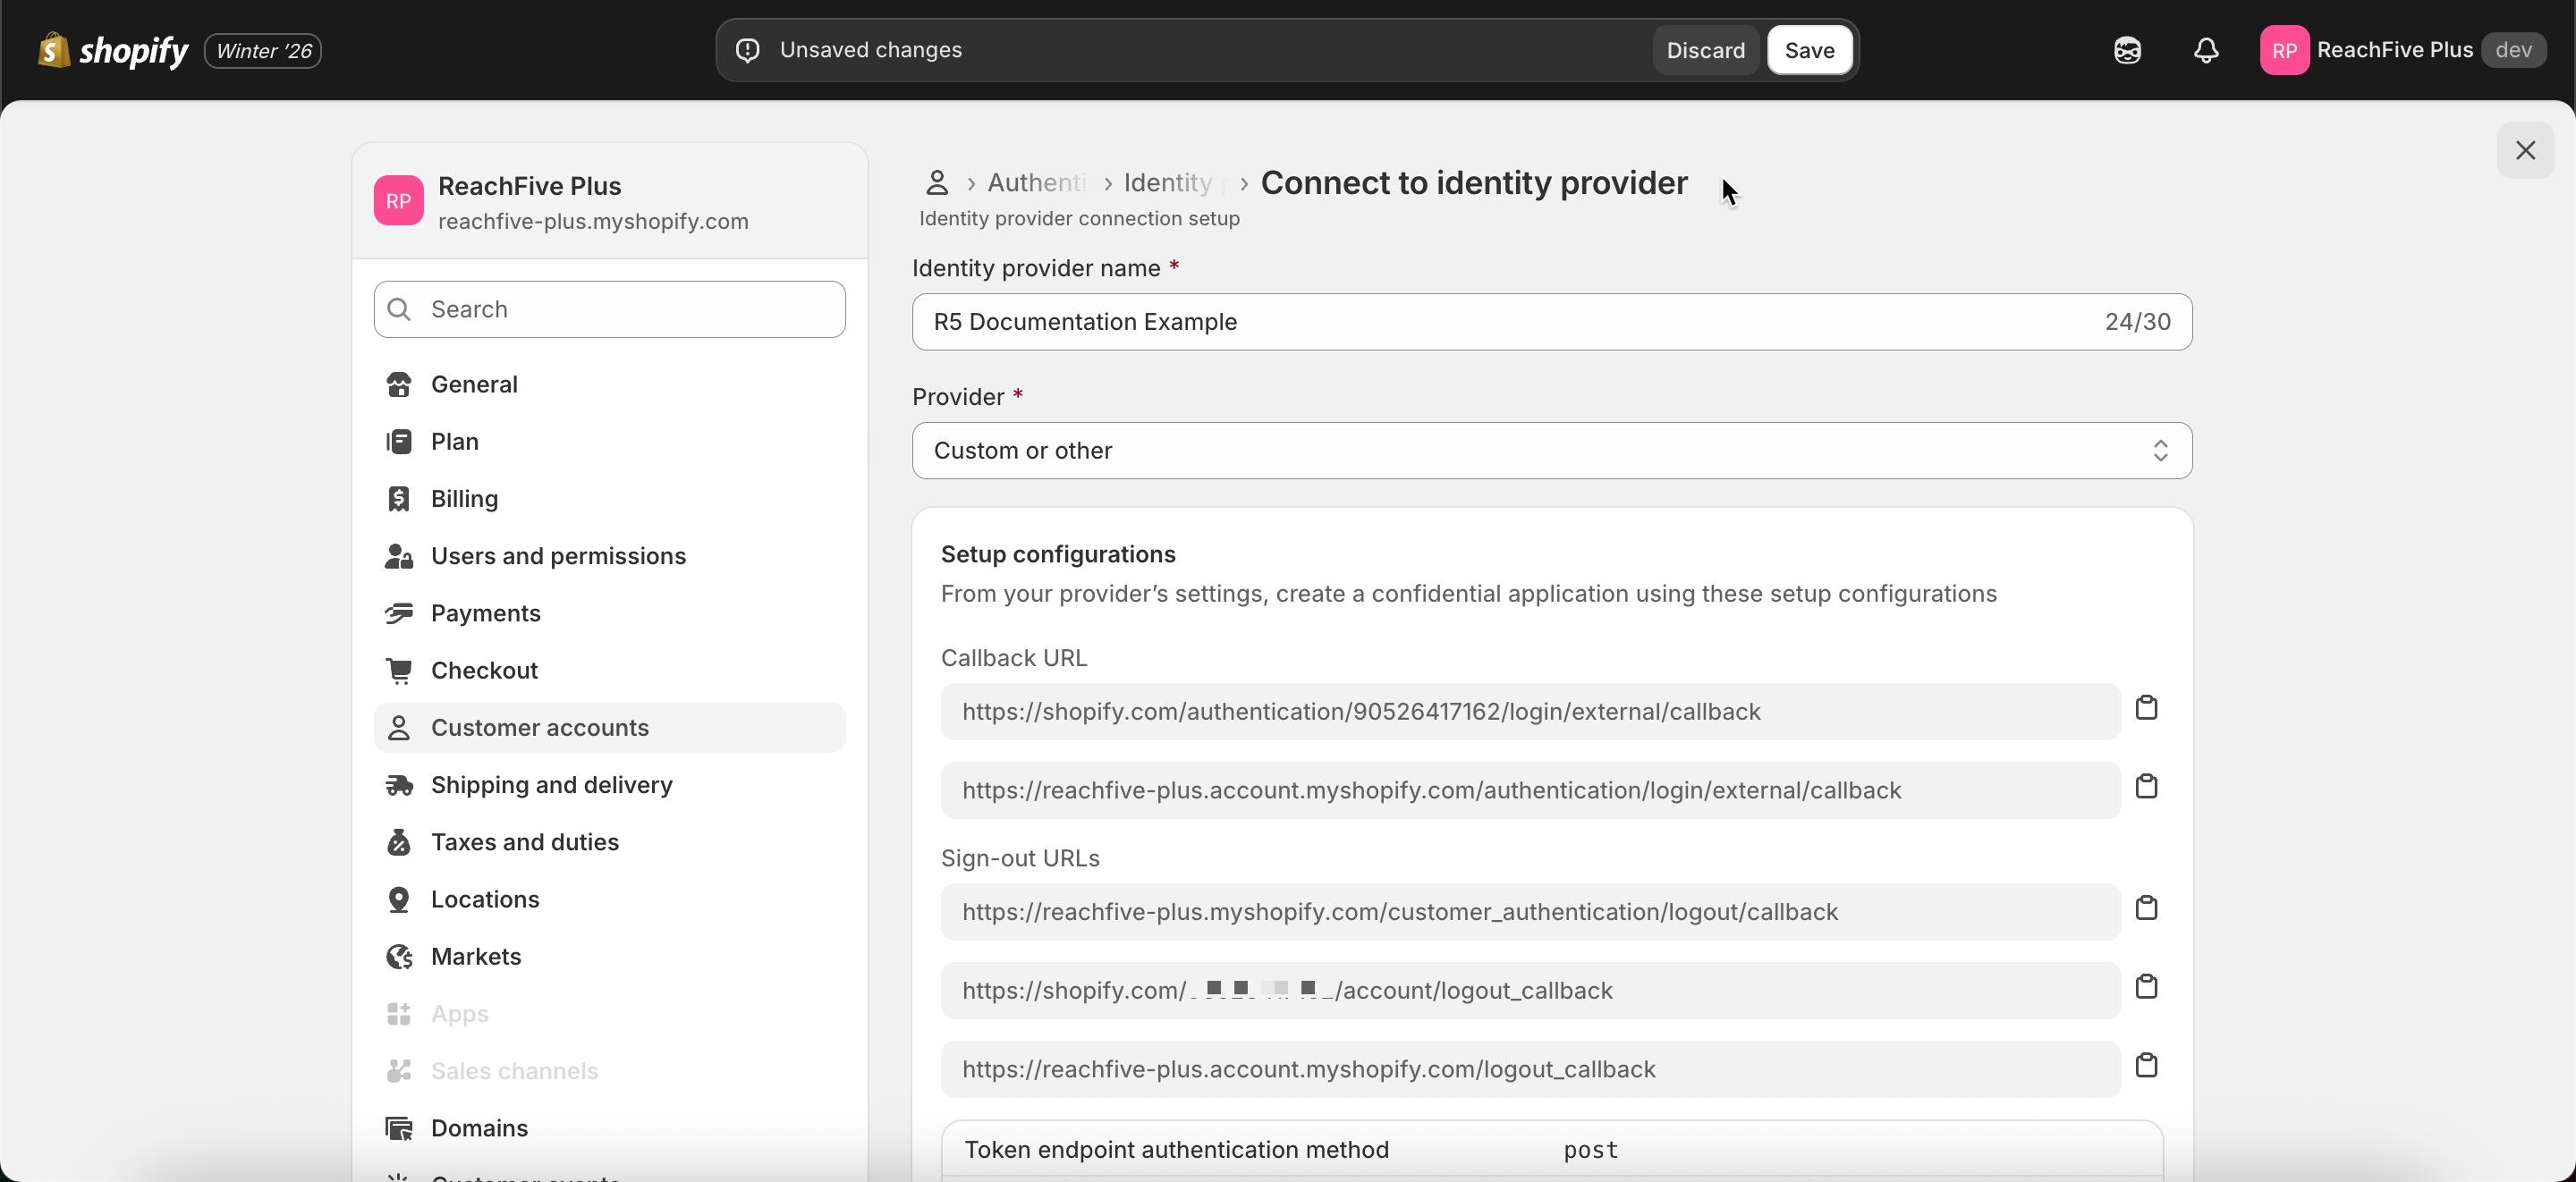 Connect a new provider in Shopify
 -
Configure the new provider with the following settings:
Setting Value Identity Provider Name
ReachFiveProvider
Custom or otherWell known URL
https://<YOUR_DOMAIN>/.well-known/openid-configurationClient ID
<YOUR_CLIENT_ID>To retrieve the Client ID or Client Secret from one of your existing clients:
-
Navigate to .
-
Choose your desired client.
-
Copy your Client ID.
-
Select the eye to reveal your Client Secret. Once revealed, highlight and copy.
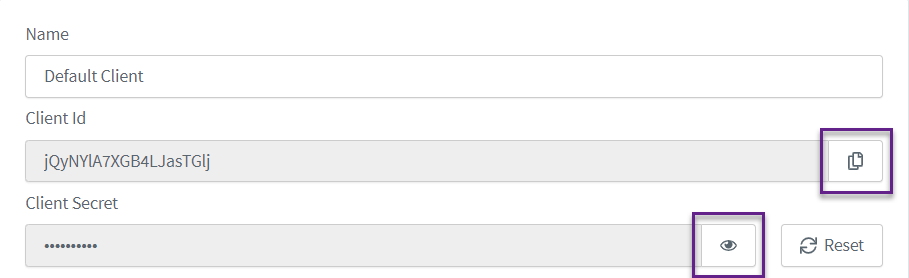
See Clients for more details.
Client Secret
<YOUR_CLIENT_SECRET>Scopes
Leave it blank. Shopify will use the default scopes defined in the ReachFive Console.
Post-sign-out redirect URI parameter name
redirect_to -
ReachFive configuration
Next, you need to create a corresponding First-party Identity client in the ReachFive Console. The instructions here cover the steps necessary to set up the client for Shopify integration. However, for full details on creating and managing clients, refer to the Clients documentation.
-
In the ReachFive Console, go to .
-
Click New client or choose an existing client.
-
Create a new First-party Identity client with the following configuration:
Setting Value Name
Give your client a descriptive name, e.g.,
Shopify Integration Client.Scopes
openid email(at a minimum)Token Endpoint Authentication Method
BasicAllowed Origins (CORS)
-
https://<YOUR_STORE_NAME>.account.myshopify.com -
https://<YOUR_STORE_NAME>.myshopify.com
Allowed Callback URLs
These are found under Settings > Customer accounts > <Account> > Setup configurations > Callback URL/Sign-out URLs in your Shopify admin panel.
-
https://shopify.com/authentication/<YOUR_STORE_ID>/login/external/callback -
https://<YOUR_STORE_NAME>.account.myshopify.com/authentication/login/external/callback -
https://<YOUR_STORE_NAME>.account.myshopify.com/account/authorize -
https://<YOUR_STORE_NAME>.myshopify.com/customer_authentication/logout/callback -
https://shopify.com/<YOUR_STORE_ID>/account/logout_callback -
https://<YOUR_STORE_NAME>.account.myshopify.com/logout_callback
Disable implicit flow
Enforce PKCE
Disable ROPC flow
Enable Refresh Tokens
JWT Algorithm
RS256Login url
Attach orchestration token
Include SSO cookie
Enforce scope
-
-
Go to in your ReachFive Console and configure the allowed callback URLs for SSO:

https://<YOUR_STORE_NAME>.myshopify.com/customer_authentication/logout/callback
https://shopify.com/<YOUR_STORE_ID>/account/logout_callback
https://<YOUR_STORE_NAME>.account.myshopify.com/logout_callback
Legacy Shopify stores
If you use Shopify Multipass for your legacy store, you can still integrate it with ReachFive. To do so, you need to create a custom Multipass implementation that uses our UI SDK.
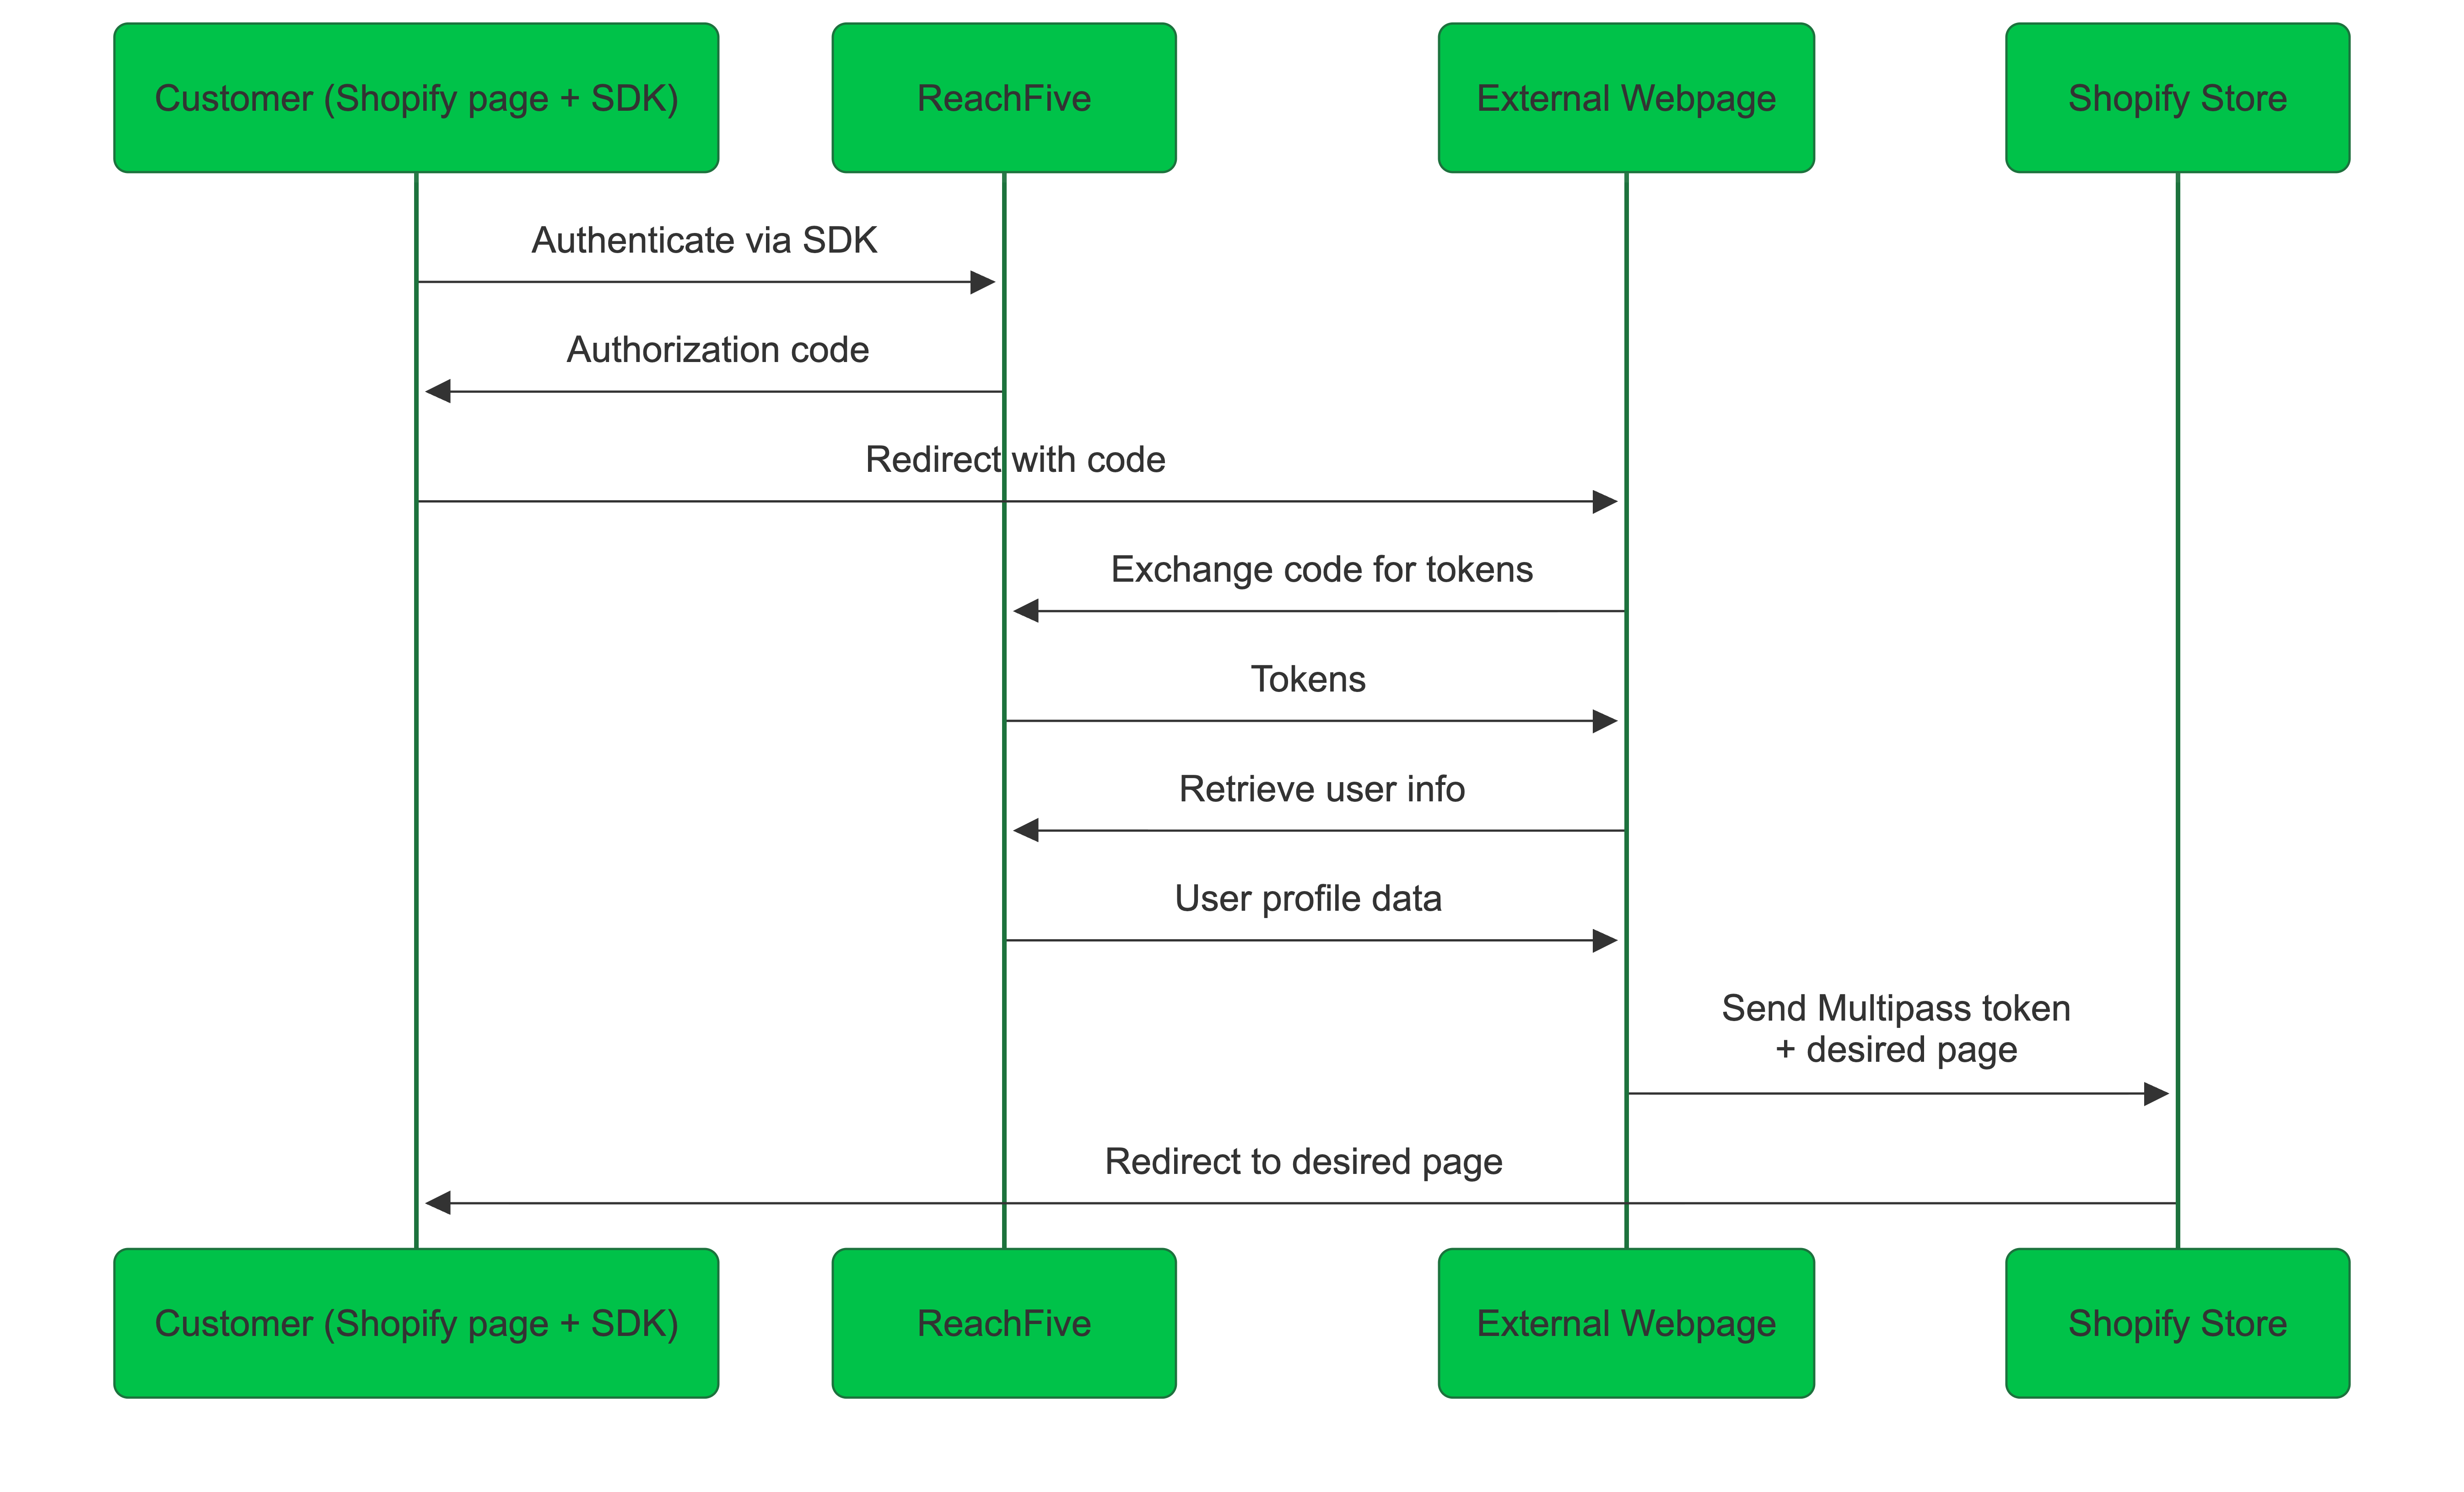
showAuth example for Shopify Multipass<script src="https://cdn.jsdelivr.net/npm/@reachfive/identity-ui@latest/umd/identity-ui.min.js"></script>
<script src="https://cdn.jsdelivr.net/npm/@reachfive/identity-core@latest/umd/identity-core.min.js"></script>
<script type="text/javascript">
const clientUI = reach5Widgets.createClient({
domain: 'demo.og4.me',
clientId: 'XXX',
language: 'fr'
});
clientUI.showAuth({
container: 'auth-container',
auth: {
redirectUri: 'XXX',
responseType: 'code',
requireRefreshToken: true
},
signupFields: [
'gender',
'given_name',
'family_name',
{ key: 'birthdate', required: false },
'email',
{ key: 'phone_number', required: false },
'password',
'consents.newsletter'
],
allowLogin: true,
allowSignup: true,
allowForgotPassword: true,
allowQuickLogin: true,
allowWebAuthnLogin: true,
allowWebAuthnSignup: true,
canShowPassword: true,
initialScreen: 'login',
socialProviders: ['google','apple','facebook','line'],
countryCode: 'FR',
redirectUrl: 'XXX',
allowPhoneNumberResetPassword: true,
phoneNumberOptions: {
withCountrySelect: true
},
theme: {
primaryColor: "#000000",
borderRadius: '25',
socialButton: {
inline: true
}
}
});
</script>
<div id="auth-container"></div>