10 October 2024 (v2.121)
ReachFive v2.121 introduces a few improvements and needed bug fixes.
We have several updates to our UI SDK.
We also made some improvements to the Identity Fraud Protection feature.
You can now use a Custom login page with your Third-party Identity clients.
As always, we fixed a few items for you.
UI SDK updates
There are several updates to the UI SDK as part of the UI SDK version 1.28.0 release.
This includes:
-
A new
phoneNumberOptionsparameter. -
The ability to use i18n keys to override social login page titles.
-
The ability to use a visual marker for required fields.
allowAuthentMailPhone parameter
You may only want your users to authenticate using a custom identifier. In cases like this, it’s important to hide the option to login with an email or phone number.
With this in mind, we’ve introduced the allowAuthentMailPhone parameter.
The allowAuthentMailPhone parameter is a boolean that you can set to show (or not show) the email and/or phone number option to your users.
It is true by default, meaning your users will see the option unless you explicitly set it to false.
For more on this topic, see UI SDK: showAuth.allowAuthentMailPhone.
client.showAuth({
    container: 'auth-container',
    auth: {
      redirectUri: 'https://example.com/auth-callback'
    },
    allowAuthentMailPhone: false (1)
})| 1 | In this case, users don’t see the option to authenticate with email or phone number. |
phoneNumberOptions parameter
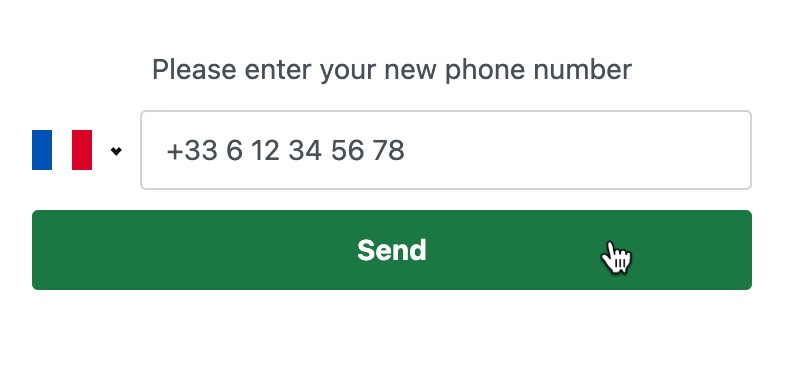
You now also have the option to display a country code option in any widget where phone numbers are displayed, meaning users can select the country from the dropdown menu.
To display the country code, you have to use the new phoneNumberOptions object that allows you to set a the withCountrySelect boolean to true.
Otherwise, the country code selected when you instantiated the UI SDK is used.
If you didn’t select a country code at instantiation, no country code is shown.
For more on this topic, see UI SDK: showAuth.phoneNumberOptions.

client.showAuth({
    container: 'auth-container',
    auth: {
      redirectUri: 'https://example.com/auth-callback'
    },
    phoneNumberOptions: {
      withCountrySelect: true (1)
    }
})| 1 | In this case, users are shown the option to select a country for their mobile number.
By default, withCountrySelect is false. |
Use i18n keys to override text
You can now override a social login button text by with an i18n key.
For example, if you wanted to use Korean (한국인) (or another one of our Supported languages) for the login title, you could do it this way.
For more on this topic, see UI SDK: showAuth.i18n.
client.showAuth({
    container: 'auth-container',
    auth: {
      redirectUri: 'https://example.com/auth-callback'
    },
    i18n: {
      "socialButton.kakaoTalk.title": "카카오톡으로 로그인" (1)
    }
})| 1 | Users see "카카오톡으로 로그인" (Log in with KakaoTalk) for the KakaoTalk login option in this example. |
Visual marker for required fields
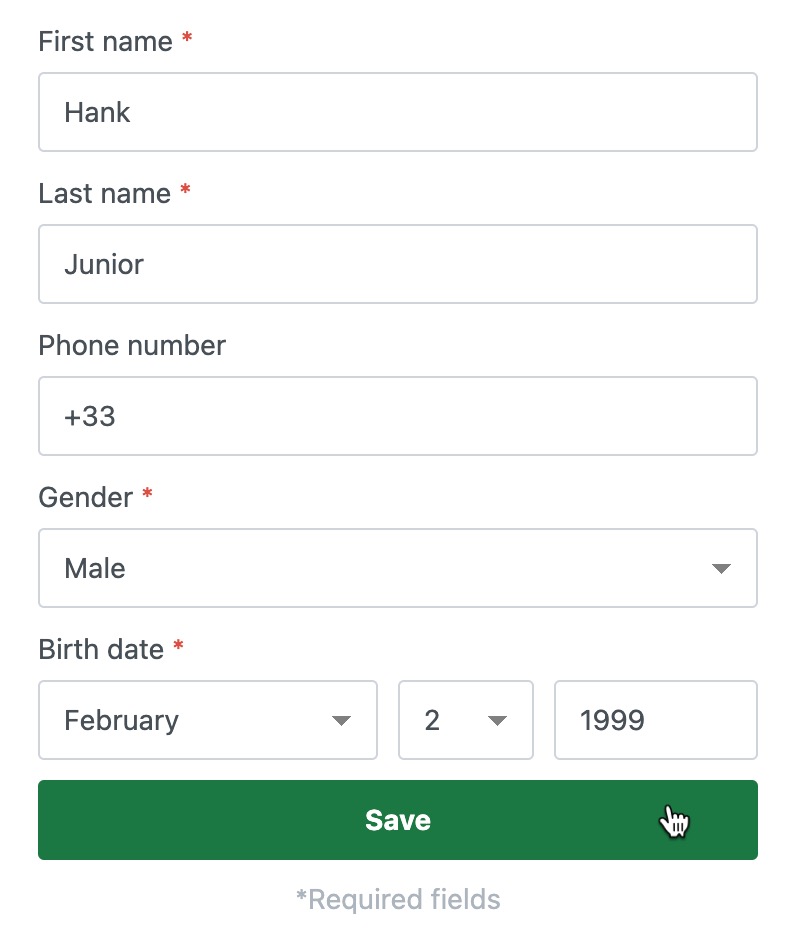
You can now ensure users better know which fields are required in your forms with the showLabels parameter.
When set to true, the widget shows which fields are required with an asterisk (*) next to the required field.
When set to false, the widget does not show which fields are required.
For more on this topic, see UI SDK: showAuth.showLabels.

client.showAuth({
    container: 'auth-container',
    auth: {
      redirectUri: 'https://example.com/auth-callback'
    },
    showLabels: true (1)
})| 1 | In this case, users see the asterisk (*) next to required fields. |
Identity fraud protection updates
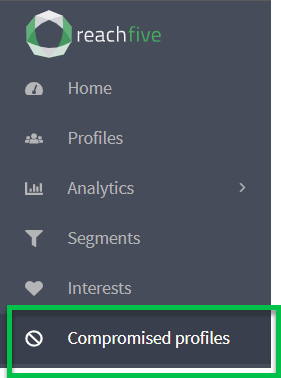
We’ve made some updates to the Identity Fraud Protection which ensures that compromised profiles listed in the ReachFive Console have even more accuracy on the identifier type ensuring optimal protection for your site.
To view compromised profiles:
-
Log in to your ReachFive Console.
-
Go to Analytics.
-
Select Compromised profiles.

OpenID as a Service updates
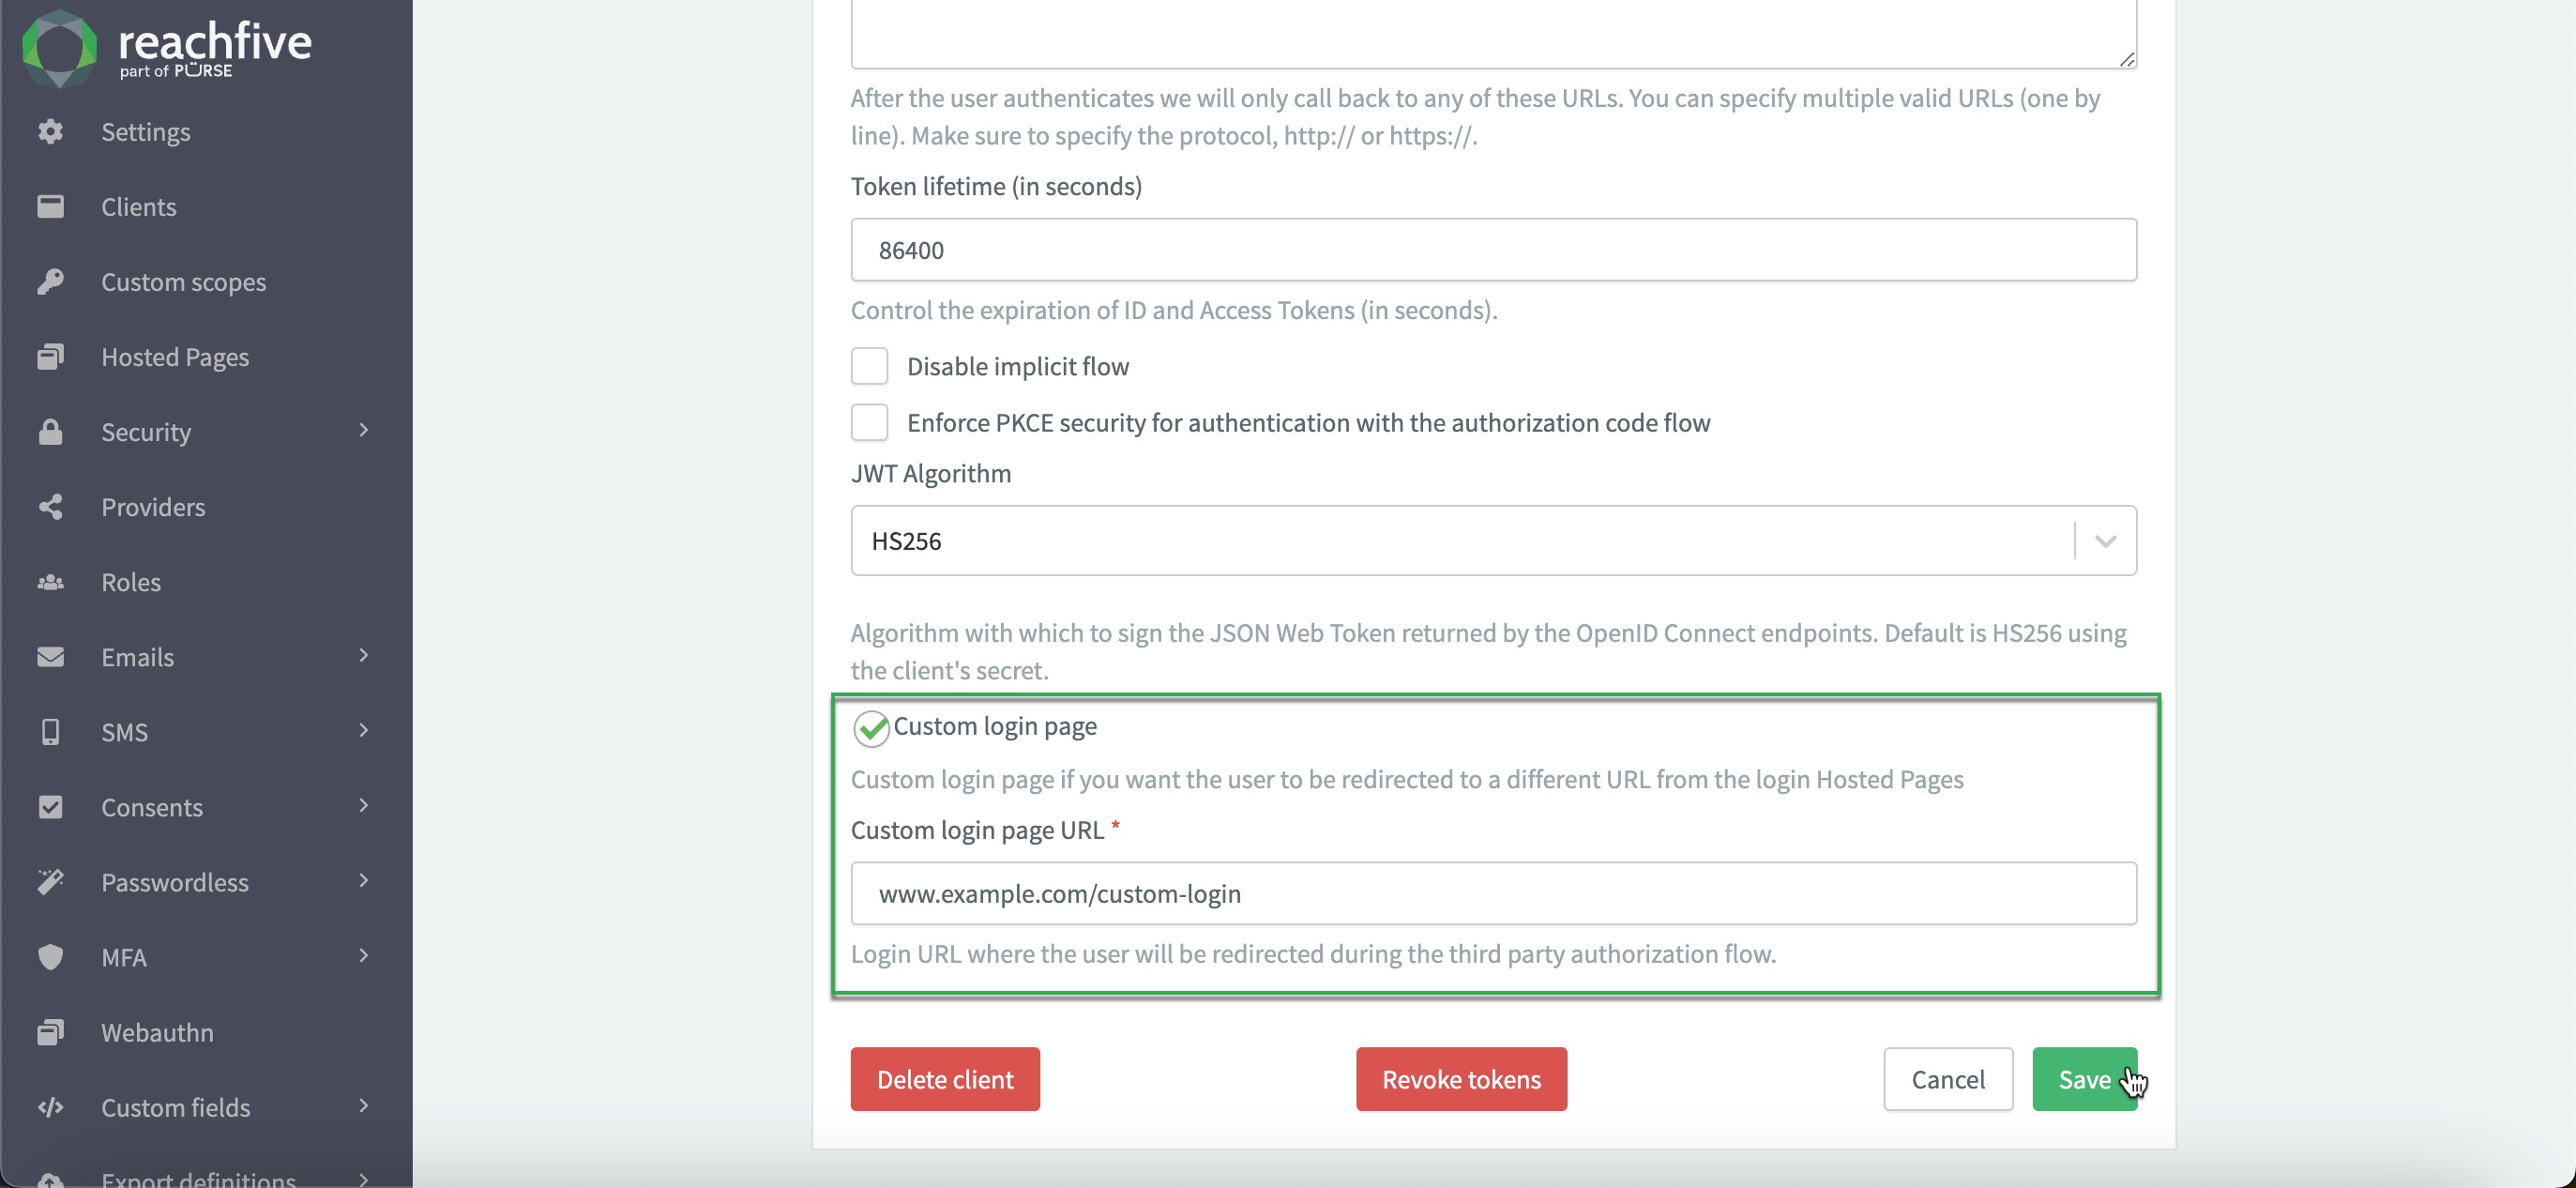
Our OpenID as a service feature now lets you use a Custom Login URL. This means you no longer are required to use the Hosted Pages login page as part of the implementation.
If you do not explicitly enable the Custom login page feature, the Hosted Pages login is still used.
To enable the feature:
-
Log in to your ReachFive Console.
-
Go to .
-
Choose your desired Third-party Identity client.
-
Scroll down until you see Custom login page.
-
Click Custom login page.
-
Enter your custom login page URL.
