FIDO2
Introduction
This guide explains how to implement the FIDO2 registration and authentication workflow on Android applications. You’ll find a detailed introduction about FIDO2 in our FIDO2 guide.
| The following code samples and screenshots are issued from our example application using our SDK. Feel free to check out the Github project. |
FIDO2 Prerequisites
To successfully enable FIDO2:
-
Enable the WebAuthn feature on your ReachFive account.
You may need to contact support to have this enabled if you do not see it on your ReachFive Console. -
From your ReachFive console:
-
Navigate to Settings > WebAuthn.
-
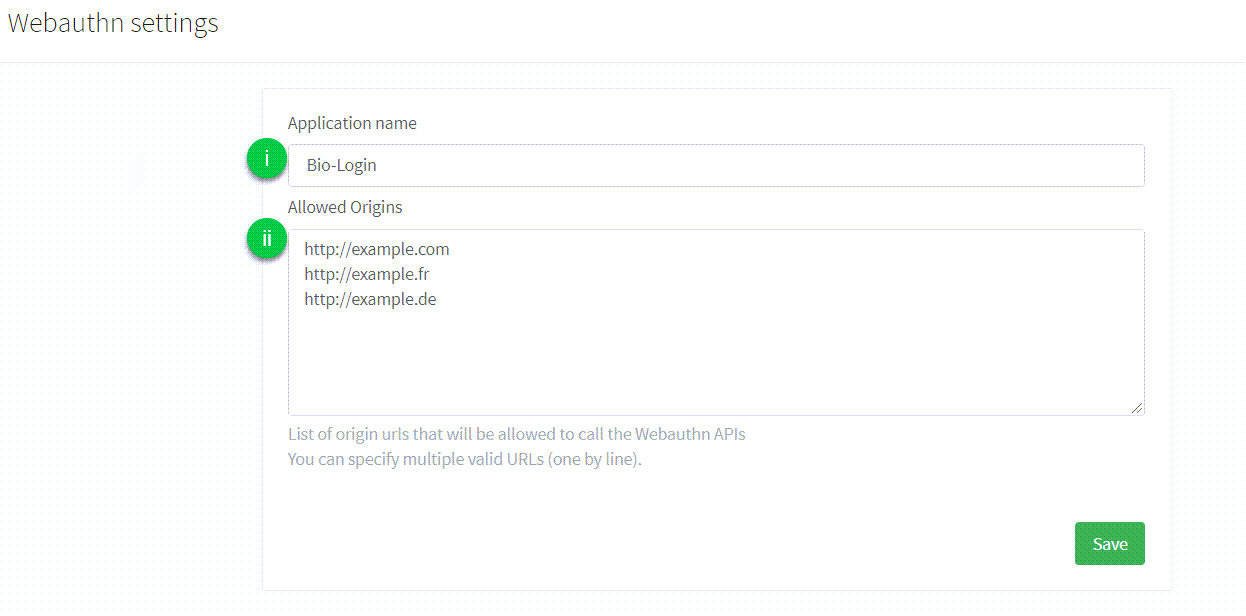
Configure the following:
-
Application name: the name of the application that is displayed to the user during the FIDO2 Registration or Authentication process. There are no particular restrictions on what you can use here. -
Allowed origins: the list of URLs that are allowed to make calls to the API endpoints provided by ReachFive to perform the FIDO2 Registration or Authentication process.
-
-
- You also need
-
-
An Android device with a fingerprint sensor or a configured screen lock.
-
Android OS 7 or later.
Make sure to register a fingerprint (or screenlock). -
To install our SDK Core which exposes all of the FIDO2 methods.
-
To include the play-services-fido library as a dependency. To do this, go to your
appfolder and add the following to thebuild.gradlefile underdependencies.dependencies { ... implementation "com.google.android.gms:play-services-fido:18.1.0" ... }
-
Initialize
Digital Asset Links
You need to host a Digital Asset Links JSON file on https://<your_domain>/.well-known/assetlinks.json to allow the application to use FIDO2 APIs to register and sign credentials for that domain.
In our application example, we are:
-
Creating a Firebase Hosting project to host the digital asset link.
-
Setting the
domainto<your_domain>. -
Hosting the
assetlinks.jsonathttps://<your_domain>/.well-known/assetlinks.json.
[
  {
    "relation": ["delegate_permission/common.handle_all_urls","delegate_permission/common.get_login_creds"],
    "target": {
      "namespace": "android_app",
      "package_name": "com.reach5.identity.sdk.demo", (1)
      "sha256_cert_fingerprints": [ (2)
        "AF:C8:F2:4C:AF:46:AA:5B:74:7B:8D:47:4D:82:A6:D1:FF:98:BF:A6:16:D0:D0:82:E8:9A:D0:8C:13:EB:B9:CE"
      ]
    }
  }
]
In the assetlinks.json file sample above:
-
package_namematches theapplicationIdin thebuild.gradlefile. -
sha256_cert_fingerprintsmatches the fingerprint of the signing key.
| Refer to Android Studio’s Generate and register an upload certificate page to generate a public certificate. |
Allowed origins
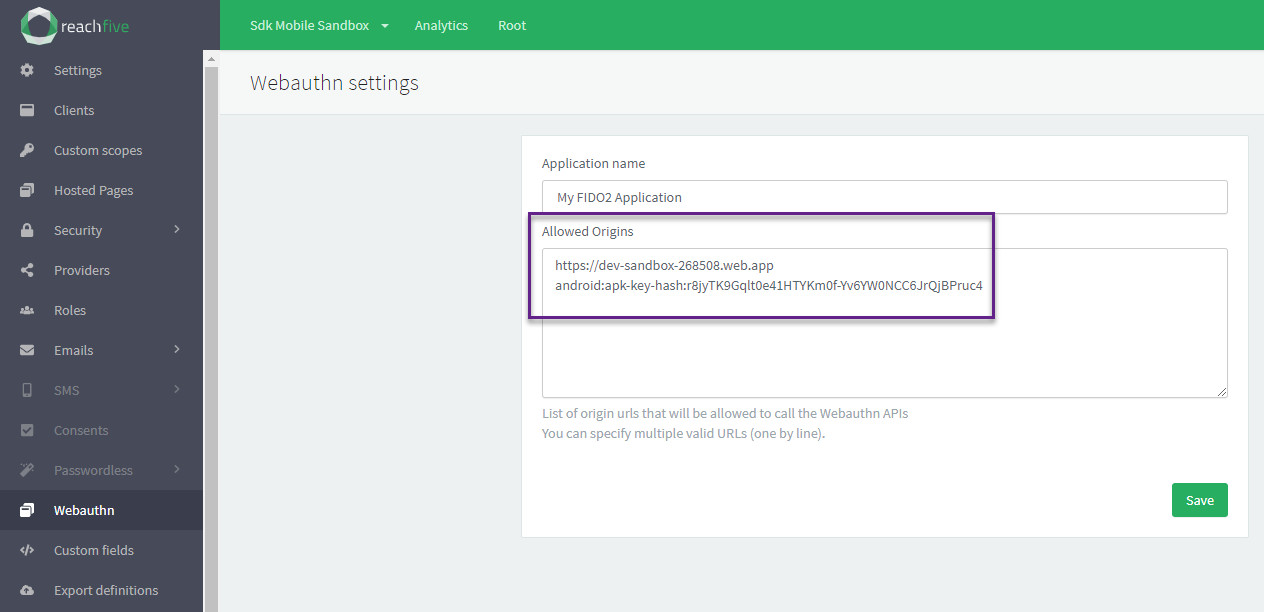
In the ReachFive Console, under you must allow:
-
the domain on which the Digital Asset Links file is hosted
-
the Facet ID
|
The Facet ID is the platform-specific identifier (URI). It matches the format You can compute the Facet ID with the command below: |
Redirection
To exhange a one-time use authentication token with the user’s access token at the end of a Webauthn flow (signup or login), you need to allow the callback URI.
-
In your
AndroidManifest.xmlfile, replace the@string/reachfive_client_id(1) variable with your ReachFive client ID.<activity android:name="com.reach5.identity.sdk.core.RedirectionActivity" android:screenOrientation="portrait"> <intent-filter> <action android:name="android.intent.action.VIEW" /> <category android:name="android.intent.category.DEFAULT" /> <category android:name="android.intent.category.BROWSABLE" /> <data android:scheme="reachfive" android:host="@string/reachfive_client_id" (1) android:pathPrefix="/callback" tools:ignore="AppLinkUrlError" /> </intent-filter> </activity>
-
In the ReachFive Console, you must whitelist
reachfive://${reachfive_client_id}/callbackin the Allowed Callback URLs section of your Identity client.
Signup
The user requests to register a new account for the first time. Users don’t need to provide a password, but instead provide an identifier like an email or mobile number as well as some personal data.
The data they provide in the signup process is reflected in the profile option in the signupWithWebAuthn method.
|
- Subsection
-
Jump to the signup process
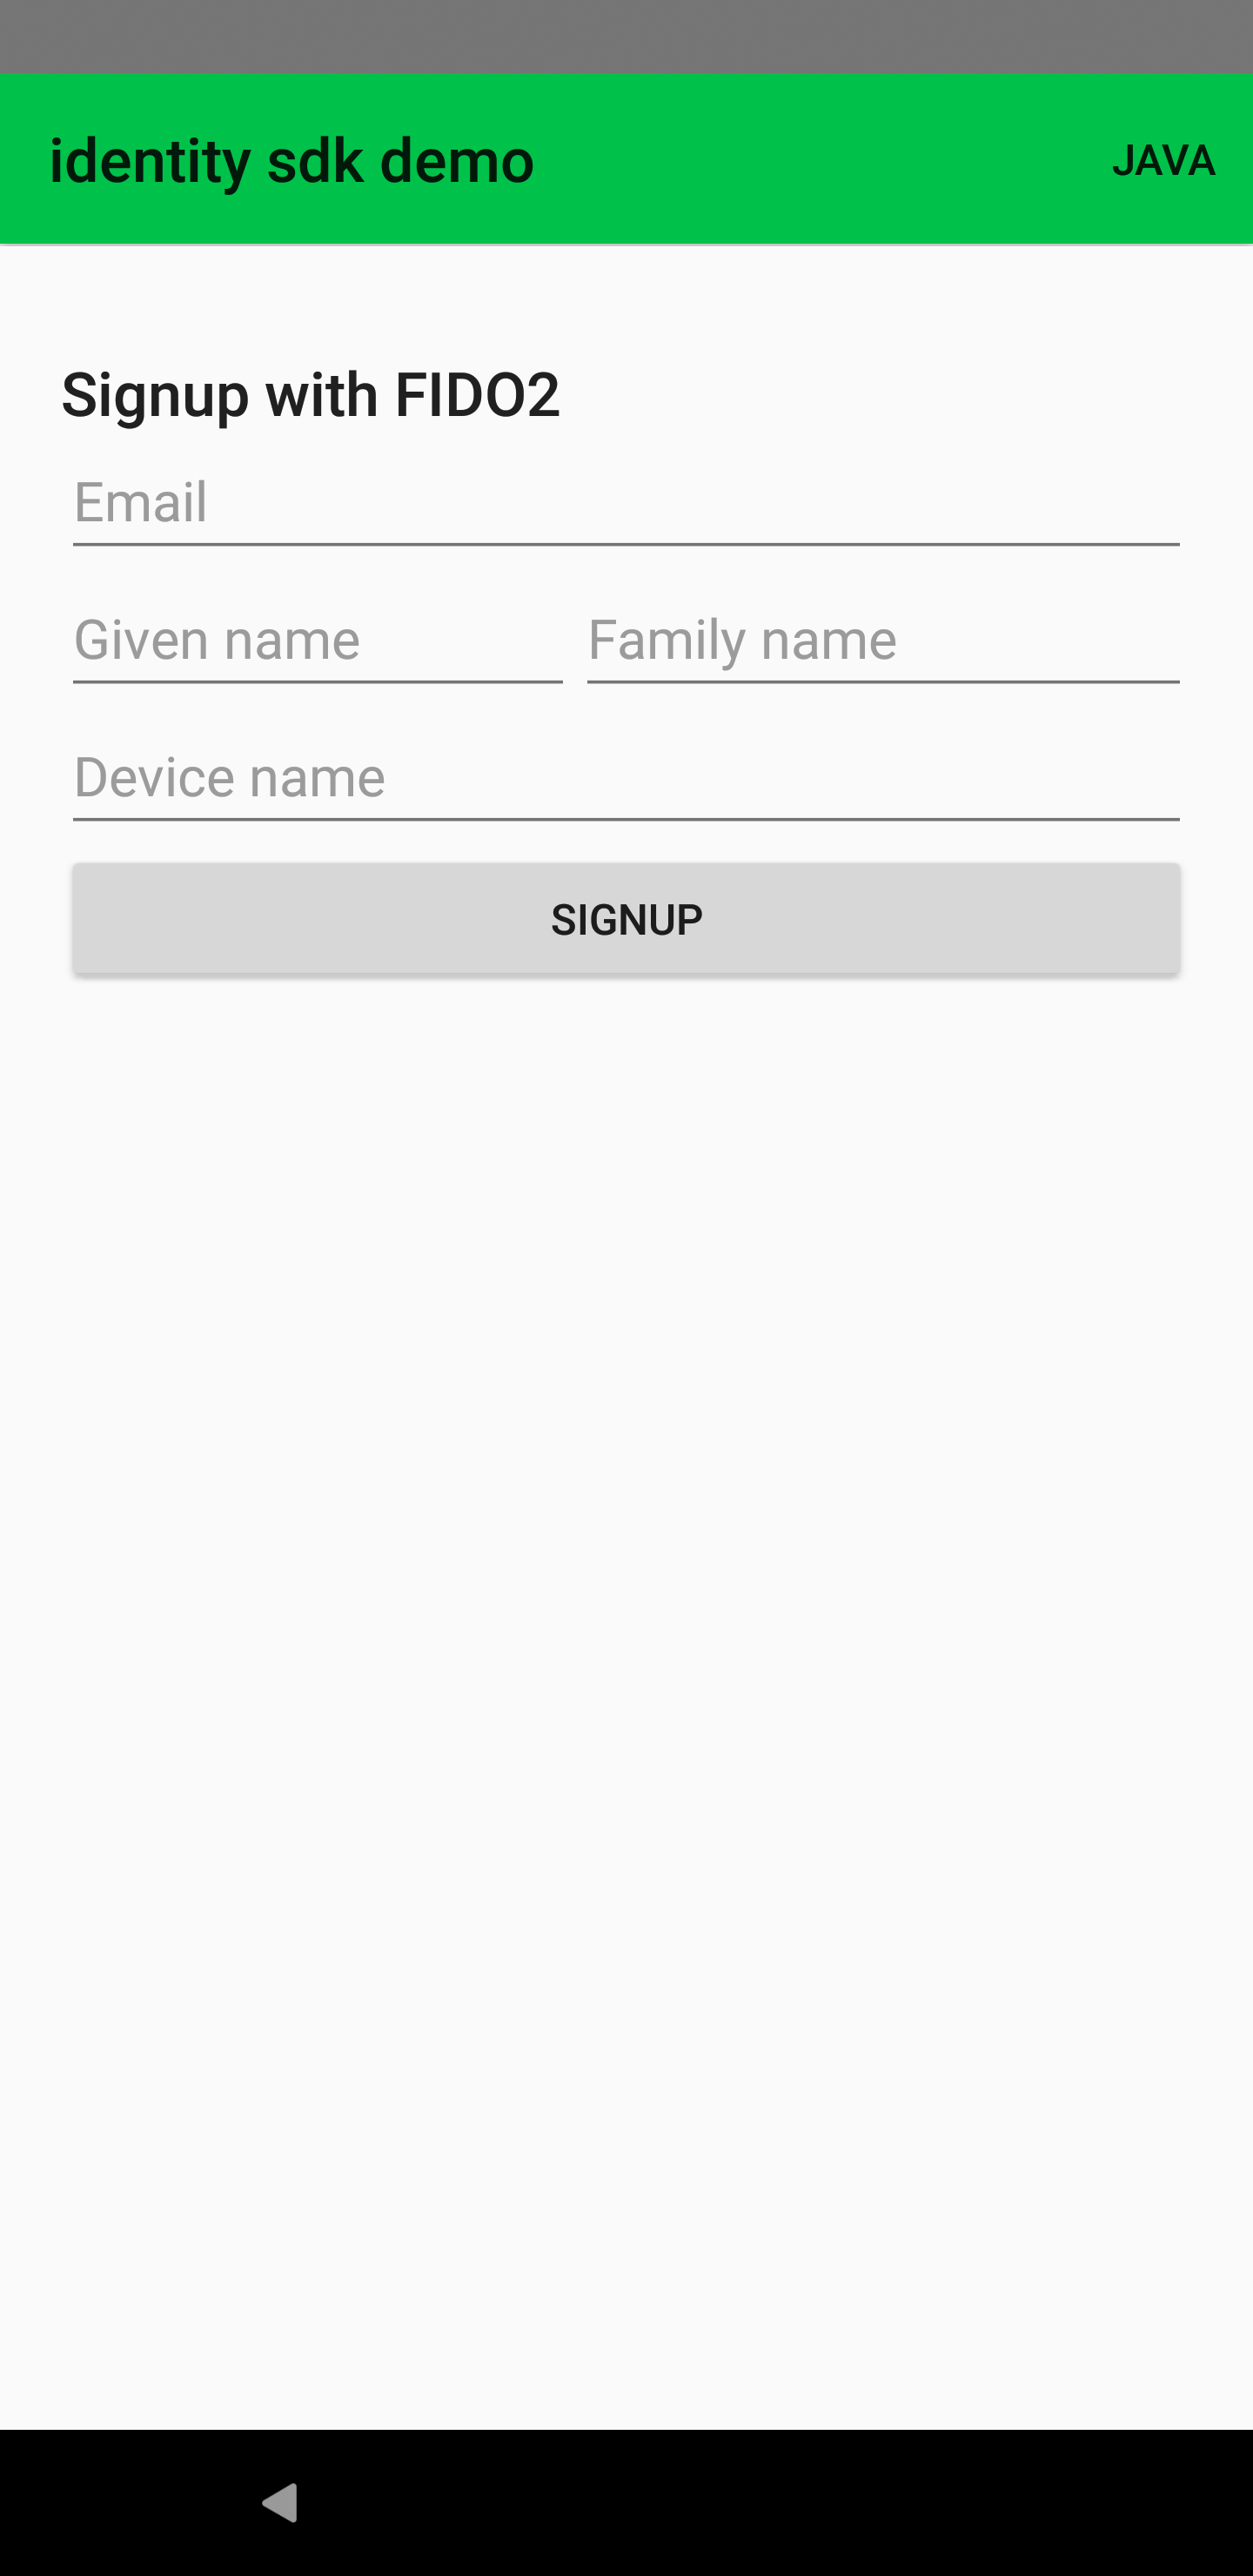
Here is a snapshot of the signup view displayed to the user.
Signup process
Signup is a three-step process.
| Each tab below shows the code needed for each step. |
-
The signupWithWebAuthn method initiates the FIDO2 signup process to retrieve a randomly generated challenge, the Relying Party information, and the user information from the ReachFive server. The options are then passed to the FIDO2 API which returns an Android Intent to open a fingerprint dialog and generates a new credential.
-
The onSignupWithWebAuthnResult method is called after the UI successfully generates a new credential. It sends the resulting data (which contains the information about this new credential) back to the ReachFive server and finalizes the FIDO2 signup process by returning a one-time authentication token.
-
Finally, we call the onLoginCallbackResult method to parse the result of the authentication callback request and retrieve the user’s authentication token.
package com.reach5.identity.sdk.demo

import android.os.Bundle
import android.util.Log
import androidx.appcompat.app.AppCompatActivity
import com.reach5.identity.sdk.core.ReachFive
import com.reach5.identity.sdk.core.models.requests.ProfileWebAuthnSignupRequest
import kotlinx.android.synthetic.main.webauthn_signup.*

// The activity controlling the view
class MainActivity : AppCompatActivity() {
    // The ReachFive client
    private lateinit var reach5: ReachFive

    // The WebAuthn identifier of the user
    private lateinit var webAuthnId: String

    companion object {
        // The domain of the origin call (it can be stored in an env file)
        const val ORIGIN = "https://dev-sandbox-268508.web.app"
        // The code of the FIDO2 signup request
        const val WEBAUTHN_SIGNUP_REQUEST_CODE = 3
    }

    override fun onCreate(savedInstanceState: Bundle?) {
        super.onCreate(savedInstanceState)
        setContentView(R.layout.activity_main)

        // Define the action on the click of the "Signup" button
        signupWithWebAuthn.setOnClickListener {
            // Launch a pending FIDO2 task for signup
            this.reach5.signupWithWebAuthn(
                profile = ProfileWebAuthnSignupRequest(
                    email = signupWebAuthnEmail.text.toString(),
                    givenName = signupWebAuthnGivenName.text.toString(),
                    familyName = signupWebAuthnFamilyName.text.toString()
                ),
                origin = ORIGIN,
                friendlyName = signupWebAuthnNewFriendlyName.text.toString(),
                signupRequestCode = WEBAUTHN_SIGNUP_REQUEST_CODE,
                successWithWebAuthnId = { this.webAuthnId = it },
                failure = {
                    Log.d("ReachFive","Unable to signup with FIDO2: $it")
                }
            )
        }
    }
public override fun onActivityResult(requestCode: Int, resultCode: Int, data: Intent?) {
super.onActivityResult(requestCode, resultCode, data)
when (requestCode) {
// The code of the FIDO2 signup request
WEBAUTHN_SIGNUP_REQUEST_CODE -> {
when (resultCode) {
// Operation succeeded
RESULT_OK -> {
if (data == null) {
Log.d("ReachFive", "The data is null")
}
else {
reach5.onSignupWithWebAuthnResult(
intent = data,
// The webauthn identifier retrieved at the first step
webAuthnId = this.webAuthnId,
scope = setOf("openid", "email", "profile", "full_write"),
failure = {
Log.d("ReachFive","Unable to signup with FIDO2: $it")
}
)
}
}
// Operation canceled
RESULT_CANCELED -> Log.d("ReachFive", "Operation is cancelled")
else -> Log.e("ReachFive", "Operation failed, with resultCode: $resultCode")
}
}
}
}public override fun onActivityResult(requestCode: Int, resultCode: Int, data: Intent?) {
super.onActivityResult(requestCode, resultCode, data)
when (requestCode) {
/*... */
// The code of the authentication redirection
REDIRECTION_REQUEST_CODE -> {
if (data == null) {
Log.d("ReachFive", "The data is null")
}
else {
reach5.onLoginCallbackResult(
intent = data,
resultCode = resultCode,
success = { authToken: AuthToken ->
// Retrieve the access token
},
failure = {
Log.d("ReachFive","Unable to get the authentication token: $it")
}
)
}
}
}
}Authentication
Once the user has a credential registered on the server and the device, they can use it to login easily with their identifier.
- Subsection
-
Jump to the authentication process
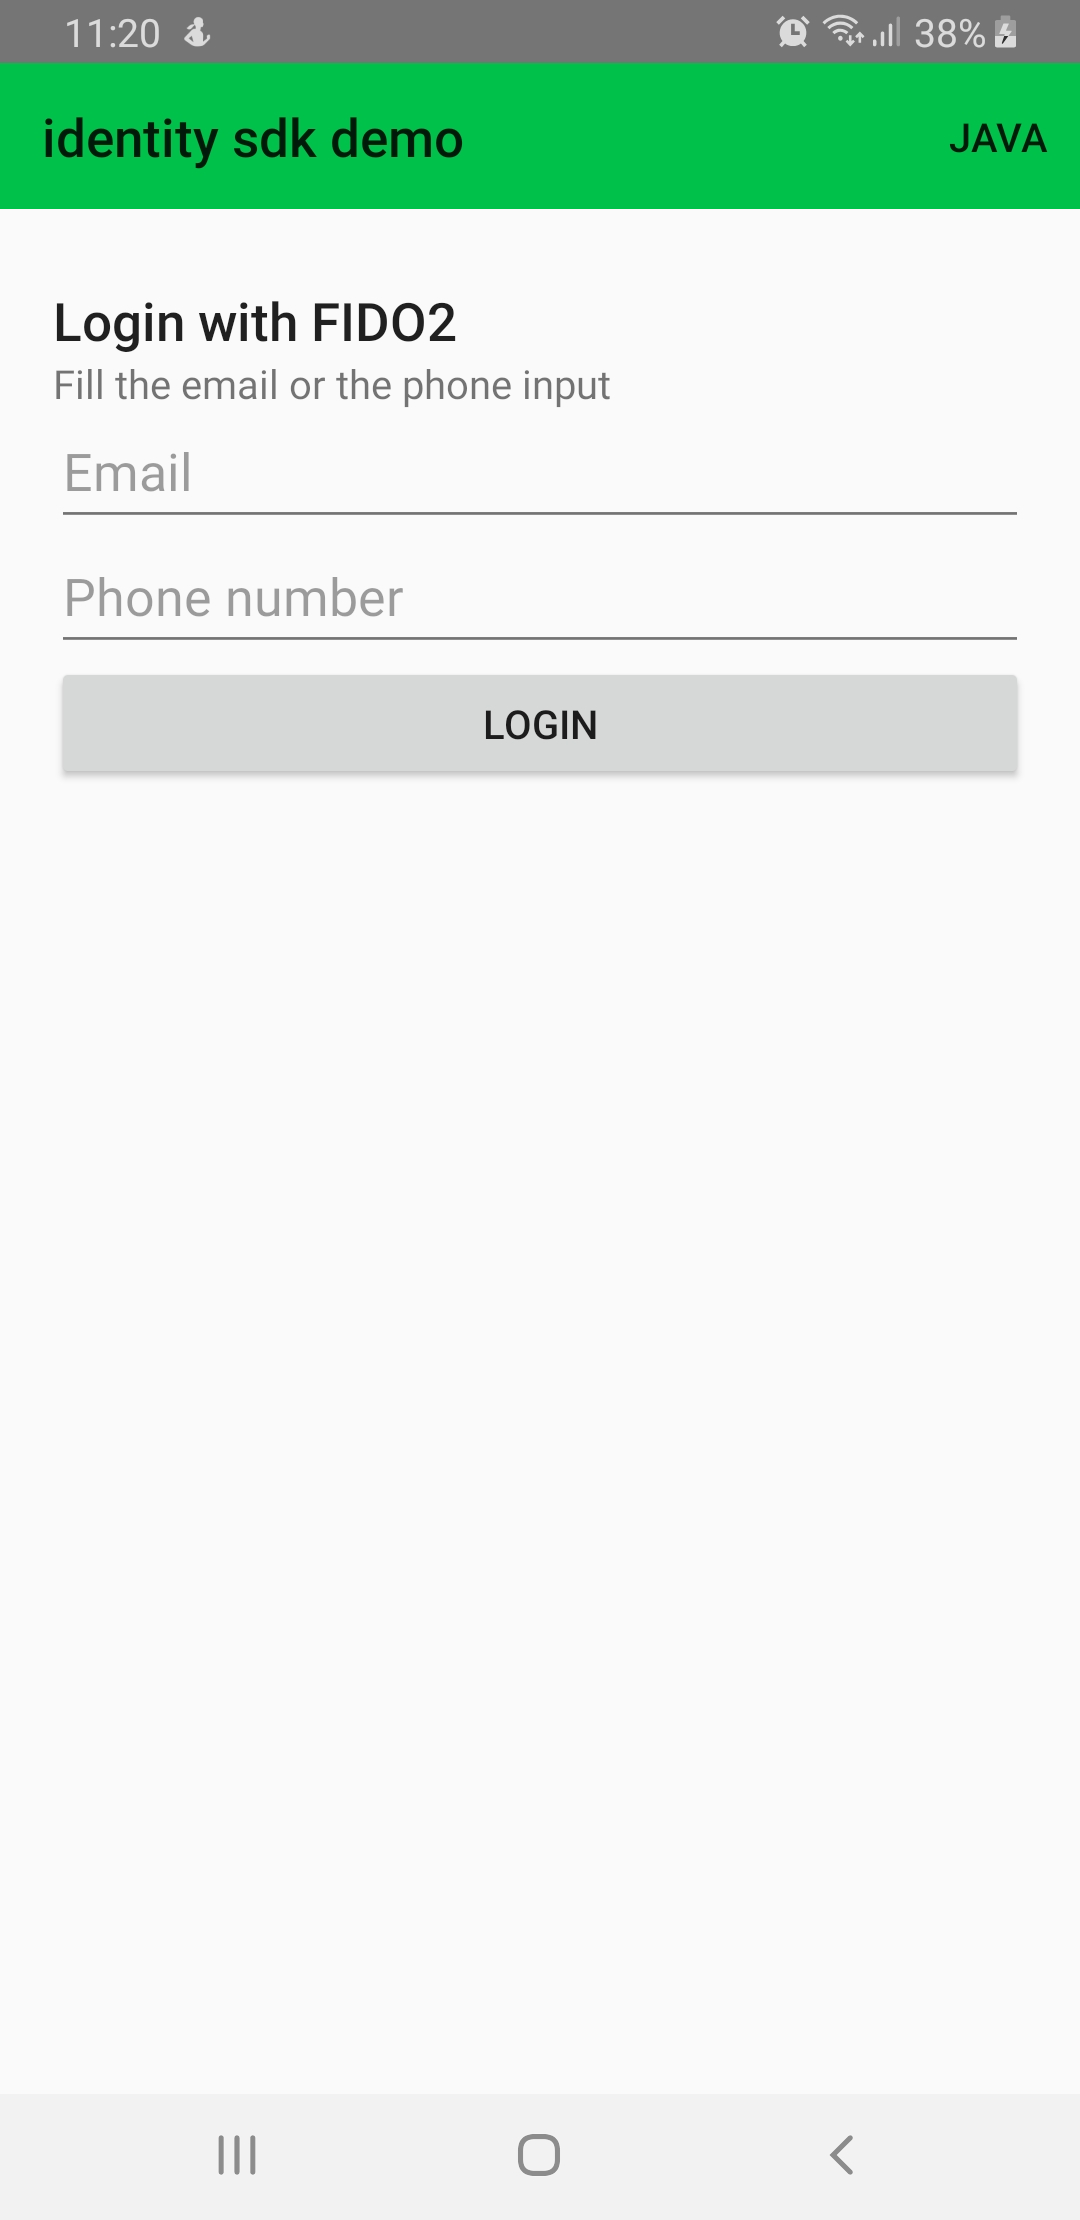
Here is a snapshot of the login view displayed to the user.
Authentication process
Authentication is a three-step process.
| Each tab below shows the code needed for each step. |
-
The loginWithWebAuthn method initiates the FIDO2 authentication process to retrieve the list of previously registered credentials and a challenge string from the server. This information is passed to the FIDO2 API which searches for a credential that matches the Relying Party ID and creates an Android Intent to open the fingerprint dialog for the user to consent for authentication.
-
The onLoginWithWebAuthnResult method is called after the UI successfully retrieves the existing credential. It returns operation result to the ReachFive server and finalizes the FIDO2 authentication process by returning a one-time authentication token.
-
Finally, we call the onLoginCallbackResult method to parse the result of the authentication callback request and retrieve the user’s authentication token.
package com.reach5.identity.sdk.demo

import android.os.Bundle
import android.util.Log
import androidx.appcompat.app.AppCompatActivity
import com.reach5.identity.sdk.core.ReachFive
import com.reach5.identity.sdk.core.models.requests.webAuthn.WebAuthnLoginRequest
import kotlinx.android.synthetic.main.webauthn_login.*

// The activity controlling the view
class MainActivity : AppCompatActivity() {
    // The ReachFive client
    private lateinit var reach5: ReachFive

    // The scope assigned to the user
    private val scope = setOf("openid", "email", "profile", "phone_number", "offline_access", "events", "full_write")

    companion object {
        // The domain of the origin call (it can be stored in an env file)
        const val ORIGIN = "https://dev-sandbox-268508.web.app"
        // The code of the FIDO2 authentication request
        const val WEBAUTHN_LOGIN_REQUEST_CODE = 2
    }

    override fun onCreate(savedInstanceState: Bundle?) {
        super.onCreate(savedInstanceState)
        setContentView(R.layout.activity_main)

        // Define the action on the click of the "Login" button
        loginWithWebAuthn.setOnClickListener {
            val email: String = webAuthnEmail.text.toString()

            // Build the request according to the identifier provided by the user
            val webAuthnLoginRequest: WebAuthnLoginRequest = if (email.isNotEmpty()) {
                WebAuthnLoginRequest.EmailWebAuthnLoginRequest(
                    origin = ORIGIN,
                    email = email,
                    scope = scope
                )
            } else {
                WebAuthnLoginRequest.PhoneNumberWebAuthnLoginRequest(
                    origin = ORIGIN,
                    phoneNumber = webAuthnPhoneNumber.text.toString(),
                    scope = scope
                )
            }

            // Launch a pending FIDO2 task for authentication
            this.reach5.loginWithWebAuthn(
                loginRequest = webAuthnLoginRequest,
                loginRequestCode = WEBAUTHN_LOGIN_REQUEST_CODE,
                failure = {
                    Log.d("ReachFive","Unable to login with FIDO2: $it")
                }
            )
        }
    }
}
public override fun onActivityResult(requestCode: Int, resultCode: Int, data: Intent?) {
super.onActivityResult(requestCode, resultCode, data)
when (requestCode) {
// The code of the FIDO2 authentication request
WEBAUTHN_LOGIN_REQUEST_CODE -> {
when (resultCode) {
// Operation succeeded
RESULT_OK -> {
if (data == null) {
Log.d("ReachFive", "The data is null")
}
else {
reach5.onLoginWithWebAuthnResult(
intent = data,
scope = setOf("openid", "email", "profile", "full_write"),
failure = {
Log.d("ReachFive","Unable to login with FIDO2: $it")
}
)
}
}
// Operation canceled
RESULT_CANCELED -> Log.d("ReachFive", "Operation is cancelled")
else -> Log.e("ReachFive", "Operation failed, with resultCode: $resultCode")
}
}
}
}public override fun onActivityResult(requestCode: Int, resultCode: Int, data: Intent?) {
super.onActivityResult(requestCode, resultCode, data)
when (requestCode) {
/*... */
// The code of the authentication redirection
REDIRECTION_REQUEST_CODE -> {
if (data == null) {
Log.d("ReachFive", "The data is null")
}
else {
reach5.onLoginCallbackResult(
intent = data,
resultCode = resultCode,
success = { authToken: AuthToken ->
// Retrieve the access token
},
failure = {
Log.d("ReachFive","Unable to get the authentication token: $it")
}
)
}
}
}
}Manage devices
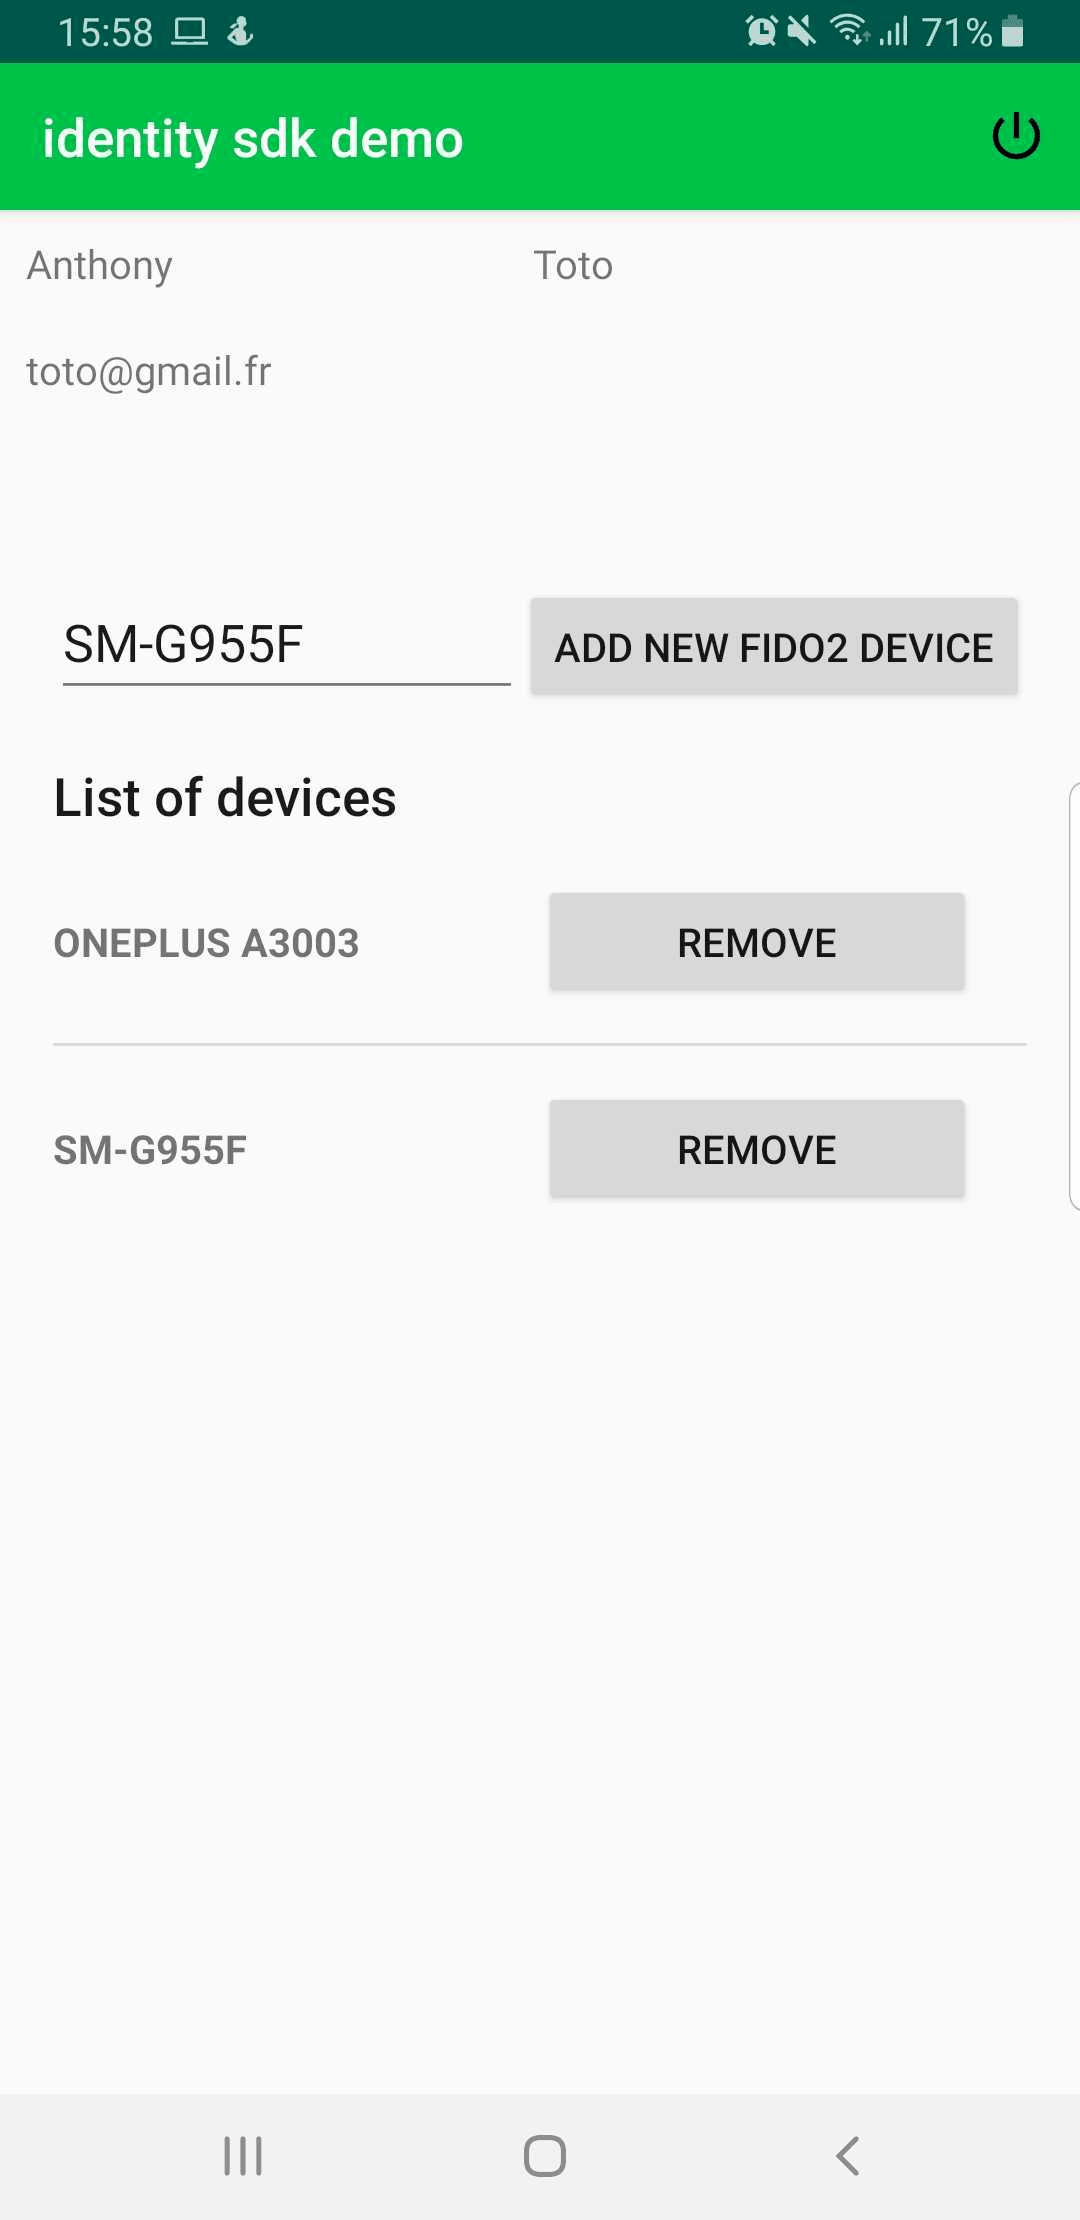
Once the user is authenticated, they can perform several actions to manage the registered devices such as:
Here is a snapshot of the view displayed to the user after a successful login.
Register a new device
Registration is a two-step process.
| Each tab below shows the code needed for each step. |
-
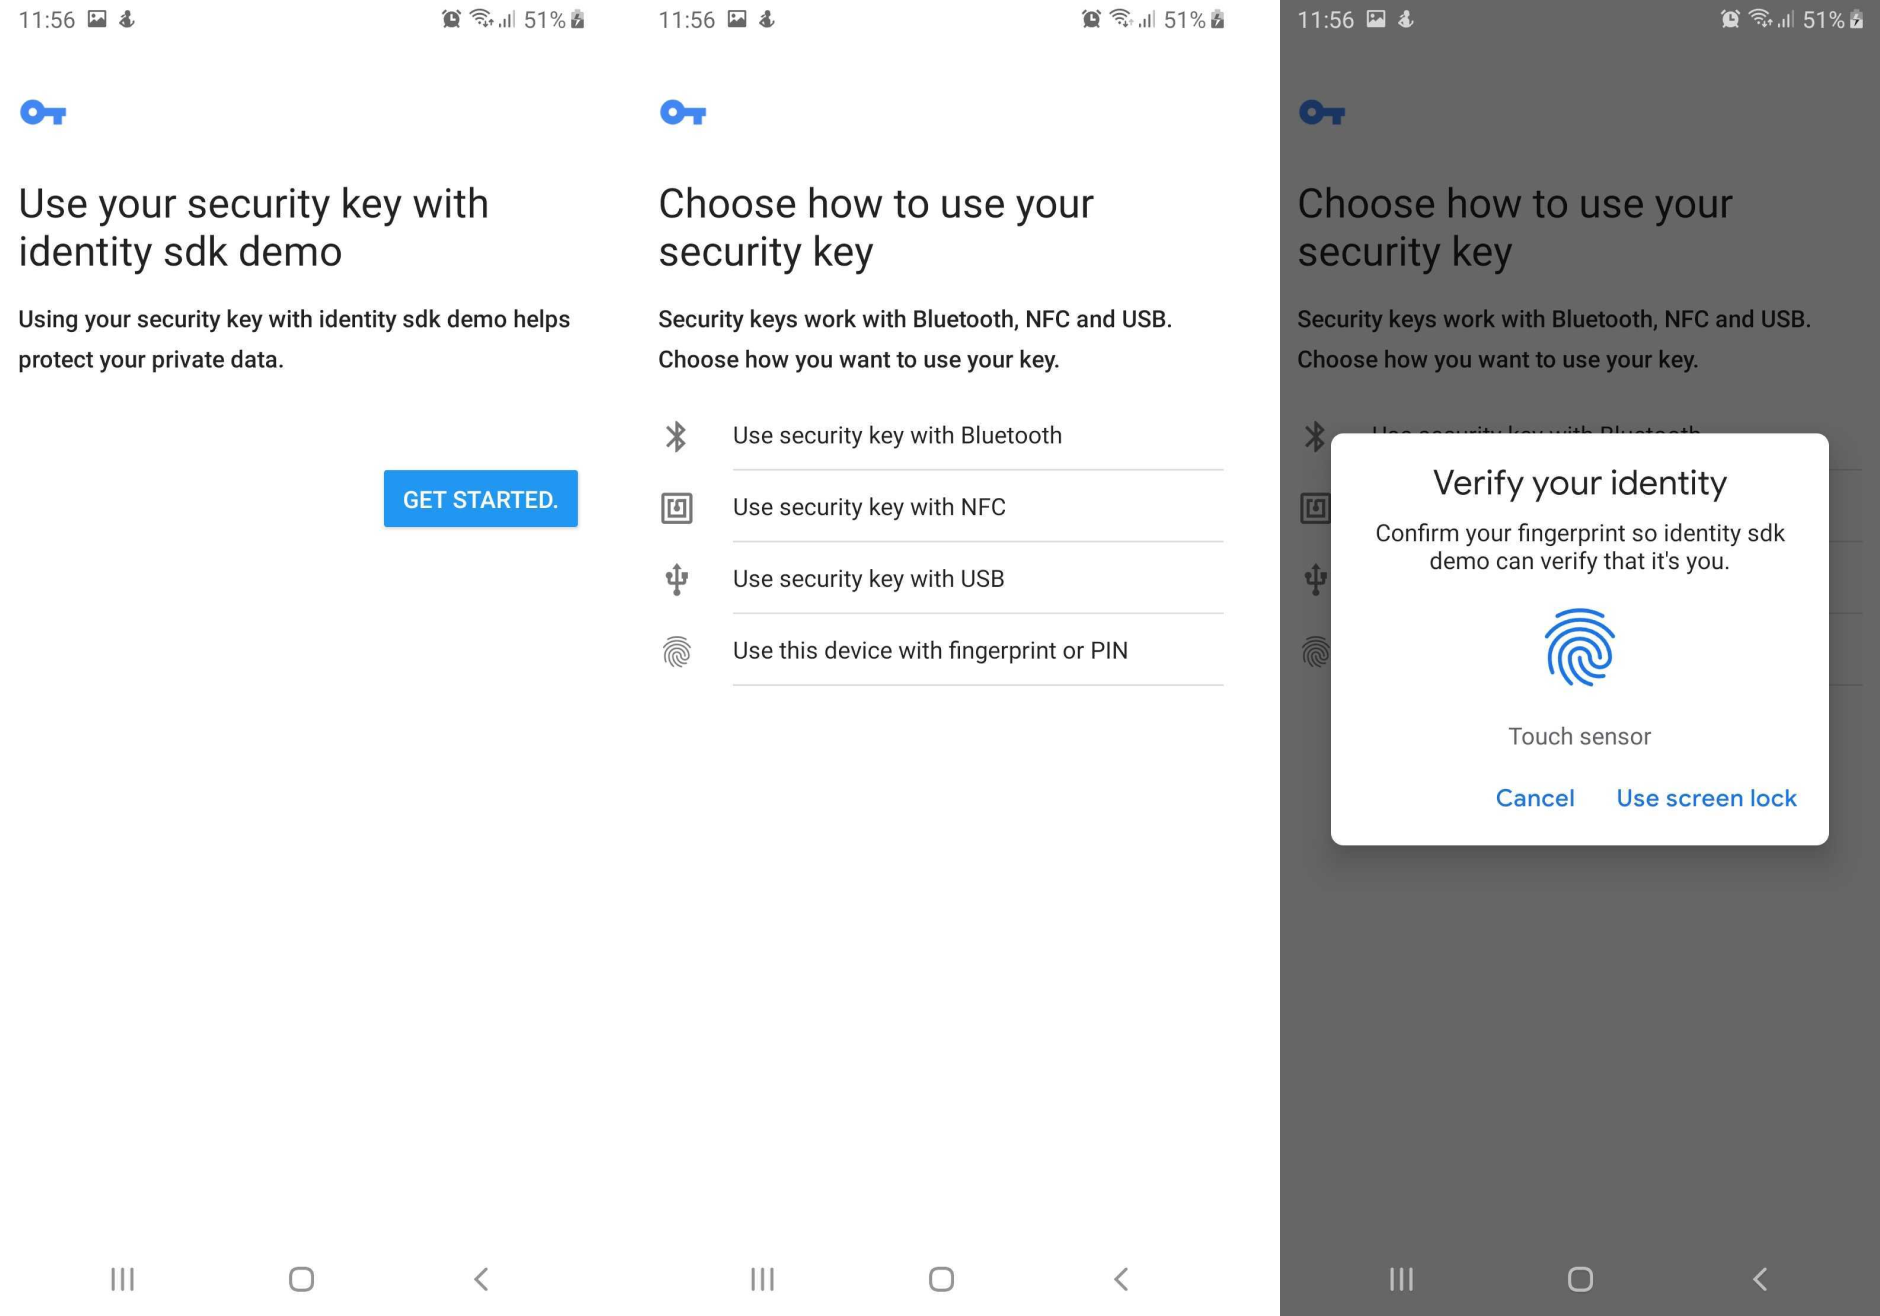
The addNewWebAuthnDevice method initiates the FIDO2 registration process to retrieve a randomly generated challenge, the Relying Party information, and the user information from the ReachFive server. The options are then passed to the FIDO2 API which returns an Android Intent to open a fingerprint dialog and generates a new credential.
A user cannot register several credentials on the same device. -
The onAddNewWebAuthnDeviceResult method is called after the UI successfully generates a new credential. It sends the resulting data (which contains the information about this new credential) back to the ReachFive server and completes the FIDO2 registration process.
package com.reach5.identity.sdk.demo

import android.content.Intent
import android.os.Bundle
import android.util.Log
import androidx.appcompat.app.AppCompatActivity
import com.reach5.identity.sdk.core.ReachFive
import com.reach5.identity.sdk.core.models.responses.AuthToken
import kotlinx.android.synthetic.main.webauthn_devices.*

// The activity controlling the view
class AuthenticatedActivity : AppCompatActivity() {
    // The ReachFive client
    private lateinit var reach5: ReachFive

    // The authentication token retrieved after the user has logged-in
    private lateinit var authToken: AuthToken

    companion object {
        // The domain of the origin call (it can be stored in an env file)
        const val ORIGIN = "https://dev-sandbox-268508.web.app"
        // The code of the FIDO2 registration request
        const val WEBAUTHN_REGISTER_REQUEST_CODE = 1
    }

    override fun onCreate(savedInstanceState: Bundle?) {
        super.onCreate(savedInstanceState)
        setContentView(R.layout.activity_authenticated)

        // Fetch the authentication token from another activity
        this.authToken = intent.getParcelableExtra("AUTH_TOKEN")

        // Define the action on the click of the "Add new FIDO2 device" button
        addNewDevice.setOnClickListener {
            // Launch a pending FIDO2 task for registration
            this.reach5.addNewWebAuthnDevice(
                authToken = this.authToken,
                origin = ORIGIN,
                friendlyName = newFriendlyName.text.trim().toString(),
                registerRequestCode = WEBAUTHN_REGISTER_REQUEST_CODE,
                failure = {
                    Log.d("ReachFive", "Unable to add a new FIDO2 device: $it")
                }
            )
        }
    }
}
override fun onActivityResult(requestCode: Int, resultCode: Int, data: Intent?) {
super.onActivityResult(requestCode, resultCode, data)
when (resultCode) {
// Operation succeeded
RESULT_OK -> {
data?.let {
when (requestCode) {
// The code of the FIDO2 registration request
WEBAUTHN_REGISTER_REQUEST_CODE -> {
// Parse the result of the intent and register the new device on ReachFive server
reach5.onAddNewWebAuthnDeviceResult(
// The authentication token retrieved after the user has logged-in
authToken = this.authToken,
intent = data,
successWithNoContent = {
Log.d("ReachFive", "New FIDO2 device registered")
},
failure = {
Log.d("ReachFive", "Unable to add a new FIDO2 device: $it")
}
)
}
}
}
}
// Operation canceled
RESULT_CANCELED -> Log.d("ReachFive", "Operation is cancelled")
else -> Log.e("ReachFive", "Operation failed, with resultCode: $resultCode")
}
}Here are some snapshots of the FIDO2 dialogs displayed to the user to save a fingerprint.
Other actions
The tabs below instruct you on listing and removing devices.
Use the listWebAuthnDevices method to list the registered FIDO2 devices.
package com.reach5.identity.sdk.demo

import android.os.Bundle
import android.util.Log
import androidx.appcompat.app.AppCompatActivity
import com.reach5.identity.sdk.core.ReachFive
import com.reach5.identity.sdk.core.models.responses.AuthToken
import com.reach5.identity.sdk.core.models.responses.webAuthn.DeviceCredential

// The activity controlling the view
class AuthenticatedActivity : AppCompatActivity() {
    // The ReachFive client already instantiated in another activity
    private lateinit var reach5: ReachFive
    // The authentication token retrieved after the user has logged-in
    private lateinit var authToken: AuthToken
    // The list of the FIDO2 devices of the user
    private lateinit var devicesDisplayed: List<DeviceCredential>

    override fun onCreate(savedInstanceState: Bundle?) {
        super.onCreate(savedInstanceState)
        setContentView(R.layout.activity_authenticated)

        /*...*/

        // Fetch the authentication token from another activity
        this.authToken = intent.getParcelableExtra("AUTH_TOKEN")
        // Initialize the list of devices
        this.devicesDisplayed = listOf()

        // Fetch the registered devices of the user from Reachfive server
        this.reach5.listWebAuthnDevices(
            authToken = authToken,
            success = {
                // Refresh the list of displayed devices
                this.devicesDisplayed = it
            },
            failure = {
                Log.d("ReachFive","Unable to list the FIDO2 devices: $it")
            }
        )
    }
}
+
Use the removeWebAuthnDevice method to delete a registered FIDO2 device.
package com.reach5.identity.sdk.demo

import android.util.Log
import androidx.appcompat.app.AppCompatActivity
import com.reach5.identity.sdk.core.ReachFive
import com.reach5.identity.sdk.core.models.responses.AuthToken
import com.reach5.identity.sdk.core.models.responses.webAuthn.DeviceCredential

// The activity controlling the view
class AuthenticatedActivity : AppCompatActivity() {
    // The ReachFive client already instantiated in another activity
    private lateinit var reach5: ReachFive
    // The authentication token retrieved after the user has logged-in
    private lateinit var authToken: AuthToken
    // The list of the FIDO2 devices of the user
    private lateinit var devicesDisplayed: List<DeviceCredential>

    /*...*/

    private fun removeDevice(position: Int) {
        // The selected device
        val device = this.devicesDisplayed[position]

        // Delete the selected registered device from the ReachFive server
        reach5.removeWebAuthnDevice(
            authToken = authToken,
            deviceId = device.id,
            successWithNoContent = {
                Log.d("ReachFive", "The FIDO2 device '${device.friendlyName}' is removed")
            },
            failure = {
                Log.d("ReachFive", "Unable to remove the FIDO2 device '${device.friendlyName}': $it")
            }
        )
    }
}
+